linear motor pcb model railroad track

PCB Linear Motors For Model Trains

Modeling a railroad is hard. Railroads are large, linear pieces of civil engineering. So many modelers are drawn to the smallest scale they can use. Recently a new scale, named T, at 1:450 has been pushing this barrier. But fitting a reliable mechanical drive mechanism and MCU board in a package this size is a challenge. In practice, even more of a problem is getting reliable electrical contact through a metal wheel on metal track (about the worst possible design for a contact).T scale electric locomotive held on a human finger

T always seemed to us a long way out on the bleeding edge. But all that may have changed. In a recent Hackaday.io writeup, author [Martin] describes a PCB technology based linear motor system to externally drive T scale locomotives.

The system uses 4mm planar coils. The underside of the PCB has another coil, so the effective pitch is 2mm. With microstepping, a step of 0.25mm is possible, and trains run smoothly. Current is 3-400mA. Continue reading “PCB Linear Motors For Model Trains”

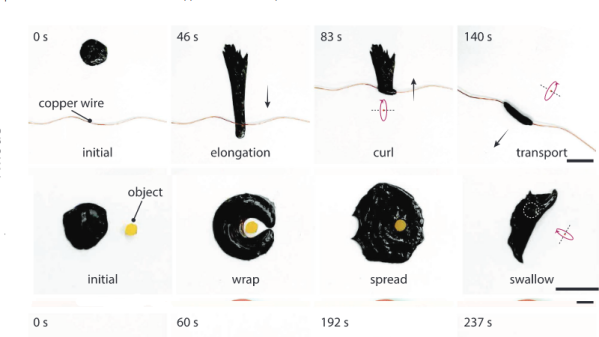
stages of moving a wire and enveloping an object

Attack Of The Magnetic Slime Robots

[Li Zhang] and his colleagues at the Chinese University of Hong Kong (CUHK) have developed a blob of goo that can navigate complex surroundings, grow an ‘arm’, grasp a wire and move it, encapsulate a small object and carry it. As explained in the research paper, the secret is in the non-Newtonian material the bots are made of.

You can make a similar concoction at home, usually called “slime”, with corn starch and water. Deformed slowly, it will move like a fluid. Deformed rapidly, it behaves like an elastic solid. CUHK’s version is polyvinyl alcohol, glass coated NdFeB microparticles (neodymium magnets), and borax.

This dual behavior lets the robot do amazing things.  Placed on a surface, they made the blob extend pseudopods by dragging underneath with a magnet, then used a circular field to make it grasp and transport a wire. They used a similar technique in the other axis to swallow an object. The CUHK group are promoting this as a way to retrieve foreign objects in the body (like an accidentally swallowed button cell).

Researchers will need to develop a non-toxic coating before it can be used in the body.

Nd magnets are made by sintering Nd2O3 or NdFeB in a strong magnetic field. Nd2O3 is available from SigmaAldrich at only slightly eye watering prices. Polyvinyl alcohol and borax are easily available. This seems like a hobbyist do-able project (Nd is toxic, use precautions).

We’ve been covering micro robots for some time. Back in 2014 we covered swarm micro robots. This project uses an external field to move a small Nd magnet, and all the way back in 2014 we covered early work in this field.

Continue reading “Attack Of The Magnetic Slime Robots”

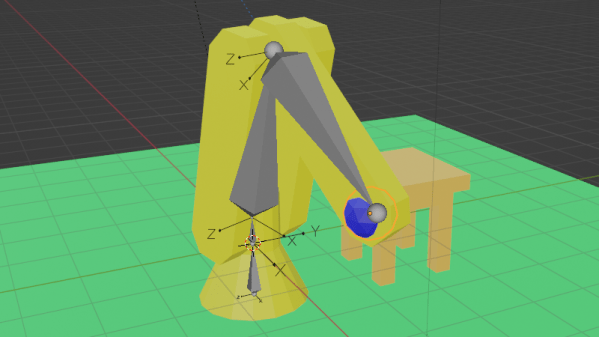
Robot arm in Blender

Animate Your Robot In Blender

You’ve built a robot crammed full of servos and now you settle down for the fun part, programming your new dancing animatronic bear! The pain in your life is just beginning. Imagine that you decide the dancing bear should raise it’s arm. If you simply set a servo position, the motor will slew into place as fast as it can. What you need is an animation, and preferably with smooth acceleration.

You could work through all the math yourself. After half an hour of fiddling with the numbers, the bear is gracefully raising it’s arm like a one armed zombie. And then you realize that the bear has 34 more servos.

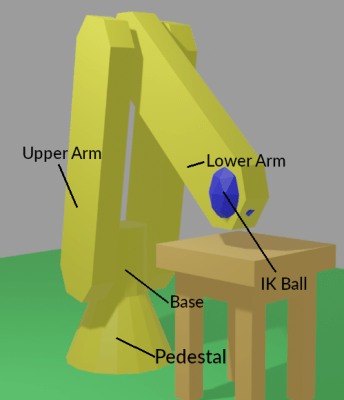
render of industrial robot type arm with pedestal, base, upperarm and lowerarm and IK ball

Fortunately for everybody who’s done the above, there’s Blender. It’s all about creating smooth motion for animations and computer graphics. Making robot motion with Blender is, if not easy, at least tolerable. We made a sample project, a 3-axis robot arm to illustrate. It has a non-moving pedestal, rotating base, upper arm, and lower arm. We’ll be animating it first in Blender and then translating the file over to something we can use to drive the servos with a little script.

Now, Blender is notorious for a difficult user interface. The good news is that, with revision 2.9, it moved to a much more normal interface. It still definitely is a large program, with 23 different editors and literally thousands of controls, but we’ll only be using a small subset to make our robot move. We won’t teach you Blender here, because there are thousands of great Blender tutorials online.  You want to focus on animation, and the Humane Rigging series is particularly recommended.

Continue reading “Animate Your Robot In Blender”

3D printed fish leaping through waves

A Crazy Wave Automaton

[Henk Rijckhaert] recently participated in a “secret Santa” gift exchange. In a secret Santa, everyone’s name goes in a hat, and each person must pick a name without looking. Each gives a gift to the person whose name they drew.

Henk needed a gift for Amy, a friend who loves the water and water sports as well as maker-y things.  So he built her a wave automaton — a sea wave and fishies, and documented the build in this video.

The build is mostly plywood and 3D printed parts. We have to  think reprising it in a nice wood and brass would make a lovely project for a hobby wood and metalworker.

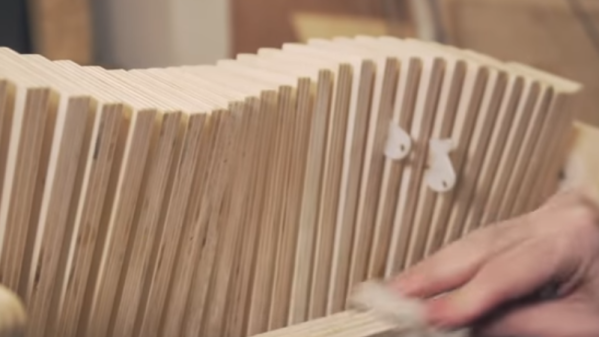
The bulk of the project is 30 plywood boards stacked up with spacers. Each board is mounted with a 3D printed stepped bushing on one end that rides in a horizontal slot. On the other end is a 3D printed eccentric riding in an oversized (about 5cm) hole. So the board moves in a circle at one end and back and forth at the other for a very nice simulation of an ocean wave. Continue reading “A Crazy Wave Automaton”

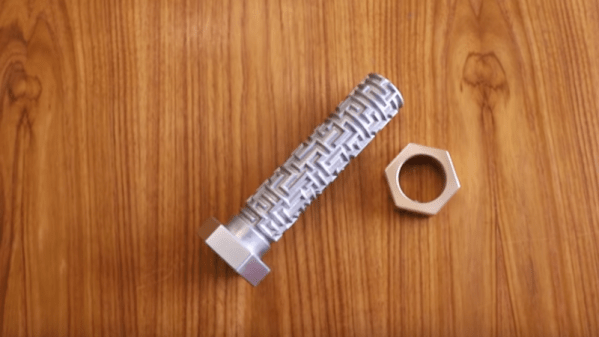
bolt with maze threads

Maze Bolt Toy By Lost PLA Casting

Maze bolts, a bolt which has a maze along its shaft traversed by a pin on its nut, are great fun. Here’s a really beautiful metal version by [Robinson Foundry], made by a process more makers should know about – lost PLA casting.

His basic method is to 3D print in PLA, and then use more or less the same process as lost wax casting.

He 3D printed the part, along with the sprues and risers that go along with casting, in PLA, then dipped the parts in slurry ten (10) times.  He heated in a kiln to 500°F (260°C), the PLA melted and ran out or burned away. With the PLA gone, after repairing a few cracks, he raised the temperature to 1500°F (815°C) and vitrified the slurry into a ceramic. He now had molds.

The nut is bronze. The bolt is aluminum.  He poured the metal with the molds hot, held in heated sand, so the metal can flow into all the small details. The rest of the project is just cleanup, but we learned that you can vary the finish produced by glass bead blasting just by varying the air pressure.

A great demo of a useful technique and a fun toy at the end.

We covered a great technique for doing lost PLA casting using a microwave.

Continue reading “Maze Bolt Toy By Lost PLA Casting”

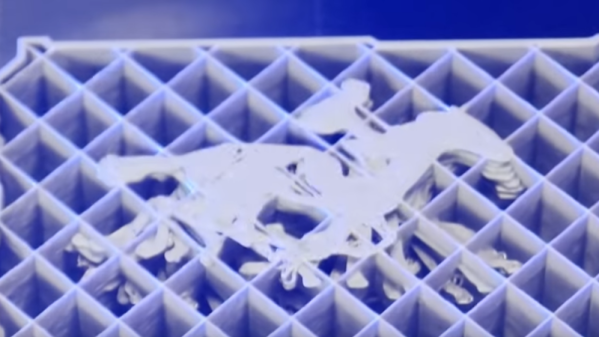
partially finished print, with the embedded animation

Flip Book Animations On The Inside Of 3D Prints

We’ve all seen 3D printed zoetropes, and drawn flip book animations in the corner of notebooks. The shifting, fluid shape of the layers forming on a 3D printer is satisfying. And we all know the joy of hidden, nested objects.

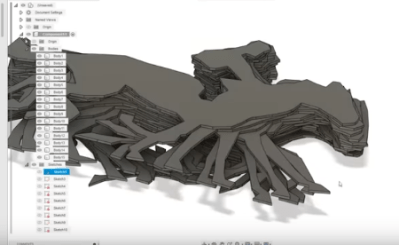
Hackaday alumnus [Caleb Kraft] has a few art pieces that all reflect all these. He’s been making animations by recording a 3D printer. The interesting bit is that his print is made of two objects. An outer one with normal infill that gives a solid form, and a layer cake like inner one with solid infill. It’s documented in this video on YouTube.

CAD model of the stack of frames

There are lots of things to get right.  The outer object needs to print without supports. The thickness of the “layer cake” layers determines the frame rate. I had to wonder how he triggered the shutter  when the head wasn’t in the way.

His first, experimental, piece is the classic ‘bouncing ball’ animation, inside a ball, and his mature piece is Eadward Muybridge’s “The Horse, In Motion” inside a movie camera.

We’ve covered [Caleb Kraft] before, of course. His Moon On A Budget piece is wonderful.  And we’ve covered a number of 3D printer animations. and 3D zoetropes.  We particularly were drawn to this one.

Thanks [jmc] for the tip!

Continue reading “Flip Book Animations On The Inside Of 3D Prints”

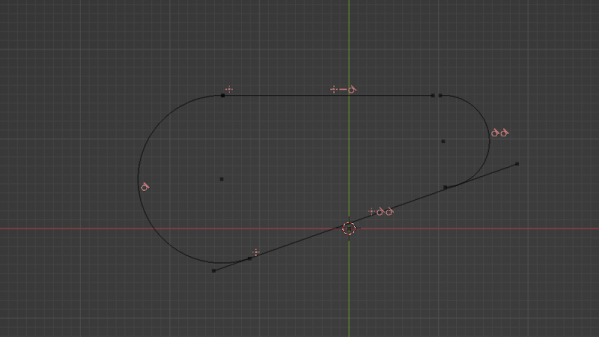
Blender screen with CAD drawing

CAD Sketcher, It’s Parametric CAD For Blender

It’s very early days for CAD Sketcher, a new parametric CAD add-on for Blender by [hlorus], but it looks very promising.

We do a lot of 3D work and like Blender as an environment. It’s always annoying that Blender doesn’t do parametric modeling, so we’re forced into a dedicated CAD package. Blending the two for that robot ocelot is always particularly annoying.

CAD Sketcher lets the user make a ‘sketch’, a 2D drawing. They then  constrain it, saying “this line is vertical, that line is parallel to this one”, until the sketch is fully defined. It’s a normal part of parametric modelling. This is powerful when your model needs refined over and over.

There’s an old adage, “Better a tool that does 90% of the job well than one that does 100% poorly”. For CAD systems, (and much other software), we’d suggest “Better a tool that does 90% of the job well and works with whatever does the other 10%”.

3D render of gaurd
Guard Drawn In CAD Sketcher And Blender

We tried a test part, and being in Blender’s universe showed its value. CAD Sketcher doesn’t do bevels and rounds yet, and probably won’t for a while. But Blender’s perfectly happy doing them.

It’s not going to put SolidWorks out of business any time soon, but it’s a very promising new development. We hope it gathers some community and encourage contributions.

We cover CAD frequently, like the recent advances with CadQuery  and the port of OpenSCAD to WASM.

[thanks paulvdh]

Continue reading “CAD Sketcher, It’s Parametric CAD For Blender”