The Most-3D-Printed 3D Printer

The most awesome things about having a 3D printer is that you can create almost anything which includes parts for the 3D printer itself. Different materials give power to your imagination and allow you to go beyond the 3D printed vase. So much so that one maker has gone as far as 3D print the bearings as well as the axis screws and nuts and it works!

The RepRap project was the first project to incorporate 3D printed parts to make it self-replicating to a certain extent. The clamps and mounts could be easily printed, however, this project uses a 3D printed frame as well as two linear bearings for the y-axis and z-axis and one for the x-axis. The y-axis is a 3D printed rack-and-pinion while the z-axis is made of a 3D printed screws and nuts. So basically, the servo motors, extruder/hotend and limits switches with mounting screws are the only part that need be bought at the store.

Even though in motors are running hot causing mounts to get soft, heat-sinks are predicted to resolve the issue. This one is not designed for accuracy though it can be a great resource for budding engineers and hackers to get their feet wet with customizing 3D printers. Check out the video for a demo.

From 3D printed guitars to RC Planes, there is a lot you can do with micro-manufacturing and all we need now is a 3D printed motor to get things rolling. Continue reading “The Most-3D-Printed 3D Printer”

Quick Face Recognition With An FPGA

It’s the 21st century, and according to a lot of sci-fi movies we should have perfected AI by now, right? Well we are getting there, and this project from a group of Cornell University students titled, “FPGA kNN Recognition” is a graceful attempt at facial recognition.

For the uninitiated, the K-nearest neighbors or kNN Algorithm is a very simple classification algorithm that uses similarities between given sets of data and a data point being examined to predict where the said data point belongs. In this project, the authors use a camera to take an image and then save its histogram instead of the entire image. To train the network, the camera is made to take mug-shots of sorts and create a database of histograms that are tagged to be for the same face. This process is repeated for a number of faces and this is shown as a relatively quick process in the accompanying video.

The process of classification or ‘guess who’, takes an image from the camera and compares it with all the faces already stored. The system selects the one with the highest similarity and the results claimed are pretty fantastic, though that is not the brilliant part. The implementation is done using an FPGA which means that the whole process has been pipe-lined to reduce computational time. This makes the project worth a look especially for people looking into FPGA based development. There is a hardware implementation of a k-distance calculator, sorting and selector. Be sure to read through the text for the sorting algorithm as we found it quite interesting.

Arduino recently released the Arduino MKR4000 board which has an FPGA, and there are many opensource boards out there in the wild that you can easily get started with today. We hope to see some of these in conference badges in the upcoming years.

Continue reading “Quick Face Recognition With An FPGA”

Malicious Component Found On Server Motherboards Supplied To Numerous Companies

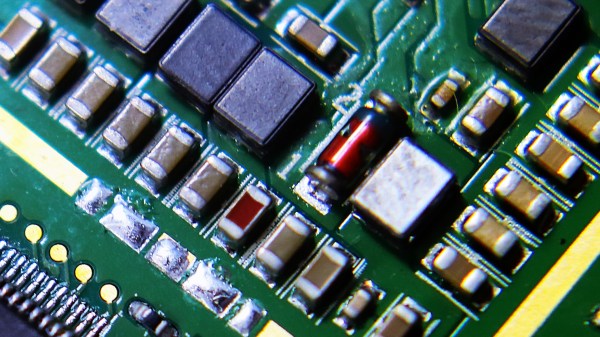
This morning Bloomberg is reporting a bombshell for hardware security. Companies like Amazon and Apple have found a malicious chip on their server motherboards. These are not counterfeit chips. They are not part of the motherboard design. These were added by the factory at the time of manufacture. The chip was placed among other signal conditioning components and is incredibly hard to spot as the nature of these motherboards includes hundreds of minuscule components.

Though Amazon and Apple have denied it, according to Bloomberg, a private security contractor in Canada found the hidden chip on server motherboards. Elemental Technologies, acquired by Amazon in 2015 for its video and graphics processing hardware, subcontracted Supermicro (Super Micro Computer, Inc.) to manufacture their server motherboards in China. It is unknown how many of the company’s products have this type of malicious hardware in them, equipment from Elemental Technologies has been supplied to the likes of government contractors as well as major banks and even reportedly used in the CIA’s drone operations.

How the Hack Works

The attacks work with the small chip being implanted onto the motherboard disguised as signal couplers. It is unclear how the chip gains access to the peripherals such as memory (as reported by Bloomberg) but it is possible it has something to do with accessing the bus. The chip controls some data lines on the motherboard that likely provide an attack vector for the baseboard management controller (BMC).

Hackaday spoke with Joe FitzPatrick (a well known hardware security guru who was quoted in the Bloomberg article). He finds this reported attack as a very believable approach to compromising servers. His take on the BMC is that it’s usually an ARM processor running an ancient version of Linux that has control over the major parts of the server. Any known vulnerability in the BMC would be an attack surface for the custom chip.

Data centers house thousands of individual servers that see no physical interaction from humans once installed. The BMC lets administrators control the servers remotely to reboot malfunctioning equipment among other administrative tasks. If this malicious chip can take control of the BMC, then it can provide remote access to whomever installed the chip. Reported investigations have revealed the hack in action with brief check-in communications from these chips though it’s difficult to say if they had already served their purpose or were being saved for a future date.

What Now?

Adding hardware to a design is fundamentally different than software-based hacking: it leaves physical evidence behind. Bloomberg reports on US government efforts to investigate the supply chain attached to these parts. It is worth noting though that the article doesn’t include any named sources while pointing the finger at China’s People’s Liberation Army.

The solution is not a simple one if servers with this malicious chip were already out in the field. Even if you know a motherboard has the additional component, finding it is not easy. Bloomberg also has unconfirmed reports that the next-generation of this attack places the malicious component between layers of the circuit board. If true, an x-ray would be required to spot the additional part.

A true solution for high-security applications will require specialized means of making sure that the resulting product is not altered in any way. This hack takes things to a whole new level and calls into question how we validate hardware that runs our networks.

Update: We changed the penultimate paragraph to include the word if: “…simple one if servers with…” as it has not been independently verified that servers were actually out in the field and companies have denied Bloomberg’s reporting that they were.

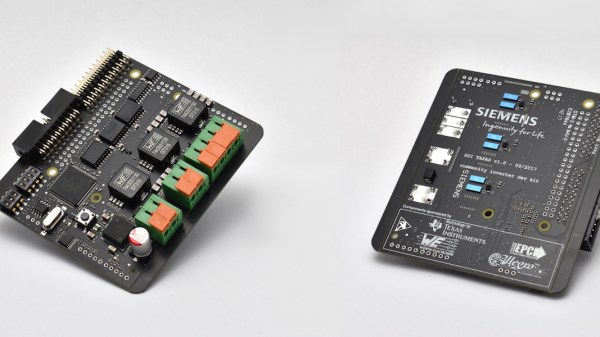
[Note: Image is a generic photo and not the actual hardware]

Better Than Original Pong Using Arduino

Games like Pong are legendary, not only in the sense that they are classic hours fun but also that they have a great potential for makers in stretching their learning legs. In an attempt at recreating the original paddle games like Pong and Tennis etc, [Grant Searle] has gone into the depths of emulating the AY-2-8500 chip using an Arduino.

For the uninitiated, the AY-3-8500 chip was the original game silicon that powered Ball & Paddle that could be played on the domestic television. Running at 2 MHz, it presented a 500 ns pixel width and operated to a maximum of 12 Volts. The equivalent of the AY-3-8500 is the TMS1965NLA manufactured by Texas Instruments for those who would be interested.

[Grant Searle] does a brilliant job of going into the details of the original chip as well as the PAL and NTSC versions of the device. This analysis will come in handy should anyone choose to make a better version. He talks about the intricacies of redrawing the screen for the static elements as well as the ball that bounces around the screen. The author presents details on ball traversal, resolution, 2K memory limit and its workarounds.

Then there are details on the sound and the breadboard version of the prototype that makes the whole write-up worth one’s time. If you don’t fancy the analog paddles and would rather use a wireless modern-day touch, check out Playing Pong with Micro:bits

Thanks [Keith O] for the tip.

How To Mash Up BLE, NodeJS, And MQTT To Get Internet Of Things

We’re living in the world of connected devices. It has never been easier to roll your own and implement the functionality you actually want, rather than live with the lowest common denominator that the manufacture chose.

In a previous article I walked though a small python script to talk to a BLE light and used it to cycle through some colors. Now I want to delve deeper into the world of Internet Connected BLE devices and how to set up a simple Internet-Of-Things light. With this example in hand the sky’s the limit on what you can build and what it will be able to do.

Join me after the break as I demonstrate how to use NodeJS to bridge the digital world with the physical world.

Continue reading “How To Mash Up BLE, NodeJS, And MQTT To Get Internet Of Things”

Beginning BLE Experiments And Making Everything Better

Successfully connecting things without physical wires has a profound effect on the maker brain. Machines talking to each other without any cables is as amazing today as it was a decade ago. When Bluetooth came out, it was a breakthrough since it offered a wireless way to connect cellphones to a PC. But Bluetooth is a complicated, high-bandwidth power hog, and it didn’t make sense for battery-powered devices with less demanding throughput requirements to pay the energy price. Enter Bluetooth LE (BLE), with power requirements modest enough to enable a multitude of applications including low power sensor nodes and beacons.

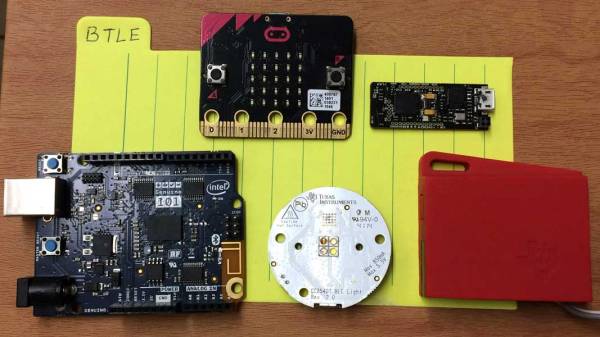
Over the years, a number of gadgets with BLE have popped up such as the LightBlue Bean, BLE Beacons as well as quadcopters like the FlexBot that rely on BLE for communication. Android or iOS apps are the predominant method of talking to these wonderful gadgets though there are alternatives.

This is the first in a two part series on building with BLE devices. First, I’ll survey some BLE devices and how to get started with BLE from the Linux command line. Later, we will go into describing the process of making a NodeJS cross-platform app that will leverage the BLE capabilities and connect it to the Internet.
Lets get started.
Continue reading “Beginning BLE Experiments And Making Everything Better”

Open Source Power Converter For The Masses

GaN or Gallium Nitride Transistors have been in the news for their high-frequency and high-efficiency applications. Anyone interested in the Power Converter domain will love this open-source project by Siemens. The offering is called SDI TAPAS and it is a multipurpose GaN FET based board with a TMS320F28x controller onboard.

A quick look at the schematic reveals a lot of stuff going on like current and voltage sense chips along with a neatly designed GaN power stage with by-the-book drivers. There is a plethora of connectors on-board including one for the Raspberry Pi which is an added bonus. The git repository comes with sample code to get you off the ground, with examples running BLDC motors as well as connect it to Siemens MindSphere Cloud Platform.

This platform can be used in a number of functions in addition to motor control, such as battery charging, solar energy harvesting, and wireless charging. There is a presentation(PDF) that is available for download, and if you are looking for use cases there are a number of user build projects on their community site. The schematic and board designs can be used to make your own, or you could ask them for a sample board and they might give away more on their community site.

For those starting out, you might appreciate this tutorial on Buck Converter Efficiency to get a feel for the hardware that goes into such experiments.