Mechanizing A Eurorack Sequencer

Eurorack has taken over the synthesizer community, and hundreds of people are building their own eurorack modules. [Michael Forrest] designed and built his own Eurorack sequencer module that doesn’t use weird things like capacitors and chips to store a signal. Instead, he’s doing it with stepper motors and some clever engineering.

The basic idea of a Eurorack sequencer is to somehow store a series of values and play them back repeatedly. Connect that sequence to a clock, and you get the same pattern of sounds out of your synth. This can be done digitally with a circular buffer, in the analog domain with a bunch of FETs and caps, or in this case, on a piece of paper glued to a stepper motor.

The key bit of mechanism for this build is a stepper motor with 96 steps per rotation. This is important, because the module is controlled by a clock pulse from the sequencer. Since 96 is evenly divisible by 8 and 16, that means this sequencer will play back in 4/4 time. That NEMA 17 motor with 200 steps per resolution simply won’t work in this situation. Rather, it will technically work, but it’ll be unusable.

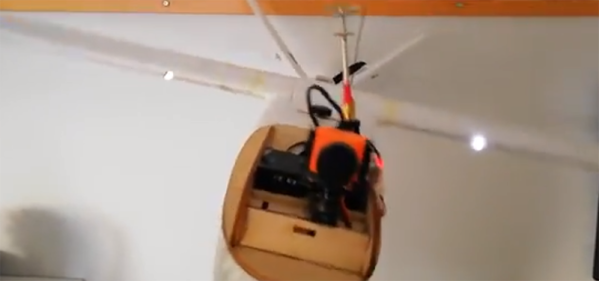
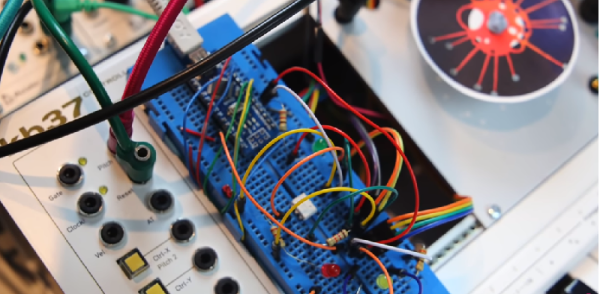
The electronics for this build are surprisingly simple, with an Arduino taking in the clock pulse and sending the step signals to an H-driver. The motor spins a paper disk, which is read with a photoresistor and a LED. It’s simple enough to be fun, and yes, it is mounted to a proper Eurorack-sized panel. You can check out the video of this build below.

Continue reading “Mechanizing A Eurorack Sequencer”

The Filament Pelletizer For Fused Granular Fabrication

The ABS and PLA that goes into your 3D printer is sold in two forms. The first, naturally, is filament. The second is plastic granules, the raw material for your filament, and costs an order of magnitude less than the filament itself. For years we’ve been seeing machines that either print directly with plastic granules or are converted into filament with fancy filament-extruding machines. Now we can do it the other way. [Aubrey Woern] and [Joshua Pearce] of Michigan Tech have been working on a polymer pelletizer chopper that takes plastic filament and turns it into pellets.

The system uses a large corded drill motor to drive a Forstner drill bit. Filament is then threaded into the top of this spinning drill bit with the help of a small DC motor and grippy wheel printed out of Ninjaflex. The system works, and the authors of the paper were able to vary the size of the chopped filament by feeding it into the Forstner bit faster or slower.

While turning an expensive product (filament) back into its raw material (pellets) may not seem like a great idea, there have been a significant number of advancements in the state of manufacturing filament on a desktop and printing directly from pellets in recent years. A machine that turns plastic back into its raw state is something that’s needed if you want to experiment with plastic recycling, and this machine is more than capable of chopping up a spool of filament in two hours or so.

Ken Shirriff Explains His Techniques For Reverse Engineering Silicon

When it comes to reverse engineering silicon, there’s no better person to ask than Ken Shirriff. He’s the expert at teasing the meaning out of layers of polysilicon and metal. He’s reverse engineered the ubiquitous 555 timer, he’s taken a look at the inside of old-school audio chips, and he’s found butterflies in his op-amp. Where there’s a crazy jumble of microscopic wires and layers of silicon, Ken’s there, ready to do the teardown.

For this year’s talk at the Hackaday Superconference, Ken walked everyone through the techniques for reverse engineering silicon. Surprisingly, this isn’t as hard as it sounds. Yes, you’ll still need to drop acid to get to the guts of an IC (of course, you could always find a 555 stuck in a metal can, but then you can’t say ‘dropping acid’), but even the most complex devices on the planet are still made of a few basic components. You’ve got n-doped silicon, p-doped silicon, and some metal. That’s it, and if you know what you’re looking for — like Ken does — you have all the tools you need to figure out how these integrated circuits are made.

Continue reading “Ken Shirriff Explains His Techniques For Reverse Engineering Silicon”

Editing GameCube Memory With A Raspberry Pi

[James] has been working with GameCubes, emulators, and Animal Crossing for a while now, and while emulators are sufficient, he’d like to play on real hardware. This means he needs to write to a GameCube memory card. While there are a few options to do this, they either require a Wii or hardware that hasn’t been made in a decade. The obvious solution to this problem is to reverse engineer the GameCube memory card to read and write the memory with a Raspberry Pi.

There’s an incredible amount of unofficial documentation for every console, and [James] stumbled upon a GC-Forever forum post that describes the electrical signals inside the GameCube memory card. There’s your standard compliment of power and ground pads, along with a DI, DO, CS, Clk, and an INT pin. [James] broke out the magnet wire and soldered up a pin header to these cards. Data was then captured with a Salae logic analyzer, and lo and behold, it looked like a standard SPI protocol.

With the low-level protocol worked out, [James] checked out the Yet Another GameCube Documentation to get the main functions allowed through the SPI bus. The ‘read block’, for instance, starts off with 0x52 and an address offset. A little bit of Python on a Raspberry Pi meant [James] could read and write the entire GameCube memory card. Right now the code is a little rough, but all the work is available should you want to edit your Animal Crossing save with a Raspberry Pi.

This work follows [James]’ earlier work on getting into the debug menu of Animal Crossing, allowing him to add items to his inventory. With this latest advancement, it’s only a matter of time before we plug Raspberry Pis directly into a GameCube.

Yet Another Restomod Of The Greatest Computer Ever

The best computer ever made is nearly thirty years old. The Macintosh SE/30 was the highest-spec original all-in-one Macs, and it had the power of a workstation. It had expansion slots, and you could hang a color monitor off the back. It ran Unix. As such, it’s become the prize of any vintage computer collector, and [Kris] recently completed a restomod on our beige king. It’s a restored Macintosh SE/30, because yes, we need to see more of these.

The restoration began with the case, which over the last thirty years had turned into an orange bromiated mess. This was fixed with RestOBrite, or Retr0Brite, or whatever we’re calling it now. This was just Oxyclean and an off-the-shelf bottle of 3% hydrogen peroxide, left out in the sun for a little bit.

Of course the capacitors had spilled their magic blue smoke over the last three decades, so a few replacements were in order. This is well-trodden territory, but [Kris] also had to replace the SCSI controller chip. Three of the pads for this chip had lifted, but this too is something that can be fixed.

With the restoration work complete, [Kris] turned his attention to doing something with this computer. The spinny hard drive was replaced with a SCSI2SD, currently the best solution to putting SCSI disks into old computers. There are a few more additions, including a Micron Xceed color video adapter, a video card that allows the SE/30 to drive two monitors (internal included) in color.

The current plans are to attach a modem to this SE/30, have it ring into a Raspberry Pi, and surf the web over a very slow connection. There is another option, though: You can get a WiFi adapter for the SE/30, and there’s a System 7 extension to make it work. Yes, we’re living in the future, in the past. It’s awesome.

Hackaday Links Column Banner

Hackaday Links: December 2, 2018

CircuitPython is becoming a thing! CircuitPython was originally developed from MicroPython and ported to various ARM boards by Adafruit. Now, SparkFun is shipping their own CircuitPython board based on the nRF52840, giving this board an ARM Cortex-M4 and a Bluetooth radio.

You like contests, right? You like circuit boards too, right? Hackster.io now has a BadgeLove contest going on to create the Blinkiest Badge on Earth. Yes, this is a #badgelife contest, with the goal of demonstrating how much you can do in a single circuit badge. Prizes include a trip to San Francisco, a badass drone, a skateboard, a t-shirt, or socks. YES, THERE ARE SOCKS.

We have a date for the Vintage Computer Festival Pacific Northwest 2019. It’s going down March 23 and 24 at the Living Computers Museum in Seattle. The call for exhibitors is now open so head over and check it out. So far the tentative list of exhibits and presenters include Attack of the SPARC Clones, and I must mention that SPARC systems are showing up on eBay with much higher frequency lately. I have no idea why.

Need another con? How about a KiCAD con? The inaugural conference for KiCAD users is happening next April in Chicago and the call for talk proposals just opened up. The con focuses on topics like using KiCAD in a manufacturing setting, what’s going on ‘under the hood’ of KiCAD, and how to use KiCAD to make an advanced product.

Spanish police have stopped a homemade scooter. Someone, apparently, was tearing around a public road in Galacia on a homemade scooter. From the single picture, we’re going to say ‘not bad.’ It’s a gas-powered weed wacker mounted to a homemade frame.

Every year, in December, we take a look back at what Hackaday has accomplished in the past twelve months. Sure, we gave out hundreds of thousands of dollars in awards in the Hackaday Prize, and yes, we’ve pushed our coverage of tech advancements into weird, uncharted, but awesome territory. Our biggest accomplishment, though, is always how many readers we reach. This year, we had a slight fall-off in our readership in the Democratic People’s Republic of North Korea. We’re down from 156 views in 2017 to 75 views this year. While the year isn’t over, we don’t expect that number to change much. What was the cause of this drop-off? We’re not quite sure. Only time will tell, and we’re looking forward to serving fresh hacks every day to the DPRK in 2019.

FPV Antenna Leans Into The Bank

If you’re doing remote controlled flight, odds are you’re also flying FPV. Or you at least have a camera on board. If you’re transmitting to the ground, you may have noticed the antenna on your plane has some weird radiation patterns; bank your plane to the left or right, and your signal gets worse. [Ant0003] over on Thingiverse has a great solution to this problem that’s small, lightweight, and will fit into just about any airframe.

[Ant]’s flying a Mini Talon with FPV, and since planes turn slower than drones, and can fly much further than multicopters, the radiation pattern of the antenna is very important. In this case, [Ant] wants to keep the antenna perpendicular to the ground. This problem was solved with a cheap 9-gram servo and a few 3D printed parts that hold an SMA connector. One end of this wire goes to the video transmitter, and the antenna is screwed into the other end.

A servo alone does not make the antenna point straight up. To do this, [Ant] needed to program his flight controller. He’s using iNav, and a few clicks of the mouse makes one servo channel do whatever the gyroscope isn’t doing. The results (video below) speak for themselves. It’s an antenna that always points straight up, which is exactly what this video transmitter needed.

Continue reading “FPV Antenna Leans Into The Bank”