GBA Consolizer Kit RetroRGB

GBA On The Big Screen: FPGA Delivers HDMI And Every Feature Imaginable

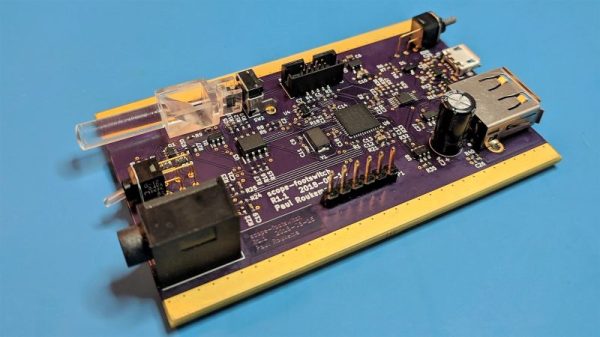
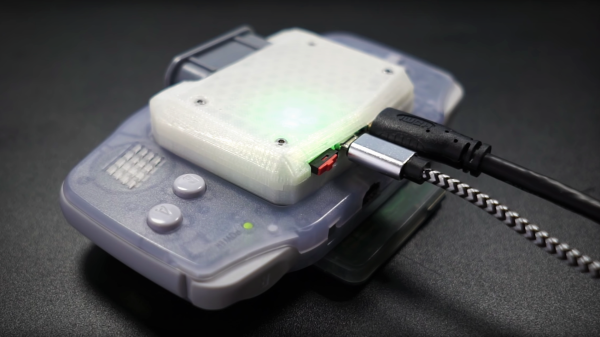
The concept of creating a gaming portable out of a home console has been around for some time, but it’s hardly seen the other way around. There have been a few devices that dared to straddle the line (i.e., Sega Nomad, Nintendo Switch, etc.), but the two worlds typically remain separate. [Stephen] looked to explore that space by attempting to turn the Game Boy Advance into a “big boy” console. The FPGA-based mod kit he created does just that, and comes complete with controller support and digital video output in 720p over a mini HDMI cable.

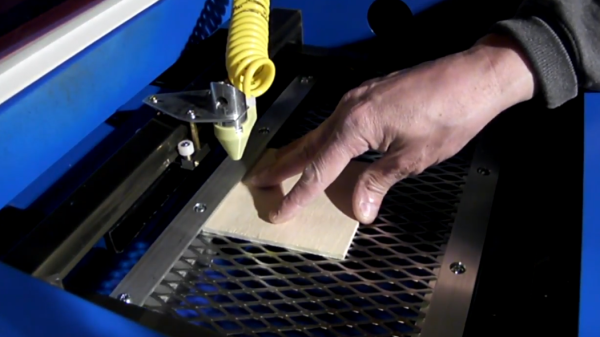
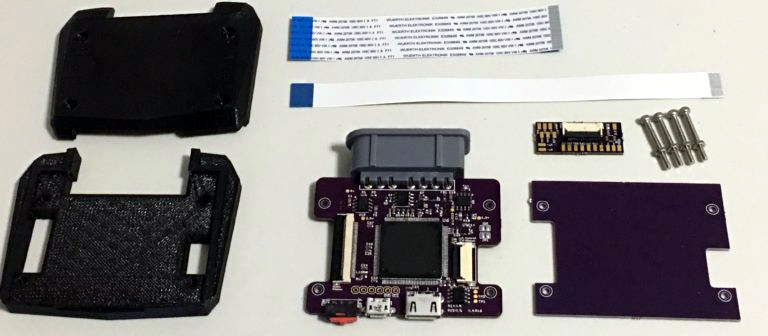
The kit itself was designed specifically for the original model GBAs containing the 40-pin LCD ribbon cable. These original models were the early run of non-backlit screens that are also denoted by a motherboard designation that can be seen by peering into the battery compartment. RGB signals are read directly from the GBA LCD socket by removing the handheld’s screen in favor of a fresh flat flex ribbon cable. This method enables a noise-free digital-to-digital solution as opposed to the digital-to-analog output of Nintendo’s own Game Boy Player add-on for the GameCube.

At an astonishing 240×160 native resolution, GBA video is scaled by the FPGA up to 5x within a 720p frame. Of course some of the image is cutoff in the process, so options for 4x and 4.5x scales were included. As a wise man once said, “Leave no pixel behind”. Since Nintendo designed the GBA clock to run at 59.7276 Hz, [Stephen] removed the oscillator crystal in order to sync the refresh rate to a more HDMI friendly 60 Hz. This means that the mod kit overclocks GBA games ever so slightly, though [Stephen] included a GBA cycle accurate mode as an option if your display can handle it.

The video below is [Stephen]’s initial test using a SNES controller. Tests must have gone well, because he decided to incorporate a SNES controller port in the final design. Now all those Super Nintendo ports on the GBA are back home once again thanks to this “consolizer” kit.

Continue reading “GBA On The Big Screen: FPGA Delivers HDMI And Every Feature Imaginable”

Keep Both Hands On The Probes With This Oscilloscope Footswitch

We’ve got two hands, so it’s natural to want to use both of them while diagnosing a circuit with an oscilloscope. Trouble is, keeping both hands on the probes makes it a touch difficult to manipulate the scope. If only there were some way to put your idle lower appendages to work.

This multipurpose oscilloscope footswitch interface makes so much sense that we wonder why such a thing isn’t standard equipment on more scopes. [Paul Roukema]’s interface relies on the USB Test and Measurement Class (USBTMC) protocol that allows most modern scopes to be remotely controlled, somewhat like the General Purpose Interface Bus (GPIB) protocol of old. [Paul]’s interface uses an STM32 microcontroller to talk USBTMC to either Keysight’s Infinium scopes or the Tektronix DPO line, since those were what he had to test against. Tapping the footswitch cycles the acquisition mode on and off or triggers a single acquisition. He’s thoughtfully included the USBTMC specs in his GitHub project, so adapting it to other scopes should be straightforward. We’d even wager that older scopes with GPIB could enjoy the same handsfree control.

Have a down-market scope but still want to go handsfree? [Jenny List]’s primer on running a Rigol with Python might offer some hints on where to start.

Hackaday Links Column Banner

Hackaday Links: December 2, 2018

CircuitPython is becoming a thing! CircuitPython was originally developed from MicroPython and ported to various ARM boards by Adafruit. Now, SparkFun is shipping their own CircuitPython board based on the nRF52840, giving this board an ARM Cortex-M4 and a Bluetooth radio.

You like contests, right? You like circuit boards too, right? Hackster.io now has a BadgeLove contest going on to create the Blinkiest Badge on Earth. Yes, this is a #badgelife contest, with the goal of demonstrating how much you can do in a single circuit badge. Prizes include a trip to San Francisco, a badass drone, a skateboard, a t-shirt, or socks. YES, THERE ARE SOCKS.

We have a date for the Vintage Computer Festival Pacific Northwest 2019. It’s going down March 23 and 24 at the Living Computers Museum in Seattle. The call for exhibitors is now open so head over and check it out. So far the tentative list of exhibits and presenters include Attack of the SPARC Clones, and I must mention that SPARC systems are showing up on eBay with much higher frequency lately. I have no idea why.

Need another con? How about a KiCAD con? The inaugural conference for KiCAD users is happening next April in Chicago and the call for talk proposals just opened up. The con focuses on topics like using KiCAD in a manufacturing setting, what’s going on ‘under the hood’ of KiCAD, and how to use KiCAD to make an advanced product.

Spanish police have stopped a homemade scooter. Someone, apparently, was tearing around a public road in Galacia on a homemade scooter. From the single picture, we’re going to say ‘not bad.’ It’s a gas-powered weed wacker mounted to a homemade frame.

Every year, in December, we take a look back at what Hackaday has accomplished in the past twelve months. Sure, we gave out hundreds of thousands of dollars in awards in the Hackaday Prize, and yes, we’ve pushed our coverage of tech advancements into weird, uncharted, but awesome territory. Our biggest accomplishment, though, is always how many readers we reach. This year, we had a slight fall-off in our readership in the Democratic People’s Republic of North Korea. We’re down from 156 views in 2017 to 75 views this year. While the year isn’t over, we don’t expect that number to change much. What was the cause of this drop-off? We’re not quite sure. Only time will tell, and we’re looking forward to serving fresh hacks every day to the DPRK in 2019.

A Raspberry Pi Has This Pool Covered

Far from being a tiled hole in the ground with a bit of water in it, a modern swimming pool boasts a complex array of subsystems designed to ensure your morning dip is as perfect as that you’d find on the sun-kissed beaches of your dream tropical isle. And as you might expect with such complex pieces of equipment in a domestic setting, they grow old, go wrong, and are expensive to fix.

[DrewBeer]’s pool had just such a problem. A decades-oldwired controller had failed, so rather than stump up a fortune for a refit, he created his own pool controller which exists under the watchful eye of a Raspberry Pi. The breadth of functionality is apparent from his write-up. In addition to the pump and heater you’d expect, he as a salt water system, environmental monitoring, and even an RTL-SDR to pull in readings from an RF floating temperature probe. It’s all exposed via a node.js API, and thus far has been running for over 6 months without mishap.

From where this is being written in the gloom of a damp November in a Northern Hemisphere maritime climate we can only envy [Drew] his pool and imagine it as perpetually deep blue and sparkling, invitingly cool against the heat of a summer’s day. If you have similar pool automation woes. perhaps you’d also like to look at this ESP8266 pool monitor, or another automation project using a Raspberry Pi.

FPV Antenna Leans Into The Bank

If you’re doing remote controlled flight, odds are you’re also flying FPV. Or you at least have a camera on board. If you’re transmitting to the ground, you may have noticed the antenna on your plane has some weird radiation patterns; bank your plane to the left or right, and your signal gets worse. [Ant0003] over on Thingiverse has a great solution to this problem that’s small, lightweight, and will fit into just about any airframe.

[Ant]’s flying a Mini Talon with FPV, and since planes turn slower than drones, and can fly much further than multicopters, the radiation pattern of the antenna is very important. In this case, [Ant] wants to keep the antenna perpendicular to the ground. This problem was solved with a cheap 9-gram servo and a few 3D printed parts that hold an SMA connector. One end of this wire goes to the video transmitter, and the antenna is screwed into the other end.

A servo alone does not make the antenna point straight up. To do this, [Ant] needed to program his flight controller. He’s using iNav, and a few clicks of the mouse makes one servo channel do whatever the gyroscope isn’t doing. The results (video below) speak for themselves. It’s an antenna that always points straight up, which is exactly what this video transmitter needed.

Continue reading “FPV Antenna Leans Into The Bank”

Spring-Loaded Bed For K40 Laser Acts As An Auto-Focus

Laser engraving and cutting has something in common with focusing the sun’s rays with a magnifying glass: good focus is critical to results. If materials of varying thicknesses are used, focus needs to be re-set every time the material changes, and manual focusing quickly becomes a chore. [Scorch Works] has a clever solution to avoid constant re-focusing that doesn’t involve sensors or motors of any sort. The result is a self-adjusting bed that compensates for material height changes, ensuring that the top surface of the material is always a fixed distance from the laser’s head.

The way [Scorch Works] has done this is to make two spring-loaded clamps from angle aluminum and a few pieces of hardware. When a sheet of material is placed into the machine, the edges get tucked underneath the aluminum “lips” while being pushed upward from beneath. By fixing the height of the top layer of angle aluminum, any sheet stock always ends up the same distance from the laser head regardless of the material’s thickness.

[Scorch Works] shows the assembly in action in the video embedded below, along with a few different ways to accommodate different materials and special cases, so be sure to check it out.

Continue reading “Spring-Loaded Bed For K40 Laser Acts As An Auto-Focus”

Wheel Of Fortune Gets Infinite Puzzles On NES

Wheel of Fortune is a television game show, born in the distant year of 1975. Like many popular television properties of the era, it spawned a series of videogames on various platforms. Like many a hacker, [Chris] had been loading up the retro NES title on his Raspberry Pi when he realized that, due to the limitations of the cartridge format, he was playing the same puzzles over and over again. There was nothing for it, but to load a hex editor and get to work.

[Chris’s] initial investigation involved loading up the ROM in a hex editor and simply searching for ASCII strings of common puzzles in the game. Initial results were positive, turning up several scraps of plaintext. Eventually, it became apparent that the puzzles were stored in ASCII, but with certain most-significant-bits changed in order to mark the line breaks and ends of puzzles. [Chris] termed the format wheelscii, and developed an encoder that could turn new puzzles into the same format.

After some preliminary experimentation involving corrupting the puzzles and testing various edge cases, [Chris] decided to implement a complete fix. Puzzles were sourced from the Wheel of Fortune Puzzle Compendium, which should have plenty of fresh content for all but the most addicted viewers. A script was then created that would stuff 1000 fresh puzzles into the ROM at load time to minimize the chances of seeing duplicate puzzles.

ROM hacks are always fun, and this is a particularly good example of how simple tools can be used to make entertaining modifications to 30-year-old software. For another take, check out this hack that lets the Mario Bros. play together.