Making A Violin Mold With A 3D Printer

IMG104

Some people see 3D printers as expensive and slow devices for replicating bracelets, whistles, and Yoda heads. Until the world transitions to a plastic octopus-based economy, those of us with 3D printers will have to find something useful for these tools. Bayesian Empiritheurgy out of Halifax, Nova Scotia wanted to do something useful with their 3D printer for the large-scale, distributed hackerspace competition, The Deconstruction. They ended up using their printer to make molds for a paper mache violin, and ended up being fairly successful at it.

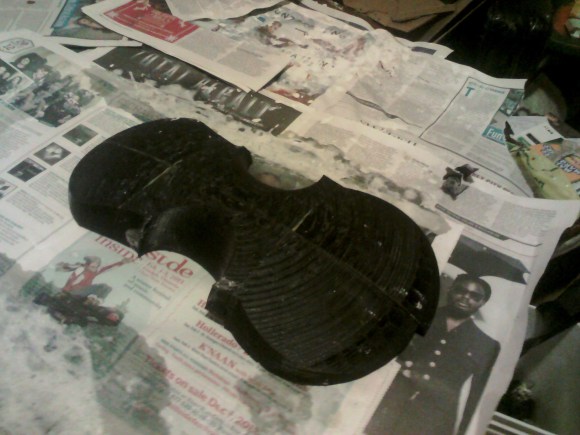
The basic idea behind their paper mache violin was to create a plastic mold for exactly half a violin body. This block was covered in newspaper drenched in wheat paste. Once the paste was dry, the violin half was pulled off the mold and another half was created. These were stitched and glued together, resulting in a violin body.

The bridge, tailpiece, tuners, and fingerboard were 3D pprinted and held together with epoxy. The epoxy flexed a lot, so every time a string was tuned it threw out the tuning of the other three strings. In the video after the break, you can check out the paper mache and plastic violin being played. It’s not much for the eyes or ears, but everyone had fun, and the team completed the proof of concept for a fiberglass or carbon fiber violin we’d suggest they try next.

Continue reading “Making A Violin Mold With A 3D Printer”

The Coolest Homebrew Computer Gets Its Own Case

SONY DSC

When you’re building one of the best homebrew computers ever created, you’ll also want a great case for it. This was [Simon]’s task when he went about building an enclosure for his Kiwi microcomputer.

We were introduced to the Kiwi last year as the end result of [Simon] designing the ultimate computer from the early to mid-1980s. Inside is a 68008 CPU, similar to the processor found in early Macs and Amigas, two SID chips taken from a Commodore 64, Ethernet, support for IDE hard drives and floppy disks, and a video display processor capable of delivering VGA resolution video at 32-bit color depth. Basically, if this computer existed in 1982, it would either be hideously expensive or extraordinarily popular. Probably both, now that I think about it.

The case for the Kiwi was carefully cut from ABS sheets, glued together with acetone, and painted with auto body paint by a friend. It’s a great piece of work, but the effort may be for naught; [Simon] is reworking the design of his Kiwi computer, and hopefully he’ll be spinning a few extra boards for everyone else that wants a piece of the Kiwi.

Massively Parallel CPU Processes 256 Shades Of Gray

256

The 1980s were a heyday for strange computer architectures; instead of the von Neumann architecture you’d find in one of today’s desktop computers or the Harvard architecture of a microcontroller, a lot of companies experimented with strange parallel designs. While not used much today, at the time these were some of the most powerful computers of their day and were used as the main research tools of the AI renaissance of the 1980s.

Over at the Norwegian University of Science and Technology a huge group of students (13 members!) designed a modern take on the massively parallel computer. It’s called 256 Shades of Gray, and it processes 320×240 pixel 8-bit grayscale graphics like no microcontroller could.

The idea for the project was to create an array-based parallel image processor with an architecture similar to the Goodyear MPP formerly used by NASA or the Connection Machine found in the control room of Jurassic Park. Unlike these earlier computers, the team implemented their array processor in an FPGA, giving rise to their Lena processor this processor is in turn controlled by a 32-bit AVR microcontroller with a custom-build VGA output.

The entire machine can process 10 frames per second of 320×240 resolution grayscale video. There’s a presentation video available (in Norwegian), but the highlight might be their demo of The Game of Life rendered in real-time on their computer. An awesome build, and a very cool experience for all the members of the class.

Taking The Pain Out Of Making Custom Eagle Parts

eagle

Cadsoft’s Eagle is a great tool for the independent maker. It’s a relatively easy to use PCB layout program with a ton of part libraries available for just about any project. If you’re using a part this isn’t included in these libraries, though, creating them by hand is a pain. [Dave] sent in a project he’s been working on that makes parts for Eagle with a Perl script, allowing for easy creation of custom parts that aren’t included in any library.

One thing that’s really convenient for custom Eagle parts is that most components are DIPs or some sort of leaded SMD component. [Dave]’s script takes the dimensional data from any chip’s datasheet and creates a custom outline for each part. The inputs and outputs can also be ripped directly from the datasheet and assigned to the footprint, making for a relatively automated process that creates custom parts in Eagle. Now for someone to use this script with a little OCR to make a ‘create Eagle part from PDF’ app…

Giving 3D Printed Parts A Shiny Smooth Finish

No matter how good a 3D printer gets, you’re always going to have visible print layers. Even with very high-quality prints with sub-0.1mm layer height, getting a shiny and smooth finish of injection molded plastic is nearly impossible. That is, of course, until you do some post-print finishing. [Neil Underwood] and [Austin Wilson] figured out a really easy way to smooth out even the jankiest prints using parts you probably already have lying around.

The technique relies on the fact that ABS plastic and acetone don’t get along together very well. We’ve seen acetone used to smooth out 3D printed objects before – either by dunking the parts in an acetone bath or brushing the solvent on – but these processes had mixed results. [Neil] and [Austin] had the idea of using acetone vapor, created in a glass jar placed on top of a heated build plate,

The process is pretty simple. Get a large glass jar, put it on a heated build plate, add a tablespoon of acetone, and crank the heat up to 110C. Acetone vapor will form in the jar and react with any printed part smoothing out those layers. The pic above shows from right to left a 3D printed squirrel at 0.35 mm layer height, 0.1 mm layer height – the gold standard of high-end repraps – and another print with 0.35 layer height that was run through a vapor bath for a few minutes. Amazing quality there, and cheap and easy enough for any 3D printer setup.

You can check out the tutorial video after the break along with a video showing exactly how dangerous this is (it’s not, unless you do something very, very dumb).

Continue reading “Giving 3D Printed Parts A Shiny Smooth Finish”

Ubuntu With A GUI On A Beagleboard

beagle

The Raspberry Pi is great if you’re looking for a cheap yet powerful computer running Linux, but let’s not forget all the other ARM dev boards out there. [Adam] spent some time this weekend putting together an Ubuntu distro for his Beagleboard XM to give it the convenience of a GUI and a whole bunch of drivers to get a lot of stuff done.

The Beagleboard XM is another high power ARM dev board that is a little more capable than the Raspberry Pi. With an integrated USB hub, LVDS LCD displays, and a camera board, the Beagleboard already has a lot of peripherals that are now only promised for the Raspberry Pi. The only problem with the Beagleboard XM is the state of drivers and software; a problem [Adam] resolved by bringing Ubuntu to the Beagleboard.

[Adam]’s distro comes with all the goodies a relatively high-powered ARM dev board should have: Python, scipy, numpy, and a few cool extras such as GIMP and Chromium. He says it’s a bit faster than the stock Raspbian distro on the Raspberry Pi, so if you’re looking for the best ARM/Linux dev board for your next project, you may want to give [Adam]’s distro a try.

SCARA Arm Finally Prints Plastic Parts

SCARA

Here’s a neat alternative to the usual gantry setup you see on 3D printers. [Quentin] designed and build a SCARA arm 3D printer that just saw its first print.

We caught wind of [Quentin]’s SCARA arm a few weeks ago when it was still just a few plastic parts and a glimmer of ambition in its creator’s eye. Most of the parts are 3D printed, including the blue arms for the x and y axes that are driven by stepper motors. The z axis is controlled by two lead screws, and judging by the height of [Quentin]’s machine, he has a pretty big printable volume – at least as large as some of the delta bot 3D printers we’ve seen.

So far [Quentin] has printed a handful of calibration cubes and a wheel with a fairly impressive print resolution. You can check out a video of the SCARA arm printer after the break.

Continue reading “SCARA Arm Finally Prints Plastic Parts”