Gigantic 555 Footstool

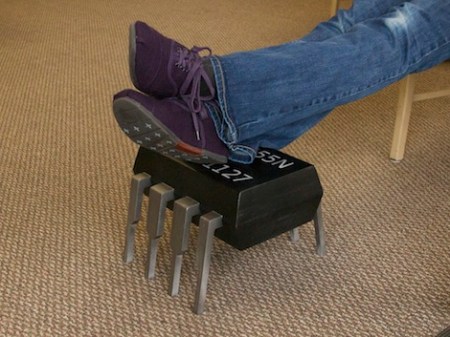
The team at Evil Mad Scientist Laboratories needed a footstool. Obviously not content with buying one, they came across the idea of building a 555 footstool.

After finding some dimension drawings of the 555 timer IC, the team scaled everything up 30 times. While a normal DIP-8 555 is around 0.4 inches long, the footstool is over a foot long and eight inches high. The stool was cut on a CNC mill out of 1/2″ plywood, glued together, and finally panted with the correct date code and the logo of Evil Mad Scientist Labs. The finished product is amazing. We’ve been looking for a nice table, and the idea of an 8 foot long wooden 64-pin Motorola 68000 is pretty appealing.

While there’s no electronics in the footstool, it’s not hard to imagine fabricating some aluminum pins and a hollow body so a huge, functional 555 could be built. It would be possible to use discreet components following the block diagram of the 555 to build a huge Atari Punk Console; the gigantic capacitors are fairly easy to build in any event.
Did you get the tickets? To what? The gun show.

Detecting Muscles With Electromyography

The folks at Advancer Technologies just release a muscle sensor board with a great walk through posted on Instructables describing how this board measures the flexing of muscles using electromyography.

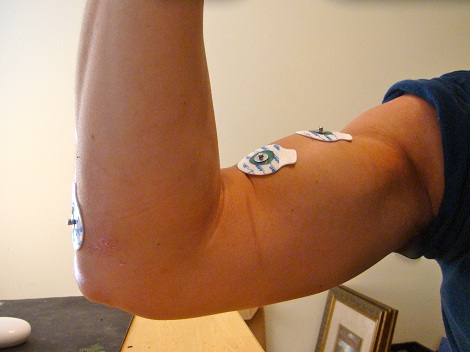
Using the same electrode placement points as the remote controlled hand we covered earlier, the muscle is measured by sensing the voltage between the muscle and its tendon. The result is a fairly fine-grained sensing of the output – more than enough to provide some analog control for a project.

The board itself is relatively simple – an INA106 differential amp is used to sense if a muscle is flexing or not. This signal is then amplified and rectified, after which it can be connected to the analog input of your favorite microcontroller. The video demo shows the board connected to a Processing app running from an Arduino, but it wouldn’t be hard to adapt this towards remote Nerf sentry turret controlled by your biceps.

Check out the video after the break to see the muscle sensor board in action.

Continue reading “Detecting Muscles With Electromyography”

PossessedHand Controls Hand With Electrical Stimuli

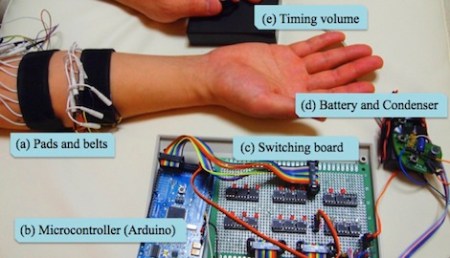
[Emi Tamaki], [Miyaki Takashi] and [Jun Rekimoto] at the University of Tokyo came up with a device called the PossessedHand that electrically stimulates muscles to train someone to play a the koto, a Japanese stringed instrument.

The PossessedHand ‘triggers’ individual fingers with precisely placed electrodes. Sixteen joints in the hand can be controlled independently by placing one electrode on the muscle that controls the joint and a ground electrode on the tendon of that muscle. Users of the PossessedHand reported no pain from the device when 30 Volts were sent though the electrodes.

The paper (PDF warning) goes into detail about the reactions of the users of the PossessedHand. While a few subjects thought the PossessedHand was scary, many enjoyed it – one subject even thought it was possible to fly a helicopter without training. While this isn’t downloading a rotary wing licence into your brain like The Matrix, the PossessedHand did prove to be a useful tool for learning the fingering for the koto. You can see a video of the PossessedHand in action in the New Scientist story.

[via New Scientist]

Handy Board Plays Music With An NES Controller

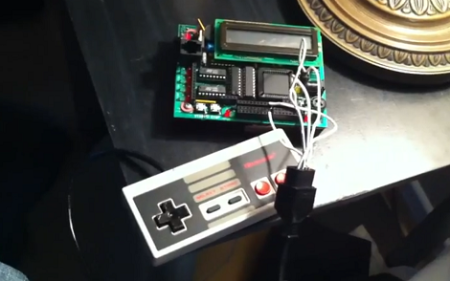
[Alex Busman] has been working with an old microcontroller board called the Handy Board. Recently, he figured out how to interface an NES controller to play music. With 8 buttons on an NES controller, [Alex] has control over an entire musical scale, so he demonstrates this in his video by covering the Dr. Mario Theme.

The Handy Board is a microcontroller board originally designed in 1995 for LEGO robots. With a 68HC11 μC running at 2MHz and 32KB of RAM, the Handy Board has been superseded by the LEGO Mindstorms NTX NXT, the Handy Board is thankfully still being supported, and is still a great platform to learn embedded design.

It’s great to see a build on relatively obsolete hardware, especially considering this would be a trivial build with an Arduino. We think it’s great [Alex] is learning the ins and outs of ‘difficult’ hardware – it’s a great way to learn something. Check out the walk though of [Alex]’s build after the break.

Continue reading “Handy Board Plays Music With An NES Controller”

Teamspeak Button Uses Tattoo Machine Foot Switch

As an avid gamer, [Pat Norton] uses Teamspeak with his friends when playing World of Warcraft. [Pat]’s friends were annoyed with the voice-activated option for Teamspeak and the constant squeaking of dog toys, and [Pat] was annoyed with the questionable usability of a push-to-talk key. Dissatisfied with his options, [Pat] built footswitch-controlled teamspeak button using a Teensyduino and a broken tattoo machine foot switch.

The Teensyduino is an incredibly small Arduino compatible board that was perfect for this project. Since the teensyduino can operate as a USB Human Interface Device, it’s very easy to have the board appear as another keyboard to the computer. After borrowing some code from the hardware button of a DIY photobooth, [Pat] hooked up the foot switch to two pins of the board. From there, it was very to adapt the code so the foot switch would act as a third ‘Control’ button. The results look very professional, like a factory-made game controller. We’ve seen a few foot switch keyboard devices before, and while this probably isn’t the most efficient way to have a foot switch button control something on a computer, it’s certainly the smallest we’ve seen.

Stereo Amplifier With Digital Volume Control

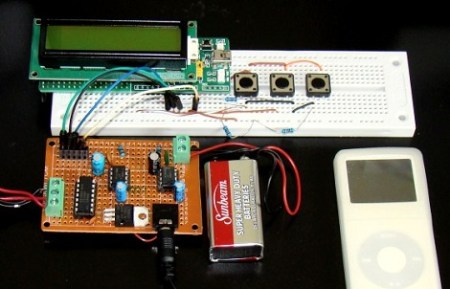
A regular Hack A Day reader sent in a tip about an LM386 stero amplifier with digital volume control. The resulting build is very professional and could easily be adapted into a slick iPod dock build.

We’ve seen a few LM386-based amplifiers over the years including one that fits inside a 9V battery, but this is the first implementation of digitally controlled volume we’ve seen. The volume control of this amp uses the DS1868 dual digital pot IC in place of the usual 10K pot providing 256 steps between zero and full volume. The DS1868 is controlled by a PIC μC with a 3-wire serial connection, although this could be implemented on any microcontroller.

Although the code provided with this build outputs volume as a linear function, it would be trivial to implement a logarithmic volume output. Because the ear perceives loudness on a logarithmic scale, this would be a great way to adjust audio volume and provide a more fine-grained control. Of course this could be implemented with a logarithmic pot, but where’s the fun in that?

Check out a video of the amp after the break.

Continue reading “Stereo Amplifier With Digital Volume Control”

Selective Solar Sintering With Sand

[Markus Kayser] built an amazing solar powered SLS printer, but instead of using lasers and powdered plastics his machine uses the power of the sun to heat sand into complex shapes.

[Markus]’ printer uses the same concept as his earlier solar cutter – burning things with a magnifying glass. Interestingly, the printer isn’t controlled with stepper motors and reprap electronics – it’s completely cam driven. The solar panels only power the motor attached to the frame moving on bearings made from skateboard wheels.

We’d guess that [Markus] is using a little more than 2 square meters of Fresnel lenses in his project. Since solar irradiance is about 120 W/m² (PDF warning), [Markus] is concentrating a lot of energy onto a point the size of a quarter, which would be necessary to heat up sand to its 1500° C melting point. The resolution isn’t what you could get with a laser, but [Markus] was able to print an amazing bowl along with other complex 3d shapes.

Check out [Markus]’ video of the solar sinter printer after the break. There’s also a video of his previous experiment with the solar cutter.

Continue reading “Selective Solar Sintering With Sand”