You know, it’s a tale as old as custom mechanical keyboards. [penkia] couldn’t find any PCBs with 36 keys and Gateron low-profile switch footprints, so they made their own and called it the LoremIpsum36. Isn’t it lovely?
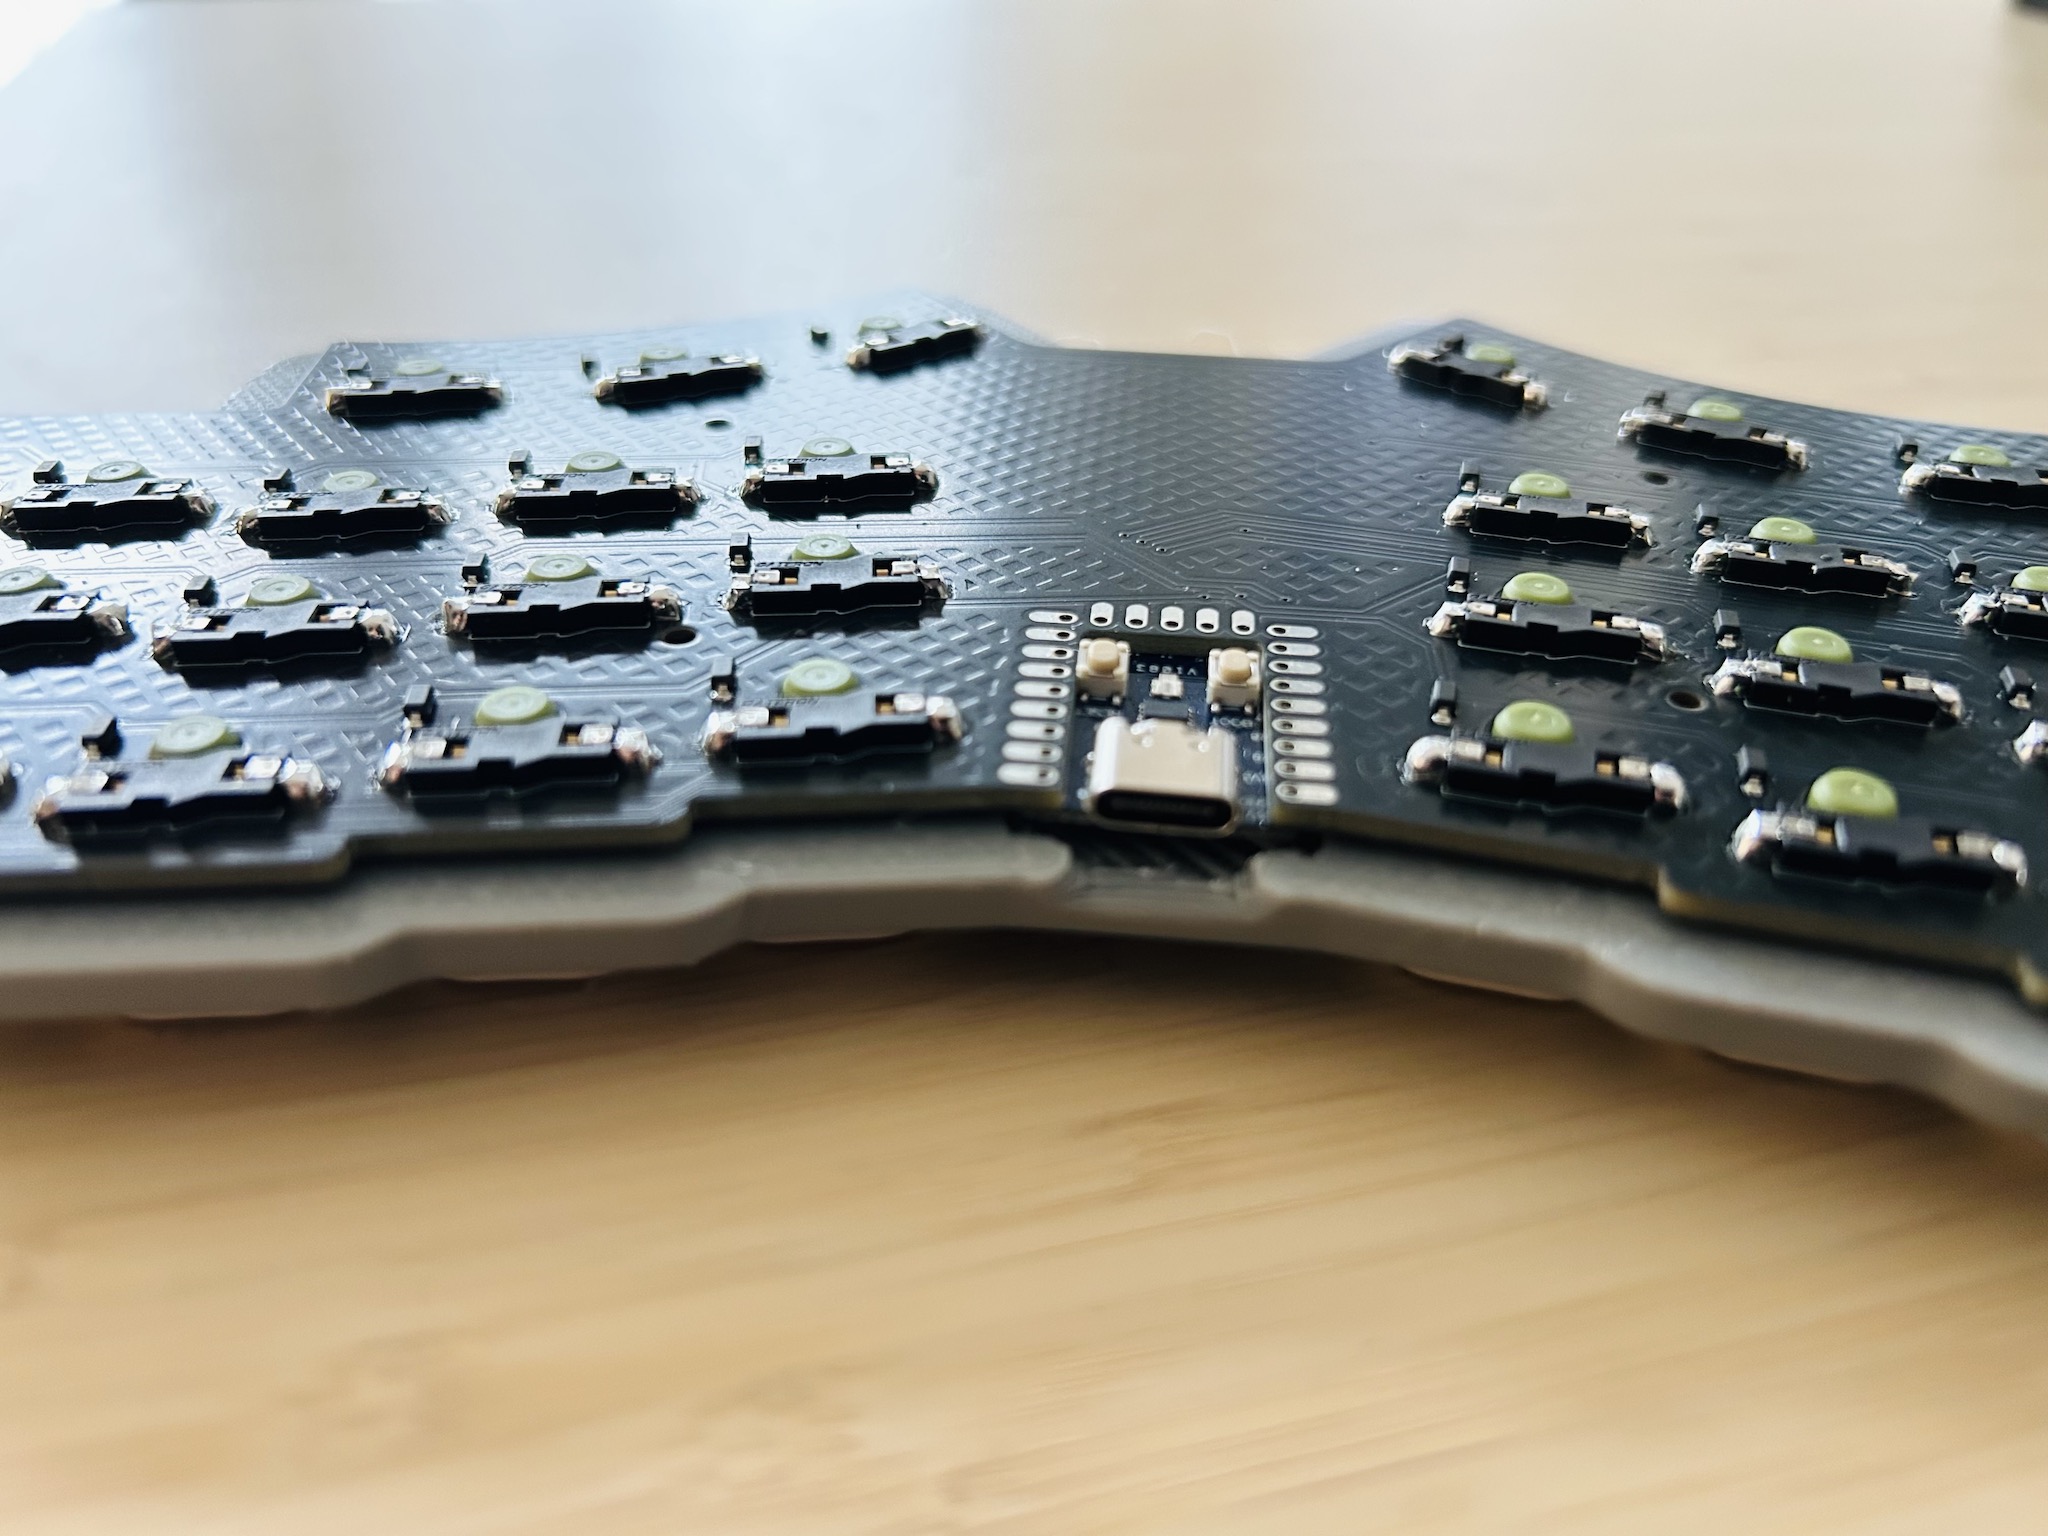 This baby runs on an RP2040, which sits flush as can be in a cutout in the PCB. This maneuver, along with the LP switches in hard-to-find SK-33 sockets results in quite the thin board.
[penkia] says that despite using a 3 mm tray for added rigidity, the entire thing is thinner than the Nuphy Air60 v2, which is just over half an inch (13.9 mm) thick. For keycaps, [penkia] has used both XVX profile and FKcaps’ LPF.
And yeah, that area in the middle is crying out for something; maybe a trackball or something similar. But [penkia] is satisfied with it as-is for the first version, so we are, too.
Do you like 36-key boards, but prefer curves? Check out the Lapa keyboard, which doubles as a mouse.


![Wearables queen [Becky Stern] with a microcontroller and a speaker. And a skull!](https://hackaday.com/wp-content/uploads/2025/01/becky-stern-800.jpg?w=600&h=450)