Feel What The Temperature Is Like Outside Without Leaving Your Bed

Your smartphone might be able to tell you what the weather is like outside, but you’d have to go outside yourself to really feel it. To do this from the comfort of your own bed, [Sagarrabanana] built a clock that lets you really feel the temperature. Video below with English subtitles.

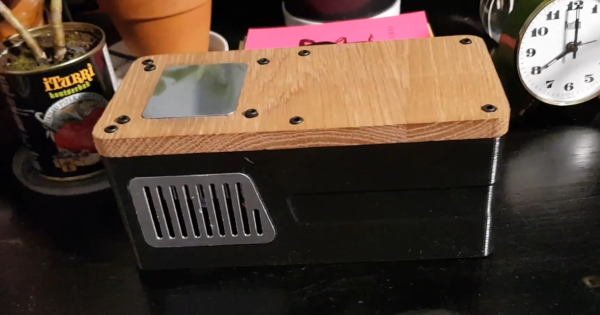
It is basically a box with a solenoid inside to knock out the time, and a Peltier plate on top. Give the box two knocks, which are detected by a piezo element,  and it will tell you the current time down to 15 minute increments in “bell tower” format. Give it three knocks, and the ESP8266 will fetch the ambient outside temperature from a cloud service and cool or heat the Peltier element to that temperature, using a H-bridge motor driver module. The code and design files are available on GitHub if you want to build your own.

All the components are housed inside an attractive 3D printed box with a machined wood top. Although we think this is a very interesting idea, we can’t help but suspect that it might be counterproductive for getting you out of bed on those cold winter mornings.

While alarm clocks are falling out of favor, they are still a popular build for hackers. We’ve covered one that looks like it came from a fallout shelter, and another with a very cool looking VFD display. Continue reading “Feel What The Temperature Is Like Outside Without Leaving Your Bed”

Active Suspension On A DIY Racing Car

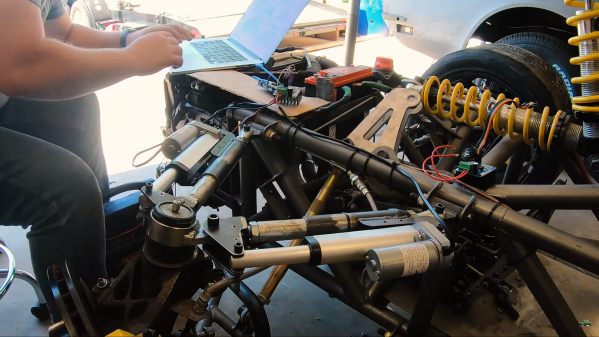
In automotive engineering, almost every design choice is a trade-off, like performance versus fuel economy, straight-line speed versus cornering, or strength versus weight. Inspired by controversial technology for the 2020 Formula 1 season, [Wesley Kagan] is fitting his DIY racing car with actuators to change the suspension geometry while driving.

The controversial technology in question is Mercedes’ DAS (Dual Axis Steering). By pushing the steering wheel in and out, the driver and change the wheel alignment to toe-out (wheels pointing outwards) for better cornering stability, or neutral for the straight sections.

Like many racing cars, [Wesley] used A-arm suspension on his racing car. By replacing the top arms with telescoping tubes with mounted actuators, the geometry can be actively adjusted. For this proof of concept, he used linear actuators but plans to move to a hydraulic system for improved speed and force. The length of the A-arms is sensed with ultrasonic sensors, while a potentiometer senses the suspension position.

Tuning the software for optimum performance will probably require some track testing which we hope to see in the future. This is not the first time [Wesley] has taken inspiration from a multimillion-dollar project and implemented it in his garage. Just check out how he converted a Miata and a Harbor Freight engine to a Free Valve system.

Continue reading “Active Suspension On A DIY Racing Car”

Reverse Engineering Self-Powered Wireless Switches

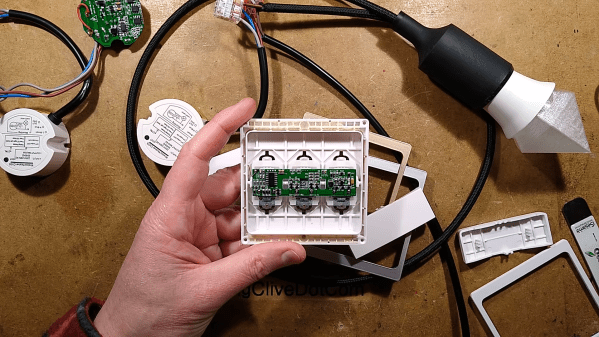
The plethora of wireless communications technologies have cut the comms wire for many applications, but these devices still require power. For home automation, this might mean a battery or mains power, but there is also an alternative that we don’t see often: Kinetic power. [Bigclivecom] bought some kinetic switches from eBay and gave it his usual reverse engineering treatment.

True to the marketing, these switches do not require external power or a battery to send a wireless signal. Instead, it harvests energy from the magnetic latching action of the switch itself. When the switch is actuated, a small current is induced in a coil as the polarity of the magnetic field through its core changes rapidly. Through a series of diodes and resisters, the energy is stored in a capacitor, which is then used to power a small transmitter chip. The antenna coil is wrapped around the switch housing.

The receiver side is powered by mains and includes a relay output for lights. It would be really nice to have a hacker-friendly module for projects. We would be curious to see the range that these devices are capable of.

The same technology is used inside the Philips Hue Tap switch, of which Adafruit did a teardown a few years ago. If you want to learn more about RF modulation, check out the crash course article we put out a while back. Of course, the RTL SDR is an indispensable and affordable tool if you want to do some experimentation.

Continue reading “Reverse Engineering Self-Powered Wireless Switches”

3D Printing 90° Overhangs With Non-Planar Slicing

When slicing a model for 3D printing, the part is divided into a stack of flat, 2D layers. But there’s an alternative in the form of non-planar slicing, where the layers can follow 3D curves. [Rene K. Mueller] took this a step further and successfully used non-planar slicing to print 90° overhangs on a normal Cartesian FDM printer.

Non-planar layers have been around for a while, but were generally limited to creating smooth curves without layer lines. The idea of using the technique for overhangs had been floating around in [Rene]’s head for a while, and he was spurred to action after seeing the rotating tilted nozzle printer featured here on Hackaday. The idea is only to have the outer edge of each layer overhang, by making each layer slope downward toward the overhang. [Rene] programmed a conic slicer algorithm for this purpose, which splits the model into dome-shaped layers, like an onion.

He did a lot of testing and documented the results in detail. Conical slices were compared with tilted slices, which are also used for belt 3D printers. Both have some geometric limitations. Tilted slices can only print the overhang in one direction, but conical slices can do this in all directions, allowing it to create a mushroom-like shape without any support. The limitation is that it can only print inward or outward from a central point. More complex geometry must be segmented, and each sub-volume sliced separately. The slicing angle is also limited by the shape of the print head, to avoid it crashing into the print.

We think this technique has a lot of potential for widespread use, especially since it is compatible with most existing FDM printers. It is still a work in progress, but support has already been added for Slic3r and Prusa Slicer. We look forward to seeing how it develops and gets adopted.

This Dual Extrusion System Rocks

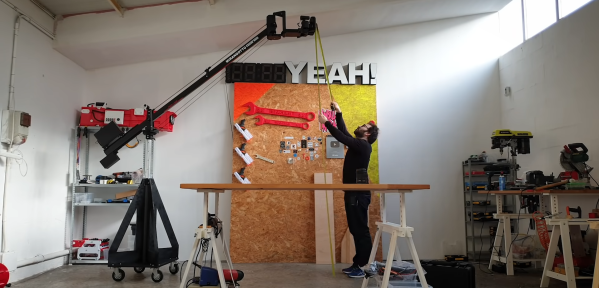
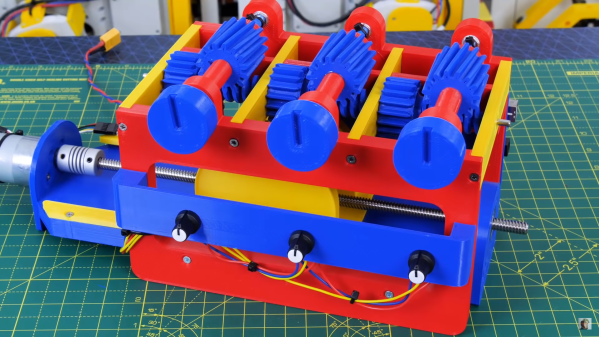
Dual extrusion systems for 3D printers have been around for quite a few years, but the additional cost, complexity, and hassle of printing with them have kept them off the workbenches of most hackers. [Jón Schone] from Proper Printing has now thrown his own hat in the ring, with a custom dual extrusion rocker system that can swap extruders without any additional actuators.

The two extruders are mounted on a spring-loaded rocker mechanism, which holds the inactive extruder up and away from the printing surface. Extruders are swapped by moving the carriage to either end of the x-axis, where the v-wheel rolls a ramp and pops the rocker over, putting the new extruder in the center line of the carriage. There are 3 wheels at the top of the carriage, but only two are in contact with the rail at any time. While this system is more complex than simply mounting two extruders side-by-side, it reduces the chances of the inactive nozzle oozing onto the parts or scraping across the surface. The height of each extruder can be adjusted with a screw,  and any horizontal offset between the nozzles is checked with a calibration procedure and corrected in the firmware. See the full video after the break.

[Jón] is offering the design files and modified firmware to perform this mod on your own Ender 3 Pro (though he notes other Creality printers should be compatible), but you’ll still need to source a control board with the additional stepper driver and heater output for the second extruder. This is yet another in a long list of hacks he’s performed on this popular entry-level printer, such as a modification that allows you to fold the machine up and take it on the go.

Continue reading “This Dual Extrusion System Rocks”

Cycling Cadence Display With ESP32

Terry Pratchett once said “Wisdom comes from experience. Experience is often a result of lack of wisdom.” This is as true with technical skills as it is with the rest of life, and you won’t truly understand a specific topic unless you’ve struggled with it a bit. [publidave] wanted a simple wireless display for a bluetooth cycling cadence sensor, and soon found himself deep down the rabbit hole of Micropython and Bluetooth Low Energy on the ESP32.

[publidave] had converted his bicycle for indoor training during lockdown and winter, and realized he can’t use the guided training app and view his cadence simultaneously, so he needed a dedicated cadence display. Since [publidave] was comfortable with Python, he decided to give Micropython on the ESP32 ago. Bluetooth Low Energy can be rather confusing if you haven’t implemented it before, especially if good examples are hard to come by. In short, the ESP32 needs to find the sensor, connect to it, select the right service, and listen for the notifications containing the data. The data is then converted to RPM and displayed on a small OLED display. [publidave] does an excellent job of describing what exactly he did, highlighting the problems he encountered, and how he solved them.

In the end, he had a functional display, a good idea of what he would do differently next time, and a lot of additional knowledge and understanding. In our book that’s a successful project.

Since so much of the health related devices work with Bluetooth Low Energy, it could be handy to know the technology and how to interface with it. It would allow you to do things like unbrick a $2000 exercise bike,

Lowering The Electricity Bill By Mining Cryptocurrency

Wherever you are in the world, the chances are that a large portion of your utility bill is for heating. This was certainly the case for [Christian Haschek], who realized he can use a cryptocurrency mining rig to offset some of his heating costs.

[Christian]’s central ventilation and water heating is handled by a heat pump, which uses a lot of electricity, especially in the Austrian winter. When it draws in cool air, it first needs to heat it to the thermostat temperature before venting it to the house. Cryptocurrency mining rigs are also heavy electricity users, but they also produce a lot of heat, which can be used to preheat the air going to the heat pump. [Christian] had four older AMD R9 390 GPUs (equivalent to the Nvidia GeForce GTX 970) lying around, so he mounted them in a server case and piped the heat pump’s air intake through the case.

At the time he did the tests, earnings from mining were enough to cover half of his heating bill, even after paying for the mining rig’s electricity. That is not taking into account the electricity savings from the preheated air. He only shows the results of one evening, where it dropped his electricity usage from around 500Wh to below 250Wh. We would like to see the long-term results, and it would be an interesting challenge to build a model to calculate the true costs or savings, taking into account all the factors. For instance, it could be possible to save costs even if the mining rig itself is running at a slight loss.

Of course, this is not a new idea. A quick internet search yields several similar projects and even some commercial crypto mining space heaters. We do like the fact that [Christian] reused some hardware he already had and integrated it into his central heating rather than using it as a mobile unit.

When [Christian] isn’t building crypto heaters, he can be found flooding phishing scams with fake data, or tracking down corporate spies.