Lego Wheels And Tracks Benchmarked For Your Pleasure

For many people, Lego is their first entry into the world of engineering. With the Technic line of building blocks complete with all manner of gears and shafts and wheels, there’s a ton of fun to be had while learning about the basic principles of mechanical things. The [Brick Experiment Channel] takes Lego quite seriously in this context, and has collected data concerning the performance of a variety of Lego wheels and tracks.

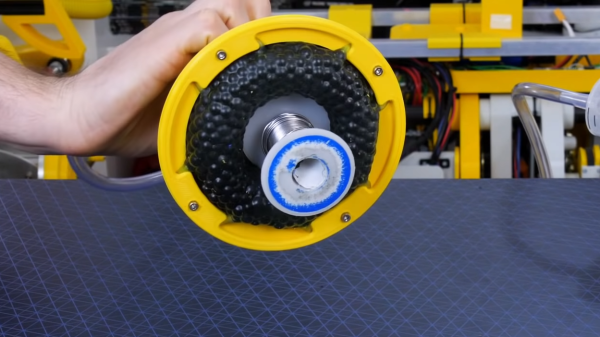
The testing setup is simple. A small vehicle is fitted with a particular set of Lego wheels or tracks. Then, it’s placed on an inclined wooden board. The angle of inclination is then increased until the vehicle neither climbs the board nor slips down it. This angle can then be used to calculate the coefficient of friction of the given tyre or track set. [Brick Experiment Channel] filmed this testing and collected data on 33 different wheel and track combinations, publishing it in the description of the Youtube video.

Interestingly, the date of release of the various parts is recorded with the data. This is interesting as one would expect older rubber parts to lose grip with age, however, the release date of the parts obviously does not correspond with the manufacturing date, so the utility of this is somewhat unclear. There’s also some surprising results, with what appear to be soft, flat and smooth rubber wheels performing somewhat worse than those with curved profiles that you’d expect to have less contact patch. Regardless, it’s the best data we’ve ever seen in this field and we think it’s great that it was collected and shared with the broader Lego community. We look forward to seeing more of this in future, as it’s obviously something of great use to builders. We can imagine it would have proved handy when [Brick Experiment Channel] built their obstacle climbing rover. Video after the break.

Continue reading “Lego Wheels And Tracks Benchmarked For Your Pleasure”

AVR Bare Metal With Lisp

There are two kinds of programmers: those who don’t use Lisp, and those who need new parenthesis keycaps every six months. Lisp is one of those languages you either really love or really hate. If you love it, you may have checked out ulisp, which runs on Arduino boards of the AVR and ARM variety, as well as ESP chips, RISC-V, and others. A recent update allows the language to insert assembler into AVR programs.

We probably don’t need to convince anyone reading Hackaday why adding assembler is a good thing. It seems to integrate well with the environment, too, so you can write assembler macros in Lisp, which opens up many possibilities.

Continue reading “AVR Bare Metal With Lisp”

Prioritising Mechanical Multiplexer

When automating almost any moderately complex mechanical task, the actuators and drive electronics can get expensive quickly. Rather than using an actuator for every motion, mechanical multiplexing might be an option. [James Bruton] has considered using it in some of his many robotics projects, so he built a prioritizing mechanical multiplexer to demonstrate the concept.

The basic idea is to have a single actuator and dynamically switch between different outputs. For his demonstration, [James] used a motor mounted on a moving platform actuated by a lead screw that can engage a number of different output gears. Each output turns a dial, and the goal is to match the position of the dial to the position of a potentiometer. The “prioritizing” part comes in where a number of outputs need to be adjusted, and the system must choose which to do first. This quickly turns into a task scheduling problem, since there are a number of factors that can be used to determine the priority. See the video after the break to see different algorithms in action.

Instead of moving the actuator, all the outputs can connect to a single main shaft via clutches as required. Possible use cases for mechanical multiplexers include dispensing machines and production line automation. Apparently, the Armatron robotic arm sold by Radioshack in the ’80s used a similar system, controlling all its functions with a single motor.

[James] knows or two about robotics, having built many of them over the last few years. Just take a look at OpenDog and his Start Wars robots. Continue reading “Prioritising Mechanical Multiplexer”

Robotic Gripper From A Squishy Ball

Soft robotic grippers have some interesting use cases, but the industrial options are not cheap. [James Bruton] was fascinated by the $4000 “bean bag” gripper from Empire Robotics, so he decided to build his own.

The gripper is just a flexible rubber membrane filled with small beads. When it is pushed over a object and the air is sucked out, it holds all the beads together, molded to the shape of the object. For his version [James] used a soft rubber ball filled with BBs. To create a vacuum, he connected a large 200cc syringe to the ball via a hose, and actuated it with a high torque servo.

It worked well for small, light objects but failed on heavier, smooth objects with no edges to grip onto. This could possibly be improved if the size and weight of the beads/BBs are reduced.

For some more soft robotics, check out this soft 3D printed hand, and the flexible electrically driven actuators. Continue reading “Robotic Gripper From A Squishy Ball”

Synth Gains Plug And Play Analog MUX

High school computer engineering teacher [Andy Birch] kept losing track of I/O pins on his home-built synth, so he made a custom plug and play addressable MUX system to solve the problem. [Andy]’s synth is based on the Teensy microcontroller, and he was already using CMOS analog 8:1 multiplexer chips (CD4051) to give him more I/O pins. But I/O pin expansion means that now there are more I/O pins to forget. Did I hook up that pitch potentiometer on U3 pin 13 or was it U10 pin 2?

He proceeds to design an addressing system for each I/O card using three bits (expandable to four) supporting eight cards, with a maximum of 16 possible in the future. Since each card may not use all eight signals, each card can tell the Teensy how many signals it has. [Andy] does his address decoding on each card using OR and XOR gates. We would have considered using a single 74HC85 four-bit magnitude comparator instead. That would require only one chip instead of two, but would deprive his students of the opportunity to learn gate level address decoding.

When seeing the term “I/O card”, you may be fooled like we were into thinking this was using PCBs and some kind of motherboard. [Andy]’s I/O cards are actually solderless breadboards mounted on the back of the synth control panel. We really like his bus technique — he removes the power strip sections from several breadboards and repurposes them as address and data buses. Check out the thorough documentation that [Andy] has prepared, and let us know if you have ever designed your own plug and play method for a project in the comments below.

[Ed Note: We love us some muxes!]

I/O Cards — Note the use of Power Strip Bars as Data / Address Buses


Linux Fu: Mixing Bash And Python

Although bash scripts are regularly maligned, they do have a certain simplicity and ease of creation that makes them hard to resist. But sometimes you really need to do some heavy lifting in another language. I’ll talk about Python, but actually, you can use many different languages with this technique, although you might need a little adaptation, depending on your language of choice.

Of course, you don’t have to do anything special to call another program from a bash script. After all, that’s what it’s mainly used for: calling other programs. However, it isn’t very handy to have your script spread out over multiple files. They can get out of sync and if you want to send it to someone or another machine, you have to remember what to get. It is nicer to have everything in one file.

Continue reading “Linux Fu: Mixing Bash And Python”

New Contest: Reinvented Retro

There are so many ways to make things look awesome by pulling inspiration from great retro hardware. And combining today’s futuristic functionality with yesterday’s lines, colors, and kitsch is the quick path to a winning combination. So why not give it a try and show us what you got? That’s the gist of Hackaday’s Reinvented Retro Contest which begins right now and runs through June.

The is a very cool Roku

This smart TV should help get you thinking in a retro-modern way. You’d never know it wasn’t stock… except when it starts streaming The Falcon and the Winter Soldier via the Roku hidden inside. Fit and finish on this one is spectacular and that woodgrain remote is a piece of artwork!

So what will it be? Keurig in a 1960’s Perculator? Desk lamp in a rotary telephone? GHz oscilloscope where a CRT used to live? Perhaps a Raspberry Pi laptop in a 1990’s form-factor? You get to decide what “Retro” means, just make sure you thoroughly show off the build!

Digi-Key is sponsoring this contest and there are $200 shopping sprees from their warehouse up for grabs for each of three top winners. Make a project page over on Hackaday.io and use the “Submit project to…” dropdown in the left side bar to enter it in the Reinventing Retro Contest.