Milk-Based 3D Scanner

3D scanners don’t have to be expensive or high-tech because all of the magic goes on in software. The hardware setup just needs to gather a bunch of cross-sections. In perhaps the lowest-tech of scanners that we’ve seen, [yenfre]’s GotMesh scanner uses milk.

Specifically, the apparatus is a pair of boxes, one with a hole drilled in it. You put the object in the top box and fill it with milk to cover the object. A camera takes pictures of the outline of the object in the milk as it drains out the hole, these get stitched together, and voilĂ .

There are limitations to this method. The object gets soaked in milk, so it won’t work for scanning sand-castles. (It’s optimally suited for chocolate-chip cookies, in our opinion.) If the camera is located directly above, the objects have to get wider as the milk drains out. You can do multiple takes with the object rotated at different angles or use multiple cameras to solve this problem. The edge-detection software will have issues with white objects in milk, so maybe you’ll want to scan that porcelain figurine in coffee, but you get the idea. More seriously, the rate of milk drain will slow down a bit as the amount of milk in the upper box decreases. This could also be handled in software.

In all, we’re not surprised that we don’t see commercial versions of this device, but we love the idea. It’s based on this experiment where they dip a guy in a tank of ink! If you just drank all your milk, but still have a line-laser lying around, maybe this build is more your speed. What’s your cheapest 3D scanner solution?

One SMT Breakout To Rule Them All

You need to use surface-mount technology (SMT) parts in your design. But you also need to prototype. How to fit those little buggers into your breadboard?

[Simon] came up with a general-purpose SMT-to-breadboard solution. Now, there are already myriad adapter boards for the many-pin devices: SSOP-to-DIP adapters and so on. But what do you do when you just need to work that tiny SOT223 voltage regulator into a breadboarded circuit?

[Simon]’s solution fills that gap with one breadboardable design to handle all of your small-pin-count part needs. It accommodates SOT223, SOT323, and SOT23 three-pin parts like transistors or voltage regulators, and also has pads for all of the common two-terminal parts like resistors and capacitors from 0402 on up to 1206. You could build up a full voltage regulator circuit on one of these things. He’s even included some whitespace on the back for your notes.

SMT parts aren’t even the future any more. And with the right procedure, they’re not hard to hand-assemble. So the next time you have some extra space in a PCB order, toss in a couple of [Simon]’s breakouts and you’ll be ready for your next breadboarding session.

Bela: Real-Time BeagleBone Audio/Analog Cape

Bela is a cape for the BeagleBone Black that’s aimed at artists and musicians. Actually, the cape is much less than half of the story — the rest is in some clever software and a real-time Linux distribution. But we’re getting ahead of ourselves. Let’s talk hardware first.

First off, the cape has stereo input and output as well as two amplified speaker outs. It can do all of your audio stuff. It also has two banks of analogue inputs and outputs, each capable of handling eight signals. In our opinion, this is where the Bela is cool. In particular, the analog outputs are not Arduino-style “analog outputs” where it’s actually a digital output on which you can do PWM to fake an analog signal. These are eight 16-bit outputs from an AD5668 DAC which means that you can use the voltages directly, without filtering.

Then there’s the real trick. All of these input and output peripherals are hooked up to the BeagleBone’s Programmable Realtime Units (PRUs) — a hardware subsystem that’s independent of the CPU but can work along with it. The PRU is interfaced with the real-time Linux core to give you sub-microsecond response in your application. This is a big deal because a lot of other audio-processing systems have latencies that get into the tens of milliseconds or worse, where it starts to be perceptible as a slight lag by humans.

The downside of this custom analog and audio I/O is that it’s not yet supported by kernel drivers, and you’ll need to use their “Heavy Audio Tools” which compiles Pd programs into C code, which can then drive the PRUs. Of course, you can write directly for the PRUs yourself as well. If you just want to play MP3s, get something you have a bunch of simpler, better options. If you need to do responsive real-time audio installations, Bela is a way to go.

The project is open-source, but we had to do a bunch of digging to find what we were looking for. The hardware is in zip files here, and you’ll find the software here. The demo projects look/sound pretty cool and their Kickstarter is long over-funded, so we’re interested to see what folks make with these.

Stealing 3D Prints By Sound

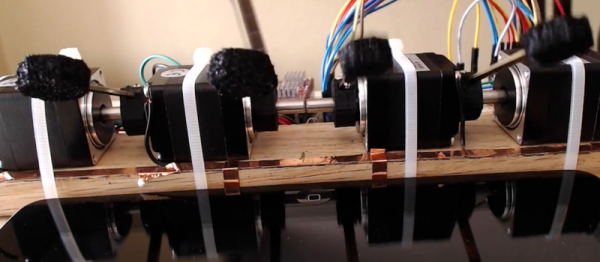
In the open hardware world, we like to share 3D design files so that our friends and (global) neighbors can use and improve them. But we’ve all printed things from time to time that we’d like to keep secret. At least this is the premise behind this article in Science which proposes a novel method of 3D-printer-based industrial espionage: by recording the sound of the stepper motors and re-creating the toolpath.

Unfortunately, the article is behind a paywall so we’re short on the details, but everyone who’s played the Imperial March on their steppers has probably got the basic outline in their mind. Detecting the audio peak corresponding to a step pulse should be fairly easy. Disentangling the motions of two axes would be a bit harder, but presumably can be done based on different room-acoustic filtering of the two motors. Direction is the biggest question mark for us, but a stepper probably has a slightly audible glitch when reversing. Keeping track of these reversals could do the trick.

What do you think? Anyone know how they did it? Does someone with access to the full article want to write us up a summary in the comments?

[Thanks LVfire via Ars Technica]

[Edit: We were sent a copy of the full article (thanks [PersonUnknown]!) and it doesn’t explain any technical details at all. Save yourself the effort, and have fun speculating, because reading the article won’t help.]

Dump Your (Old) Computer’s ROM Using Audacity

If you’ve got an old calculator, Commodore 64, or any other device that used a tape recorder to store and retrieve data, you’ve probably also got a bunch of cassettes lying around, right? Well, you can get rid of them now (or sell them to nostalgic collectors for outrageous prices) because you can just as easily dump them to Audacity, decode them and archive them on a more sane medium.

In [Kai]’s case, the computer was a Sharp Pocket Computer system, and in his post there’s a lot of detail that’s specific to that particular system. If that’s applicable to you, go read up. In particular, you’ll be glad to find that the Pocket-Tools is a software suite that will encode and decode files between the Sharp binary formats and audio. Along the way, we found similar tools for Casio pocket computers too.

For a more general-purpose approach, like if you’re trying to dump and load data from a more standard computer that uses 1200/2400 Hz FSK encoding, this Python library may be useful, or you can implement the Goerzel algorithm yourself on your platform of choice. If you’ve got a particular binary format in mind, though, you’ll have to do the grunt work yourself.

Anyone out there still using these audio data encodings? We know that ham radio’s APRS system runs on two tones. What else? Why and when would you ever transfer data this way these days?

via the Adafruit blog!

Audio Out Over UART

There’s a reason that the bog-standard serial port will never die. It’s just so robust and simple. When you need a console that will absolutely work with minimal software and hardware, UART is the way to go. Because of this, UART hacks abound. Here’s a new one to us, and a challenge to our readers.

[Tiziano Bacocco] decided to use UART signals as a type of PWM to create audio. That’s right, he’s plugging the serial TX line straight into a speaker. This gives you eight possible PWM output voltage levels. The trick is using some Python code (using the awesome pyserial module) to down-quantize the audio data to fit these eight possible values and then push them out at the correct sampling rate. ffmpeg is used to pre-process the files.

Continue reading “Audio Out Over UART”

“World’s Brightest” Flashlight

With the crazy extremes of light flux density that are possible these days, we’re putting quotation marks around “world’s brightest”, but it’s abundantly clear that this flashlight build is very much too bright. No, really. Why would you want a flashlight so bright that you have to wear sunglasses to look at anything that’s within a twenty foot radius?

Because you can. [Mads Nielsen] combined 18, one hundred Watt LED units with some giant machined heatsinks, fans to cool those heatsinks, lenses, and other hardware to make a device that turns electrons into photons at an alarming rate. Each chip-on-board LED package requires 32 Volts, and they’re pairwise in series so it’s a 64 V system. A boot converter pushes up the twelve LiPo battery packs up to the required voltage.

Even with the relatively high voltage, this thing sucks in 27 A, so the power supply is distributed among four of these boost converters. All of this means thick cables and a rather hefty power switch. When you’re designing something ridiculous, all of these little details come out of the woodwork. We’ve included part one of the four-part build video here, because they’re full of great detail. [Mads] has a lot more interesting LED-related info on his YouTube channel. You can watch the showing-off video on your own time.

Continue reading ““World’s Brightest” Flashlight”