This project is so pretty in its own right, it doesn’t need a case!
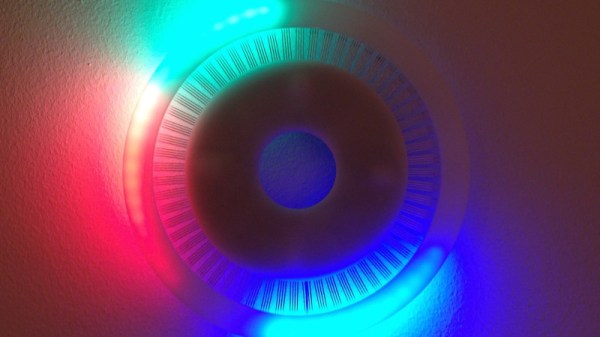
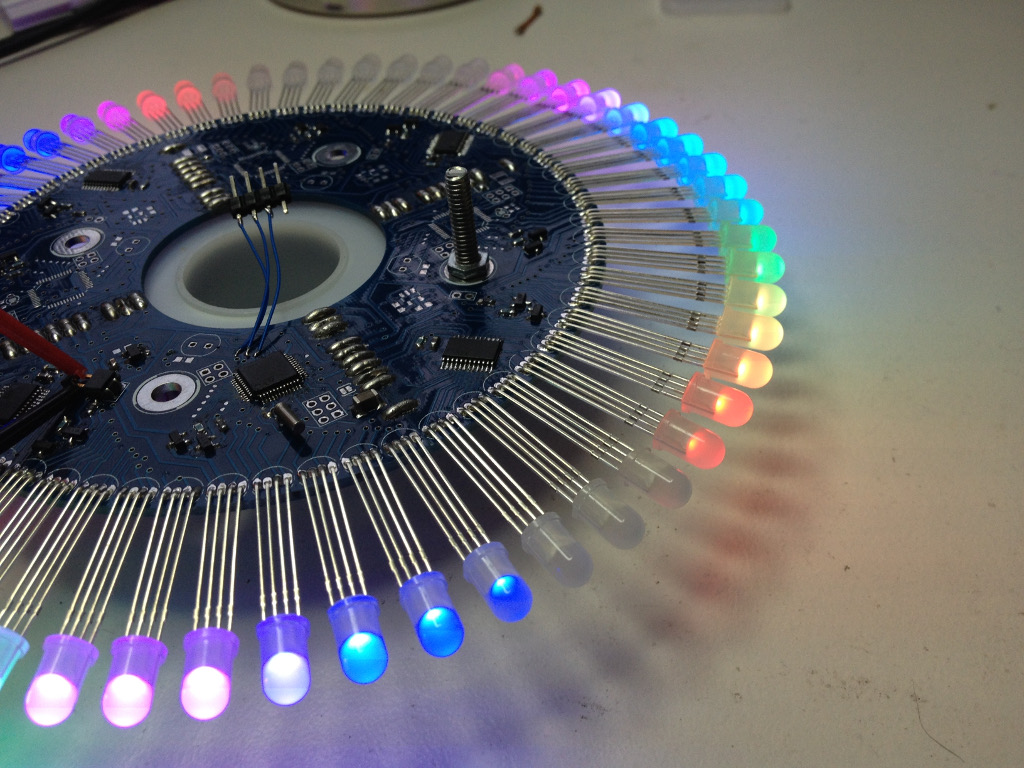
Clocks are a recurring feature among the projects we feature here on Hackaday, with several common themes emerging among them. We see traditional clocks with hands, digital clocks with all forms of display including the ubiquitous Nixie tube, and plenty of LED ring clocks. [Matt Evans]’s build is one of the final category, a particularly nice LED ring clock using wire-ended multi-colour LEDs. Other clocks produce an effect that looks good from across the room, but this one is also a work of beauty when examined in close-up.
Behind it all are four interlocking semicircular PCBs, an STM32F051C6T6 ARM Cortex M0 microcontroller which controls the clock, and a brace of driver chips. The different “hands” of the clock are expressed as different LED colours, and there is a variety of different colour and clock “hand” effects. An acrylic ring completes the effect, by covering the LEDs themselves. He’s put together a video of the clock in action, which you can see below the break.
The semiconductor devices were put to the test under different atmospheres in this chamber.
One of the humbling things about writing for Hackaday comes when we encounter our readership and learn the breadth of our community and the huge variety of skills and professions you represent. Among your number are a significant representation among scientists, and as a result we often receive fascinating previews of and insights into their work. Sometimes they deserve a little bit more attention than one of our normal short daily pieces, and such a moment has come our way this week.
We’ve been fortunate enough to have an early look at a paper which makes detailed observations of a hitherto barely characterised property of semiconductor junctions that might have some interest for Hackaday readers in their work. In their paper, [Mellie], [Bacon] et al at Fulchester University in northeast England take a look at incandescent luminescence, a fleeting and curious effect exhibited by all semiconductor junctions in which they emit short-duration high-intensity infra-red and visible light with an extremely fast rise time when presented with high levels of current. This is a property which has been rarely exploited in commercial devices due to the large current densities required to reproduce it.
Incandescent Luminescence Explained
If you’ve never heard of incandescent luminescence before then you’re in good company, for neither had we until it was explained to us. It appears that there are a set of higher energy state conductivity bands in a semiconductor junction that can only be reached once the current passing through it breaches a threshold governed by the available quantum plasma dipole moment of the semiconductor material in question. At this point the junction assumes a plasma condition resulting in the abrupt emission of infra-red and visible radiation, the incandescent luminescence phase has been triggered.
A near-infra-red spectrum of incandescent luminescence in a silicon semiconductor junction.
Though it has been known to science since first being observed in the early 20th century by the earliest experimenters in the field of semiconductor junctions, the transitory nature of the phenomenon has traditionally been a barrier to its proper examination. The British team took a selection of commercial semiconductor devices very similar to the types that might be used by Hackaday readers, placed them in a chamber, and used an array of photoelectric sensors coupled with ionising detectors using americium-241 alpha radiation sources to measure their emissions.
The resulting data was then harvested for processing through a stack of custom high-speed ADC cards. Current densities from as low as a few milliamps to hundreds of amps were tested across forward-biased PN diode junctions using a computer-controlled DC power supply, resulting in a variety of spectra and showing the resulting thermionic photon emission at higher currents to have a preponderance in the infra-red region.
Incandescent luminescence in action, through an infra-red pyrometer.
A series of experiments were conducted to investigate a related effect first described by those early scientists in the field: that the atmosphere in which the semiconductor junction sits has a significant effect on the way it exhibits incandescent luminescence. Bathing it in gaseous CO₂ or nitrogen was found to reduce the phenomenon by as much as 95%, while immersing it in liquid nitrogen resulted in it becoming completely unobservable. Oxygen-rich atmospheres by comparison served to enhance the luminescence observed, to the point that in one of pure oxygen it reached an efficiency level of 100%.
The high conversion efficiencies and rapid onset of incandescent luminescence once it has been triggered compares favourably to those of existing devices such as LEDs or wire-wound resistors used where either infra-red or visible light is required. The researchers expect the effect to be exploited in such product families as photographic flash generators, electronic igniters, and other short-duration high-intensity applications. Given their obvious advantages, we’d expect their effects on those particular markets to be nothing short of incendiary.
Thanks Ellie D. Martin-Eberhardt for some invaluable inspiration and technical help with covering this story.
One of the things that every student of digital electronics learns, is that every single logic function can be made from a combination of NAND gates. But nobody is foolhardy enough to give it a try, after all that would require a truly huge number of gates!
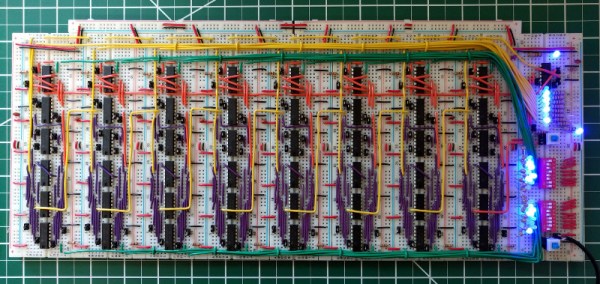
Someone evidently forgot to tell [Notbookies], for he has made a complete 8-bit ALU using only 4011B quad NAND gates on a set of breadboards, and in doing so has created a minor masterpiece with his wiring. It’s inspired by a series of videos from [Ben Eater] describing the construction of a computer with the so-called SAP (Simple As Possible) architecture. The 48 4011B DIP packages sit upon 8 standard breadboards, with an extra one for a set of DIP switches and LEDs, and a set of power busbar breadboards up their sides. He leaves us with the advice borne of bitter experience: “Unless your goal is building a NAND-only computer, pick the best IC for the job“.
We have covered countless processors and processor components manufactured from discrete logic chips over the years, though this makes them no less impressive a feat. The NedoNAND has been a recent example, a modular PCB-based design. TTL and CMOS logic chips made their debut over 50 years ago so you might expect there to be nothing new from that direction, however we expect this to be well of projects that will keep flowing for may years more.
There was a period in the late 1980s when the home computer to own did not come with an Apple logo and was not an IBM, Compaq, or any of the other clones, but instead sported a Commodore logo. The Amiga 500 was an all-in-one console-style cased machine that maybe wasn’t quite the computing powerhouse you might have wished it to be, but gave you enough of the capabilities of the more accomplished 16-bit machines of the day to be an object of desire while also having a games catalogue second to none.
A500s have survived in reasonable numbers, but inevitably working A500s haven’t. Fortunately there are decent emulators, and it was for one of these that [intric8] has produced an extremely well-done installation of a Raspberry Pi 3 in an Amiga case. The intention has been throughout to avoid modification or damage to the Amiga case, and eventually to have all Amiga internal peripherals including the floppy drive in a fully working condition.
The result has a Tynemouth Software USB adaptor for the Amiga keyboard, and a set of nicely designed 3D printed backplates to bring the extended Raspberry Pi ports to the back of the case. The floppy isn’t yet interfaced and there isn’t a socket for the quadrature mouse, but otherwise it’s a very tidy build. He might be interested in one of the several USB to quadrature interfaces we’ve featured over the years.
You might ask why so much effort should be put in for an emulation of an A500, and in a sense you’d be right to do so. The Pi will run the emulator from any case or none. But if you happen to have a spare A500 case, why not give this one a go!
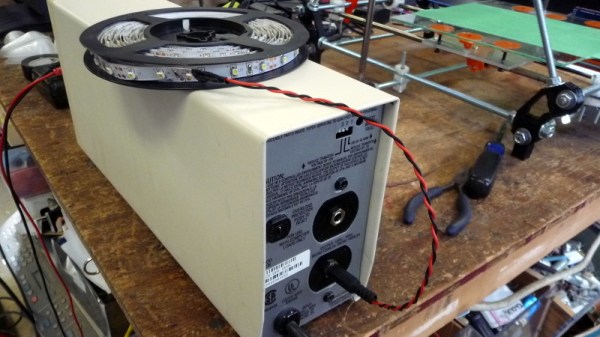
We know your shame. Like you, we wanted to save some scratch and bought the bottom-of-the-range UPS, only to discover that it is no use to man or beast as it lacks the power to perform any reasonable task. It’s now sitting in a corner, to gather dust as its batteries deteriorate.
Not so fast with the UPS abandonment! [rue_mohr] came up with a modification for a small APC UPS that turned it into something a little more useful. Removing the mains inverter from the picture with a few displaced wires and PCB mod, the UPS is now a 12V battery with a mains charger and power outage detection built-in. In this state it’s the perfect power pack for some 12V LED strips used for emergency lighting. There is a handy 3D print that fits the rear socket cut-outs on the US version of the device and provides apertures for a pair of DC power jacks.
This is a relatively simple hack, but we like it for taking the focus away from the obvious part of the UPS, its mains inverter, and turning to the batteries as the main event. It’s a relatively tiny device, but in the past we’ve featured a UPS at the other end of the scale being used for power back-up to a whole house. Meanwhile we’d like to take a leaf from the [BOFH]’s book, and recommend that the most important piece of infrastructure requiring a UPS is the sysadmin’s coffee machine.
Building a robot that can do anything well is a tough challenge. Building one that can stand up to another robot trying to violently put it out of commission is an even harder task. But it makes for some entertaining television! It is this combination that thrust a few creative robot building teams into the world of Robot Wars.
SMIDSY in the pits for series 5 of the UK Robot Wars TV show. From left to right: [Andy Pugh], [Robin Bennett], and [Mik Reed]. RIP [Mik].SMIDSY, short for the insubstantial excuse heard by many a motorcyclist “Sorry Mate, I Didn’t See You”, is a robot that competed in several seasons of the British incarnation of the Robot Wars TV show. It wasn’t the most successful of machines because its weapons were slightly weedy compared to some of the competition, but it was one of the more robust and reliable platforms on the circuit at the time thanks to its combination of simple uncomplicated construction and extremely good design. I had the pleasure of being on the team that built and competed with SMIDSY and carry from it some of the more found memories from that decade.
A few weeks ago I learned that a friend from that period in my life had died following an illness. I hadn’t seen [Mik] for a few years as our lives had drifted apart, but if we were to turn back the clock nearly a couple of decades you would find us and about twenty other fellow members of the Ixion British motorcyclist’s mailing list hard at work building a Robot Wars robot.
The hard work and determination make this a great story. But even more so it’s fun to look back on the state of the art of the time and see some clever workarounds in a time when robot building was just starting to be approachable by the average engineer.
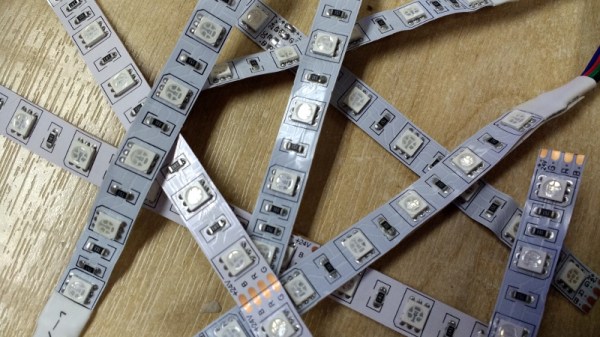
Sometimes there will appear a figure that flies in the face of reason, and challenges everything you think you know about a subject. Just such a moment came from [Chris Taylor] at Milton Keynes Makerspace when he characterised a set of LED strips, and the figure in question was that he found an LED strip creates the same amount of heat as its equivalent incandescent bulb.
We can hear your coffee hitting the monitor and your reaching for the keyboard to place a suitably pithy comment, because yes, that’s a pretty unbelievable statement. But it’s no less true, albeit that the key to it lies in its details. If you have a 100 W incandescent bulb, 88% of the energy is radiated as light and infra-red, leaving 12 W heating the bulb itself. To get the same light output from an LED meanwhile we’d only need 17 W, of which 11.9 W would be left to heat the LED. Which means that an LED strip can get as hot as an incandescent bulb with equivalent light output, and he’s run some tests to prove it.
If you’ve worked with LEDs, you’ll know that they get hot. But to learn that they have the potential to get as hot as their incandescent equivalents is something of a eye-opener, and should demonstrate the need for adequate thermal mitigation. It’s easy to take them for granted, and we’ve taken a look before at some of their safety pitfalls.
Disclosure: [Jenny List] is a member of MK Makerspace.







![SMIDSY in the pits for series 5 of the UK Robot Wars TV show. From left to right: [Andy Pugh], [Robin Bennett], and [Mik Reed]. RIP [Mik].](https://hackaday.com/wp-content/uploads/2018/03/smidsy-teamrw5-hires.jpg)