When the Raspberry Pi first appeared there was some excitement among Raspberry Jam attendees at the prospect of a computer with a video output on a board small enough to be concealed inside a TV. But while the idea is a good one the prospect of poking around among the high voltages of an older CRT model has meant that surprisingly few such ideas turned into reality.
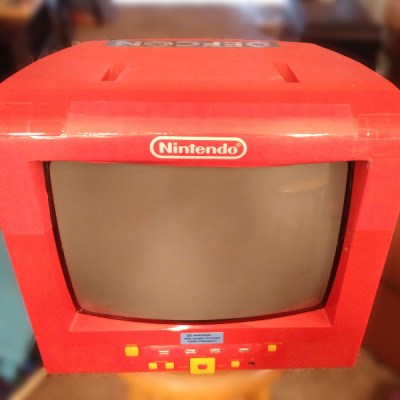
One person who made the idea into a reality was [Jon], who took a [Dora] The Explorer branded CRT/DVD combo in a fetching shade of red and turned it into an all-in-one retro console gaming system with an embedded Raspberry Pi.
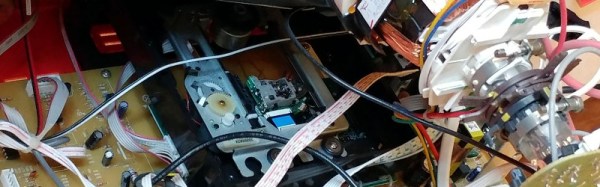
 This is however not merely a Pi stuffed inside the rear casing with a few holes for cables, instead he took away the substantial part of the DVD mechanism and mounted his Pi safely in a plastic box. Some USB extension cables bring all four USB sockets to the front panel through the DVD slot with a bit of Sugru to hold them in place. An HDMI panel-mount extension goes to the TV’s rear connector panel, as does a power switch for the Pi which is wired to a USB charger mounted on a trailing mains socket inside the case. The composite video from the Pi is wired to the TV’s AV in video socket.
We don’t blame [Jon] for not looking at the TV’s power rails to find power for his Pi, though a TV of this recent age would have safely mains-isolated rails that’s still a task fraught with hazards. The resulting unit is a high quality retro console, and as a final touch he’s given it a Nintendo logo and some storage for his gamepads on the rear.
We’ve had a few CRTs with integrated computers before here at Hackaday, but not all have been as they seemed. This Pi for instance sat in a vintage Singer TV, but the CRT was replaced with a modern LCD. Our favourite though it this Chromecast driving a 1978 GE model.