Serial Telemetry To Wi-Fi With An ESP8266

Hackaday.io user [J. M. Hopkins] had a problem with his rocketry. Telemetry from the rockets came down to Earth via a 433MHz serial link, but picking just the bits he needed from a sea of data for later analysis on a laptop screen on bright sunny days was getting a little difficult.

His solution was to bring the serial data from his transceiver module to an ESP8266, and from that both share it over WiFi and display pertinent information via I2C to an LCD for easy reference. And he’s put the whole lot with a power supply in a rather splendid wooden case with an SMA socket on the back to attach his Yagi.

All information received from the telemetry is passed to a client connecting via Telnet over the WiFi, but pertinent information for the LCD is selected by sending it from the rocket enclosed in square brackets. We hope that the source code will be forthcoming in time.

This isn’t the first time we’ve featured rocket telemetry here at Hackaday. And we’d be missing a trick if we didn’t point out that this project is using our own Hackaday-branded Huzzah ESP8266 breakout board from the Hackaday Store.

Rescuing The World’s First Preserved Railway

Preserved railways are now an established part of the tourist itinerary. It doesn’t matter if you call it a railroad, railway, chemin de fer, Eisenbahn or whatever, the chances are that somewhere near you there will be a line rescued from dereliction on which you can spend a Saturday afternoon in vintage rolling stock being hauled by a locomotive long ago withdrawn from regular service. They are established enough to have become an industry in their own right, with the full range of support services to maintain hundred-year-old machinery and even build entire new locomotives.

So we’ve become used to seeing preserved railways in a state of polished perfection. Sometimes a little too perfect, there was a wry observation in a recent BBC documentary on the subject that a typical British preserved railway represents an average day in the 1950s when the Queen was about to visit. Anyone who lived through that era will tell you the reality was a little different, how run down the system was after World War II and just how dirty everything became when exposed to decades of continuous coal smoke.

A particularly worn-out section of railway in those days could be found at Tywyn, on the Welsh coast. A 2’3″ narrow-gauge line built in the 1860s to serve a slate quarry and provide a passenger service to local communities, the Tal-y-Llyn Railway (Welsh pronunciation help) had been in continuous decline for decades and on the death of its owner in 1950 faced closure. With only one of its two locomotives operational and its track in a parlous state it attracted the attention of the author Tom Rolt, already famous for kick-starting the preservation of Britain’s inland waterway system. A preservation society was formed, and in a joint enterprise with the former owner’s estate the line was saved. The world’s first preserved railway had commenced operations.

"Lawnmower" Locomotive in 1952 [Source: talyllyn.co.uk]
“Lawnmower” Locomotive in 1952 [Source: talyllyn.co.uk]
In a country reeling from the economic effects of fighting a world war there was no infrastructure for a group of enthusiasts rescuing a near-derelict railway. Nobody had ever done this before, there was no body of expertise and certainly no handy suppliers to call when parts were required. To rebuild their line the Tal-y-Llyn volunteers had to reach into their own well of initiative gained over the “Make do and Mend” war years and build their own way out of any challenges they encountered. In case you were wondering what the relevance to Hackaday readers has been in the last few paragraphs there’s your answer: what would you do if you were handed seven and a quarter miles of run-down track and a single barely serviceable locomotive that is one of the oldest in the world still running?

We are fortunate that in 1953 an American film maker, Carson “Kit” Davidson, visited the line, and through his affectionate short film we have a portrayal of the railway’s state in the early stages of preservation. When the footage was shot they had secured a second serviceable locomotive courtesy of the nearby and recently closed Corris Railway, but had yet to replace the majority of the worn-out and overgrown track. It’s a treat to watch, and sets the stage very well for the home-made machinery that is to follow.

Continue reading “Rescuing The World’s First Preserved Railway”

Polyhedrone

[Brainsmoke] had a simple plan. Make a quadcopter with lots of addressable LEDs.

Not just a normal quadcopter with ugly festoons of LED tape though. [Brainsmoke] wanted to put his LEDs in a ball. Thus was born the polyhedrone, the idea of a flying deltoidal hexecontahedron covered as you might expect with all those addressable LEDs.

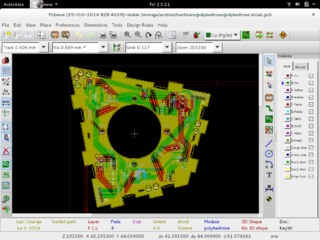
polyhedrone-PCB-kicadA Catalan solid makes a good choice for the homebrew polyhedron builder because its faces are all identical. Thus if you are making PCBs to carry LEDs, for example, you need only create a single PCB design to use on all faces. A bit of work in KiCAD, and a single face design with interlocking edges was ready. The boards were tested, a wiring layout was worked out, and the polyhedron was assembled.

But [Brainsmoke] didn’t stop there. He produced a flight case for the polyhedron, in the form of a larger polyhedron from what looks like lasercut thin ply.

Having a finished polyhedron, the next thing was to hook up a Raspberry Pi and write some software. First in Python, then in Go.

polyhedrone-light-1The results are simply stunning. If the mathematics and construction of a polyhedron were not enough to make this project worth a second look, then the gallery of images should be enough. You’ll notice that this is ostensibly a quadcopter project, yet no mention of flying has been made on this page. That’s because this is still a work in progress at Tech Inc Amsterdam, and there is more to come. But it honestly doesn’t matter if this project never moves a millimeter off the ground, as far as we are concerned [Brainsmoke] has created a superbly built thing of beauty in its own right, and we like that.

As you might expect, this is just the latest of many projects featured here that have involved addressable LEDs or quadcopters. Of note among them is this LED polyhedron that cleverly closes in all its bits, and this LED-equipped quadcopter that generates very pleasing patterns with a hi-res cross of pixels.

Repairing A Sony Dream Machine

Have you ever fancied a gadget but been put off by what seems like an excessive price? [leadacid44] did just that back in 2009, in his case the gadget in question was a Sony Dream Machine ICF-CL75iP. It’s an alarm clock radio, albeit a very fancy one featuring an iPod dock, SD card slot, and an electronic photo frame. Back then it was just too expensive, but in 2016 [leadacid44] spotted one on an auction site for pennies, and so snapped it up.

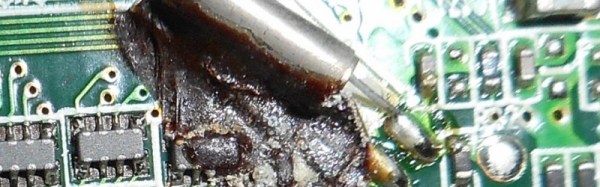
Of course, with something cheap there is so often a catch. In the case of this Dream Machine, it would not keep time — something pretty important in a clock. But rather than throw it on the “Hack later” pile, [leadacid44] decided to investigate, and turned up a surprising culprit. The glue Sony had used to secure the timing crystal in 2009 had become conductive with age, causing the oscillator to stop oscillating. A simple fix involving a bit of glue removal and a touch of resoldering, and the clock was back with us.

This was a very simple repair when the problem was diagnosed, but it tells us something about electronic product design, and about quality control. Sony have spent a very long time building a reputation for quality manufacture, and it is likely the Dream Machine was built with their full attention to detail. It is highly unlikely that the Sony engineers chose their crystal glue in the knowledge it would break down, after all the company is likely to make far more money selling a new TV or phone to a satisfied alarm clock owner than it is by selling them a new alarm clock. Instead it tells us that even Sony with a legendary attention to quality control can be caught out by unexpected component failures, and that as engineers we should always expect the unexpected.

So [leadacid44] has a new alarm clock, and presumably now always wakes up on time. It’s interesting to look at the Dream Machine from another perspective, to compare what was hot in 2009 with what you might see now. The Apple Dock connector for instance, or the full-size SD card. Both of which are now becoming historical curiosities, even though this device is not much more than six years old.

Over the years we’ve featured a lot of clocks, and even the odd clock radio. But this isn’t really about clock radios, and with that out of the way we’ve certainly featured a few Sony hacks.

Odroid C2 Bests Raspberry Pi 3 In Several Ways

It’s been a big week in the world of inexpensive single board computers, and everyone’s talking about the new Raspberry Pi 3. It blows away the competition they say, nobody can touch it for the price.

Almost nobody, that is.

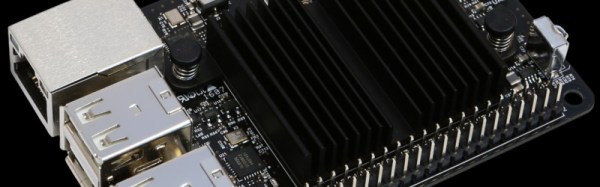
With a lot less fanfare on these shores, another cheap and speedy 64-bit quad-core ARM-based SBC slips onto the market this week, Hardkernel’s Odroid C2. And looking at the specification it seems as though the Pi 3 may be given a run for its money. Like the BCM2837 in the Pi 3 its Amlogic S905 SoC is a quad-core ARM Cortex-A53, but the C2’s 2GHz clock speed gives the raspberry to the 1.2GHz of the Pi 3. There is twice the RAM of the Pi 3 at 2Gbytes, and the onboard Mali-450 GPU can deliver 4K video.

Unlike the Pi 3 there is no wireless or Bluetooth on board, but the C2 has a Gigabit Ethernet port which is wired directly into the SoC. Compared to the Pi 3’s 100 megabit port which suffers through being on a USB interface, that’s likely to be very quick.

Storage can be a choice of either the usual micro SD card or eMMC. Given that the two boards share a very similar form factor it is no surprise that they have very similar GPIO capabilities, however it is worth noting that the C2 has a built-in analog-to-digital converter. As to operating systems, the C2 can run Ubuntu 16.04, or Android Lollipop.

Of course, we’ve seen so many boards touted as Pi-killers, and like all those also-ran tablets touted as iPad killers a few years ago we’ve never heard of most of them again after a brief moment of chatter. They look so good on paper but the price always lets them down.

The C2 could just escape that fate though, its $40 price point is very close to that of the Pi 3. Setting aside for a moment how much shipping and customs might cost for a package from Korea, that sounds interesting to us.

Why might you buy a C2 then, and why might you buy a Pi 3? That the C2 has a much faster processor is beyond doubt. This and its faster wired networking would make it a much more interesting prospect for anyone whose work involves network-attached data processing. But even though a USB wireless network adaptor can be had for only a few dollars the Pi 3’s onboard wi-fi and Bluetooth makes it much more attractive to a home user or someone using a computer on a platform unfettered by wires.

However impressive the C2 may be it is overwhelmingly likely that the Pi 3 will outsell it many times over. This will not just be due to the massive publicity advantage achieved by the Pi Foundation, but the huge ecosystem of hardware and software developers that have made the Pi boards perform to the limit of their abilities in all directions. If you don’t mind forgoing that support though, you could just find that the board from Korea gives you enough extra bang for your buck to make having it on your bench worthwhile.

We’ve followed the Odroid products from the start here at Hackaday. The C2 is just the latest of a procession of boards from Hardkernel, and we’ve featured a few projects that include them. Theirs is always the name at the top of the list when the subject turns to Raspberry Pi competitors, perhaps with the C2 they’ve got a winner.

Our thanks to [Derrick].

Boldport Tribute To Bob Pease

We have lost something in PCB design over the last few decades. If you open up a piece of electronics from the 1960s you’ll see why. A PCB from that era is a thing of beauty, an organic mass of curving traces, an expression of the engineer’s art hand-crafted in black crêpe paper tape on transparent acetate. Now by comparison a PCB is a functional drawing of precise angles and parallel lines created in a CAD package, and though those of us who made PCBs in both eras welcome the ease of software design wholeheartedly we have to admit; PCBs just ain’t pretty any more.

It doesn’t have to be that way though. Notable among the rebels are Boldport, whose latest board, a tribute to the late linear IC design legend [Bob Pease], slipped out this month. They use their own PCBmodE design software to create beautiful boards as works of art with the flowing lines you’d expect from a PCB created the old-fashioned way.

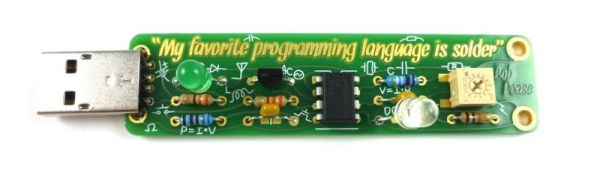
The board itself is an update to an earlier Boldport design, and features Pease’s LM331 voltage to frequency converter IC converting light intensity to frequency and flashing an LED. It’s one of the application circuits from the datasheet with a little extra to drive the LED. Best of all the kit is a piece of open-source hardware, so you can find all its resources on GitHub.

We are fans of Boldport’s work here at Hackaday, and it should come as no surprise that we have featured them before. From one of their other kits through several different pieces of PCB wall art, to their work making an appearance in Marie Claire magazine they have graced these pages several times, and we hope this latest board will be one of many more.

A Wooden Performance Is Fine WIth This Sequencer

You could sometimes be forgiven for thinking that making popular music has become too easy. With a laptop and suitable software almost anybody can now assemble something that had they secured the services of a canny promoter would be in with a shot at stardom. So many performances have been reduced to tightly choreographed dance acts to mask the absence of musicians or indeed musical talent, and our culture is poorer for it. It’s not that music made with modern technology or outside the performance is an indicator of lack of talent, indeed when a truly talented musician makes something with the resources of a modern technology the results are astounding. Instead it perhaps seems as though the technology is cheapened by an association with mediocrity when it should be a tool of greatness.

So it was with pleasure that we noticed a fresh project on Hackaday.io this morning which provides a marriage of accessible music technology and a requirement for performance. [Ernest Warzocha] has made a wooden sequencer.

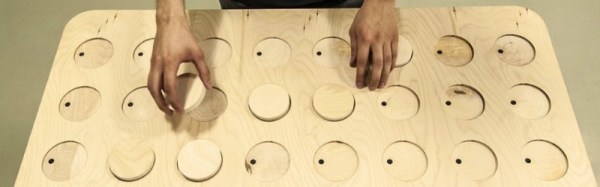
It’s true, audio sequencers are old hat, so a new one will have to work hard to enthuse a seasoned Hackaday reader who’s seen it all. What makes [Ernest’s] sequencer different is that he’s made one with a very physical interface of wooden pucks placed in circular recesses on a wooden surface. Each recess has an infra-red reflective sensor that detects the surface texture of the puck placed in it and varies the sample it plays accordingly. It’s all held together underneath by an Arduino, and MP3 samples are played by a Sparkfun MP3 shield. At a stroke, he has turned the humble sequencer from a workaday studio tool into a performance art form that you can see in the video below, and we like that.

Home made sequencers have a special place in maker culture, and as you might expect over the years we’ve featured quite a few of them. Shift registers, CMOS analogue switches or even turntables as the sequencer elements, Lego as a human interface, a sequencer made from a cash register, and a rather lovely steampunk sequencer, to name but a few. So this one joins a rich tradition, and we look forward to more in the future.

Continue reading “A Wooden Performance Is Fine WIth This Sequencer”