An FPGA-Based Mechanical Keyboard

You can buy all kinds of keyboards these days, from basic big-brand stuff to obscure mechanical delicacies from small-time builders. Or, you can go the maker route, and build your own. That’s precisely what [Lambert Sartory] did with their Clavier build.

This build goes a bit of a different route to many other DIY keyboards out there, in that [Lambert] was keen to build it around an FPGA instead of an off-the-shelf microcontroller. To that end, the entire USB HID stack was implemented in VHDL on a Lattice ECP5 chip. It was a heavy-duty way to go, but it makes the keyboard quite unique compared to those that just rely on existing HID libraries to do the job. This onboard hardware also allowed [Lambert] to include JTAG, SPI, I2C, and UART interfaces right on the keyboard, as well as a USB hub for good measure.

As for the mechanical design, it’s a full-size 105-key ISO keyboard with one bonus key for good measure. That’s the coffee key, which either locks the attached computer when you’re going for a break, or resets the FPGA with a long press just in case it’s necessary. It’s built with Cherry MX compatible switches, has N-key rollover capability, and a mighty 1000 Hz polling rate. If you can exceed that by hand, you’re some sort of superhuman.

The great thing about building your own keyboard is you can put in whatever features you desire. If you’re whipping up your own neat interface devices, don’t hesitate to let us know!

Toy Train Joins The Internet Of Things

[Zoltan] was developing a workshop on Matter for DEF CON, and wanted to whip up a fun IoT project to go with it. His idea was simple—take a simple toy train, and put it on the Internet of Things.

Speed and low cost were the goals here, with a budget of around $40 and a timeline of one week. The train set sourced for the build was a 43 piece set with a locomotive, one carriage, and a simple oval track, retailing for $25. The toy train got a new brain in the form of an ESP32-C3 DevKitM-1, with the goal of commanding the device over Wi-Fi for ease of use. The microcontroller was set up to control the train’s brushed DC motor with an IRL540 MOSFET. A USB battery bank was initially employed to power the rig, which sat neatly on the train’s solitary carriage. This was later swapped out for a CR123A battery, which did the job for the train’s short duration in service.

Code for the project was simple enough. The ESP32 simply listens for commands via Matter protocol, and turns the train on and off as instructed. [Zoltan] demos the simple interoperability of the Matter protocol by switching the train on and off with Google Home voice commands, and it works perfectly well.

Toy trains aren’t something we typically see included in smart homes, but maybe they should be. If you’re cooking up your own oddball IoT hacks, be sure to let us know on the tipsline!

Hard Hat Becomes Bluetooth Direction Finder

Have you ever wanted to find a Bluetooth device out in the wild while looking like the comic relief character from a science-fiction series? You might like Dendrite, the direction-finding hat from [SolidStat3].

Dendrite is intended for hunting down Bluetooth devices. It’s capable of direction estimation based on signal strength readings from four ESP32 microcontrollers mounted on an off-the-shelf hard hat. Each ESP32 searches for BLE devices in the immediate area and reports the apparent signal strength to a fifth ESP32, which collates readings from all units. It then runs a simple multilateration algorithm to estimate the direction of the device. This information is then displayed via a ring of addressable LEDs around the perimeter of the hat. White LEDs marking the direction of the detected device. The only problem? You can’t see the LEDs while you’re wearing the hat. You might need a friend to help you… or you can simply take it off to see what it’s doing.

Ultimately, this project is a useful direction-finding hard hat that would also make a perfect prop from an episode of Inspector Spacetime. We’ve covered direction finding in other contexts before, too. Meanwhile, if you’re cooking up your own innovative hard hat (or radio) hacks, don’t hesitate to let us know!

A Trail Camera Built With Raspberry Pi

You can get all kinds of great wildlife footage if you trek out into the woods with a camera, but it can be tough to stay awake all night. However, this is a task you can readily automate, as [Luke] did with his DIY trail camera.

A Raspberry Pi Zero 2W serves as the heart of the build. It’s compact and runs on very little power, but also provides a good amount more processing power than the original Raspberry Pi Zero. It’s kitted out with the Raspberry Pi AI Camera, which uses the Sony IMX500 Intelligent Vision Sensor — providing a great platform for neural networks doing image classification and similar machine learning tasks. A Witty Pi power management module is used both for its real time clock and to schedule start-ups and shutdowns to best manage the power on offer from the batteries. All these components are wrapped up in a 3D printed housing to keep the Pi safe out in the wild.

We’ve seen some neat projects in this vein before.

Continue reading “A Trail Camera Built With Raspberry Pi”

Creating Python GUIs With GIMP

GUI design can be a tedious job, requiring the use of specialist design tools and finding a suitable library that fits your use case. If you’re looking for a lightweight solution, though, you might consider just using a simple image editor with a nifty Python library that [Manish Kathuria] whipped up.

[Manish’s] intention was to create a better-looking user interface solution for Python apps that was also accessible. He’d previously considered other Python GUI options to be unimpressive, requiring a lot of code and delivering undesirable results. His solution enables the use of just about any graphic you can think of as a UI object, creating all kinds of visually-appealing possibilities. He also was eager to make sure his solution would work with irregular-shaped buttons, sliders, and other controls—a limitation popular libraries like Tkinter never quite got around.

The system simply works by using layered image files to create interactive interfaces, with a minimum of code required to define the parameters and performance of the interface. You’re not strictly limited to using the GIMP image editor, either; some of the examples use MS Paint instead. Files are on Github for those eager to try the library for themselves.

We’ve featured some neat GUI tools before, too, like this library for embedded environments. Video after the break.

Continue reading “Creating Python GUIs With GIMP”

Macintosh System 7 Ported To X86 With LLM Help

You can use large language models for all sorts of things these days, from writing terrible college papers to bungling legal cases. Or, you can employ them to more interesting ends, such as porting Macintosh System 7 to the x86 architecture, like [Kelsi Davis] did.

When Apple created the Macintosh lineup in the 1980s, it based the computer around Motorola’s 68K CPU architecture. These 16-bit/32-bit CPUs were plenty capable for the time, but the platform ultimately didn’t have the same expansive future as Intel’s illustrious x86 architecture that underpinned rival IBM-compatible machines.

[Kelsi Davis] decided to port the Macintosh System 7 OS to run on native x86 hardware, which would be challenging enough with full access to the source code. However, she instead performed this task by analyzing and reverse engineering the System 7 binaries with the aid of Ghidra and a large language model. Soon enough, she had the classic System 7 desktop running on QEMU with a fully-functional Finder and the GUI working as expected. [Kelsi] credits the LLM with helping her achieve this feat in just three days, versus what she would expect to be a multi-year effort if working unassisted.

Files are on GitHub for the curious. We love a good port around these parts; we particularly enjoyed these efforts to recreate Portal on the N64. If you’re doing your own advanced tinkering with Macintosh software from yesteryear, don’t hesitate to let us know.

Smart Home Gets A Custom Keypad Controller

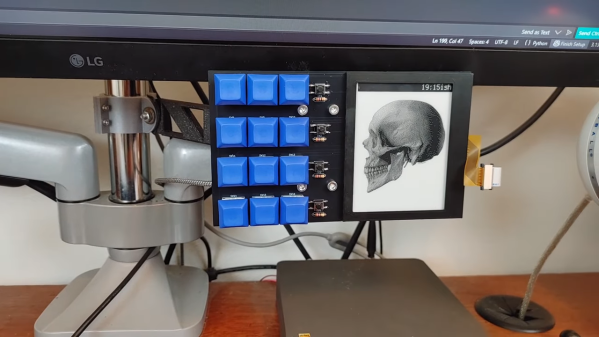
Voice assistants and smartphones are often the go-to interfaces for modern smart home systems. However, if you fancy more direct physical controls, you can go that route as well. To that end, [Salim Benbouziyane] whipped up a nifty keypad to work with his Home Assistant setup.

The build is based on an ESP32 microcontroller, which has wireless hardware onboard to communicate with the rest of [Salim’s] Home Assistant setup. Using the ESPHome firmware framework as a base, the microcontroller is connected to a four-by-three button keypad array, built using nice clicky key switches. There’s also an indicator light on top as a system status indicator. A fingerprint scanner provides an easy way for users to authenticate when disarming the alarm.

Security and speed were the push for [Salim] to whip up this system. He found it difficult to disarm his alarm in a hurry when fumbling with his phone, and the direct keypad entry method was far more desirable.

Sometimes, the easiest route to the smart home of your dreams is to just build the exact solutions you need. Video after the break.

Continue reading “Smart Home Gets A Custom Keypad Controller”