Simple Power Adapter Thumbs Its Nose At Proprietary Connectors

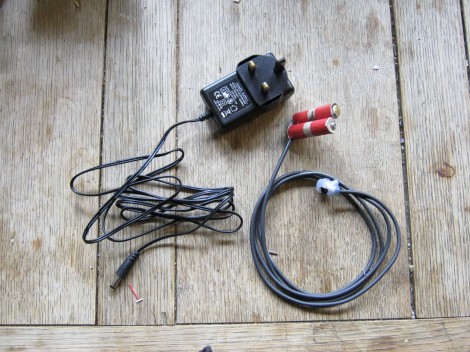
[Mike Worth] wanted to use his camera for some time-lapse photography. Since it’s used to take many pictures over a long period of time, he doesn’t want to deal with batteries running low. But there’s no standard power jack on the side; instead the official charger consists of an adapter that is inserted in place of the batteries. Rather than break the bank with the special cable, [Mike] made his own battery compartment A/C adapter.

You can see that it is made up of two parts. The first is a standard wall wart that outputs the correct voltage and has an acceptable current rating. The other part is the adapter cable that connects to the camera on one end, and has a barrel jack on the other. [Mike] rolled some paperboard around a pencil until it matched the diameter of a AA battery. Once of the cylinders has a thumb tack for the negative lead, and the other uses a screw and washer for the positive side. He soldered some wire to these and he’s in business.

He must be snapping photos frequently enough to avoid the auto-shutoff feature. That or he’s disabled it with the use of some custom firmware.

Bike Alert Tells Drivers To Back Off

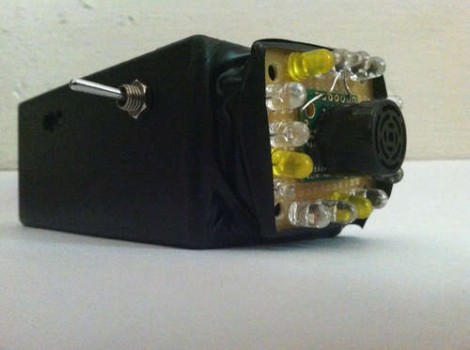
Bicycle commuters are often in a battle with drivers for space on the road. [Hammock Boy] does all of his commuting on two human-powered wheels, and is quite interested in not getting hit by a car. He decided to ply his hobby skills to build a device that helps keep him safe. It’s not just a tail light, it’s a sensor that shines brighter the closer a car is to the back of the bike.

The sensor portion is the ultrasonic range finder seen in the center of the protoboard. Surrounding it is a set of LEDs. Each is individually addressable with the whole package controlled by an Arduino. The sketch measures the distance between the back of the bike and whatever’s behind it. If there’s nothing, one Red led is illuminated. If there is an object, the lights shine brighter, and in different patterns as the distance decreases.

Certainly the next iteration could use a standalone chip without the need for the whole Arduino. This could even work with two battery cells and no voltage regulator. We also think the use of any other color than Red LEDs is suspect but we do love the concept.

Tunes In The Icebox

A couple of years back [Bryan’s] iPod went on the fritz. It wasn’t completely broken, as long as he kept it really cold it still worked. So what was he to do with the crippled device? We’ve all heard of elevator music. [Bryan] decided to invent refrigerator music.

First he needed some speakers. A trip to the Goodwill store netted him a pair for under $5. They need A/C power, and the project depends on sensing when the door to the refrigerator is open. He killed two birds with one stone by adding a light socket outlet adapter. This provides a place to plug in the speakers’ power adapter, and it only gets juice when the door is opened. The gimpy iPod just constantly loops through the tracks stored within, but you’ll only hear it when the door is open and the speakers receive power. Of course the iPod will eventually run its own battery down so [Bryan] ran an extension cord out the side of the door to a wall outlet. This interrupts the door seal and we wish there were another way to keep it contained within.

New STM32 Discovery Board Can Now Be Programmed On Linux

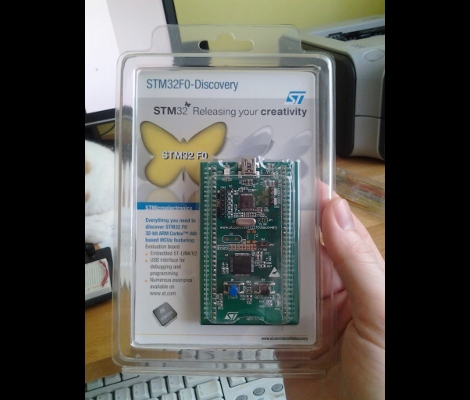
Last Wednesday I posted a video review of the new STM32F0-Discovery board which is built around an ARM Cortex-M0 chip. I speculated that it should work with the open source project aimed at programming these discovery boards. I tested it out and a connection could be made, but no code could be flashed. So I spent a few hours over the weekend and added support.

My updates are already in the stlink repository. After cloning the code, you can use three commands to compile the software (./autogen.sh, ./configure, make). That’s assuming you have all of the necessary dependencies (I had to install libusb-1.0-0-dev) and that you add the udev rule suggested in the documentation (also found in the repository). The program st-util connects to the board and provides a listening port for an ARM debugger (I’m using arm-none-eabi-gdb from CodeSourcery G++ Lite).

When I first started testing, the chip id was reporting as 0. It turns out the register address polled for this information was wrong. After finding that in the almost-900 page reference manual I went through the painstaking process of finding the hex values necessary to properly memory map the device. From there I also updated the blink example to generate an ELF file compatible with the Cortex-M0 chip. So out of the gate you should be able to use an ARM cross compiling toolchain to compile the example, connect to the board with this utility, then use the debugger from the toolchain to connect and flash that example to RAM.

There’s lots more to be done. To fully utilize the chip it is necessary to use a startup file and linker script when compiling. I’ve done nothing in this area, but I hope to work on some tutorials as I get further along. Of course if you have your own successes developing for this board using a Linux machine we want to hear about it!

[Easton’s] Robot Arm Takes 2nd Place In The International Science And Engineering Fair

Here we see [Easton LaChappelle] getting a congratulatory handshake from the robotic arm he built. This project is aimed at human prosthetics, and we’re happy to report that [Easton] won second place in Electrical and Mechanical engineering division of this year’s International Science and Engineering Fair (PDF listing the winners).

In the video he gives us a great look of the state of the project. Since we checked in with him last he’s added a body for the arm to mount to. The arm now has shoulder movement, which uses geared DC motors along with some potentiometers for orientation feedback. For the elbow he wanted to have the same setup but ran into trouble mounting the potentiometer. His solution was to use some shapelock to mold a bracket (shapelock is the plastic you melt in water to form any shape). In addition to the aforementioned joints, the wrist, fingers, and hand have all seen improvements in how they are supported and in their performance.

We think this is amazing work for anyone, especially a 16-year-old High School student. Great job [Easton]!

Continue reading “[Easton’s] Robot Arm Takes 2nd Place In The International Science And Engineering Fair”

Shoulder Robot For The Forever Alone

Don’t have anyone to share activities with? Forget Siri, she’s just a disembodied voice in a box. You need to get yourself a shoulder-mounted robot pal.

The idea behind this design actually has something to do with telepresence. Let’s say you and your best friend want to go check out the local Hackerspace. The problem is that you met your best friend on the Internet and they live thousands of miles away. Well just strap on your shoulder robot and have your friend log on. There’s a camera to give him or her feedback, and twenty degrees of freedom lets them control the torso, arms, and head of the bot in a realistic and creepy way. This works much like a marionette, with motors pulling wires to actuate the robot’s movements. You can get a very brief look at this in the clip after the break.

Continue reading “Shoulder Robot For The Forever Alone”

Building A Quiz-show Style Buzzer System

Theses are the team buzzer boxes which [Philippe Chrétien] built for his mother. She’s a big fan of quiz shows (we’re thinking Jeopardy and the like) and he thought she’d enjoy a proper setup for home gaming.

Each unit consists of an arcade button and one LED, both housed in a project box. He uses telephone wire to connect each buzzer to the base unit. We like that idea since we’ve got a lot of old telephone cable lying around and our RJ-45 crimp includes an RJ-11 slot. This is perfect for making our own cables.

The base unit houses an Arduino board which polls the buttons to see which is pressed first. The LED on the appropriate buzzer box is illuminated so the players know who got in first. One special feature of this setup is the ability to choose from 30 different buzzer sounds.

There are several other quiz buzzer projects kicking around Hackaday if you’re interested. One of our favorites is this system which uses plastic bowls as the buttons.

[via Adafruit]