IButton Is Opening Doors At The TkkrLab

Finding alternative ways to unlock doors is a favorite hacker pastime. TkkrLab recently took on the challenge themselves. The hackerspace, which is located in the Netherlands, faced a problem common to communal workshops; how could they manage keyed access for a large number of members? The metal keys for the door are special, and cannot be cheaply duplicated. To further compound the issue, they are not the only tenants in the building so they can’t replace the lock with one that uses less-expensive keys. So they decided to add an electronic solution.

They first looked at a method for electronically opening the door. Often, this comes in the form of an electronic strike, but rather than alter the door jamb, they replaces the latching mechanism. The electronic latch was compatible with the original cylinder, which means the old keys still work in it. You can see the new assembly above. Just to the left of the lock is an iButton reader. We’ve seen this hardware in projects many times before. It’s cheap, and easy to work with. Now TkkrLab issues an iButton to each member, and can keep track of who is coming in door.

ND Sticks It To Traditional Gaming Giants

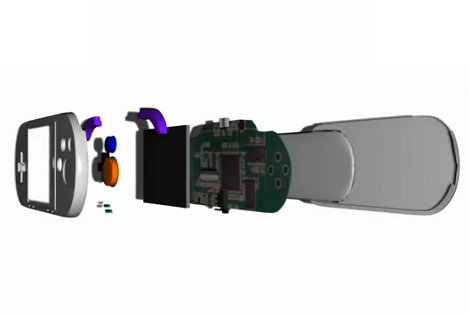
What do you do if you’re a developer that gets shut out of the approval process for closed-shop gaming systems? If you’re [Robert Pelloni] you protest first, then establish your own startup to develop a gaming platform that is open and inexpensive. The hardware seen above is a rendering of the nD, a cheap and open gaming handheld. They plan to sell it at cost ($20) and let anyone develop games.

Check out the video after the break to see the pitch. The hardware is sparse; a plastic case and some buttons, a 320×240 LCD screen, a PCB with a system-on-a-chip, and a rechargeable battery. But if you’re writing great games the spartan hardware doesn’t matter (we still love a good game of Metroid when we have the time). Developers will be able to license games for sale in the nD online market. They’ll keep 90% while nD takes it’s 10%. Not a bad deal.

If you haven’t heard about [Bob] protesting Nintendo, give this article a gander.

Continue reading “ND Sticks It To Traditional Gaming Giants”

IOIO Upgrades Get A Bit Easier

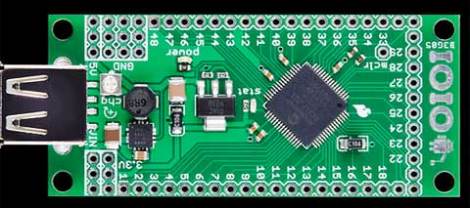
The IOIO, a breakout board for Android phones that predates the Android Developer Kit hardware, is a now a little bit easier to upgrade. That’s because [Ytai’s] IOIO manager app just his the Android market. The PIC24F that sits proudly on top of the board has always been running a bootloader, but for security reasons it is programmed to only talk to apps that have been officially signed. Now that there’s an app that meets this qualification, you can upgrade the firmware from your phone without the need for an external programmer.

What about the bootloader itself? Surely that will need upgrades over time, right? Well, yes. [Ytai’s] announcement today also came with an option for upgrading the bootloader but with one caveat. You’ll need two IOIO boards to complete the upgrade. One connects to the phone and becomes a programmer, while the other lays back and waits for a refreshing code flash.

Character LCD Screen Add-on For Android Devices

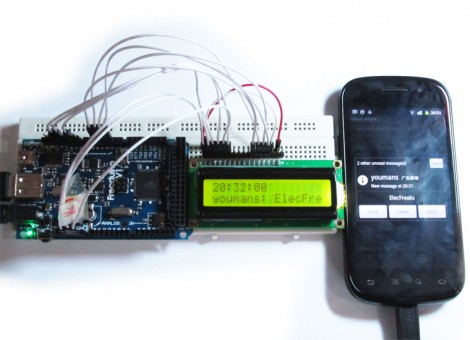
Here’s an Android accessory project that adds a secondary LCD display. It utilizes the Android Open Accessory Development Kit standard to connect the 16×2 character LCD as a USB device. It pairs an app on the phone which runs transparently with firmware for the ATmega2560-based Arduino compatible board you see to the left. The app launches as soon as the auxiliary hardware is connected and is responsible for determining which lines of text are pushed out to the LCD. The example code displays the current time on the top line, and scrolls incoming text messages as they are received.

This is a good way to get your feet wet with the ADK hardware. We’ve already seen it used for larger displays like this LED marquee, but this smaller test project doesn’t require much hardware setup. Chances are you either already have an Arduino and character LCD on hand, or can easily borrow which makes this an easy weekend project.

One note on that Arduino compatible board; it’s called a Freakduino ADK but we couldn’t figure out if it’s a Freak Labs product or not. If you have some insight about that, please leave a comment.

FPGA Generated SPDIF Output

[Mike Field] just finished implementing SPDIF generation on an FPGA. SPDIF is an industry standard for transmitting digital audio signals; the acronym stands for Sony/Philips Digital Interconnect Format. It’s been around for more than a decade and since it’s found on most home-audio equipment, building an SPDIF output into your projects may be quite a desirable feature. [Mike] mentions several ideas for this functionality like building high-end test equipment, or providing a high-quality output for electronic instruments.

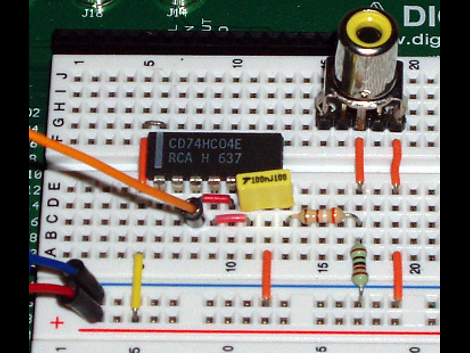
He first jumped into analyzing the specification in order to determine the hardware requirements. Due to some issues with jitter, he found it necessary to use a 100 MHz clock signal. This pushes the jitter down to +/- 5ns of jitter, which he concedes may raise the hackles of audio purists, but does satisfy the published standard. Output requires just one pin of the FPGA and the five components seen above. A hex inverter (74HC04) voltage divider, capacitor, and RCA connector transmit the 0.5V signal to your audio-receiver of choice. Of course, since TOSLINK fiber optic connectors use the same protocol, you could redesign the output and make this an optical connection.

FabLab Helps The Developing World Set Up Long-distance Wireless Ethernet

The wooden frame seen above hosts a parabolic reflector making up one side of a wireless network link. This is a Fab Lab project called FabFi which uses common networking hardware to setup long-distance wireless Ethernet connections. It’s a bit hard to tell in the image above, but the reflector focuses radio waves on the antennae of a router we’re quite familiar with, the Linksys WRT54G. It’s held upside-down in an enclosure meant to protect it from the elements. The node above manages to complete a connection spanning 2.41 miles!

One of the core values of the project is to develop hardware that is easy to build with limited resources, then to make that knowledge freely available. Anyone who has the ability to download and print out the 2D design file can build a reflector for themselves. As we’ve seen in other projects, paper stencils and hand tools can handle this job with no need for a laser-cutter (which was used for the prototype). WRT54G routers are inexpensive and the project uses the open source firmware OpenWRT. They can be run from 12VDC power which means a car battery works when mains power is not an option. The system has been running in Afghanistan for two years and hardware failure is still in the low single-digits.

[Thanks das_coach]

One-click Unbrick For Samsung Phones

[Adam Outler] has been pretty heavy into mobile device hacking lately. The biggest problem with that field is recovering from back flashes or development firmware glitches. In many cases you can use a JTAG programmer to reflash stock firmware to resurrect a handset. Unfortunately you’ll be hard pressed to find a phone that comes with a JTAG header, and soldering to the microelectronic boards is not for the faint of heart.

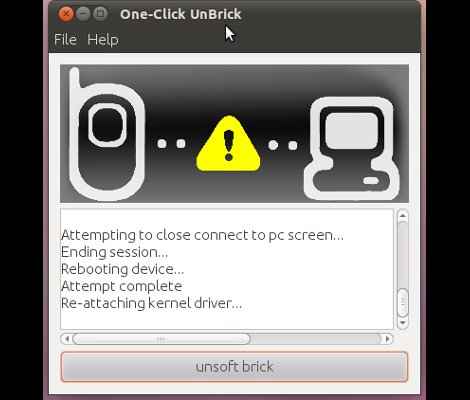
But a solution is here, [Adam] pulled together a wide set of resources to create a package to unbrick Samsung phones. Now we’re sure that there’s more than a handful of people who would argue that a bad firmware flash that can be fixed this way means that the phone wasn’t actually “bricked” in the first place. But what we see is one more barrier torn down between being a hardware user and becoming a hardware hacker. You’re much more likely to get in there and get your hands dirty if you know that you’ll be able to undo your mistakes and reclaim you precious pocket hardware. See just how easy it is in the video after the break.

Continue reading “One-click Unbrick For Samsung Phones”