open flame heated slippers

Heated Slippers Keep Your Feet Warm, Also Your House As It Burns To The Ground.

Winter may be coming to a close but that doesn’t mean that feet are free from being cold. Sure, socks or slippers may help a little, or you can even turn up the heat in your home but none of those options are as fun or as dangerous as [Colin Furze’s] solution. He has come up with some crazy DIY heated slippers.

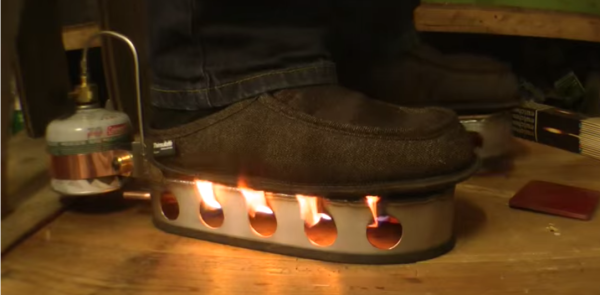
Sure, there’s battery powered heated slippers or even ones you can microwave to heat up but those are wicked boring. These puppies are actually gas powered and more resemble a small portable camping stove than any sort of footwear. Under each slipper is a custom-made burning chamber inside which is a small burner. Each slipper is supplied a constant flow of fuel from its own on-board gas can. Warming your feet couldn’t be easier, just turn on the gas and light the burner with a match.

It goes without saying but we should reiterate… Don’t try this at home! What you can try is watching the video of these slippers after the break.

[Colin Furze] is not new to having his projects on Hackaday. For more of his flame-based projects, check out his Pyro Gloves. And of course, who could forget these amazing retractable Wolverine Claws.

Continue reading “Heated Slippers Keep Your Feet Warm, Also Your House As It Burns To The Ground.”

14 Wheel Drive

14 Wheel Drive Vehicle Climbs Over Most Things

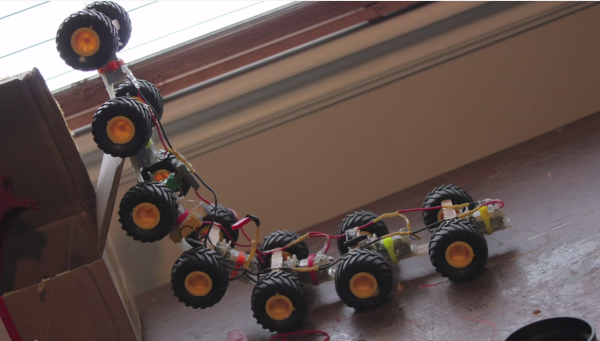
What do you get when you cross 7 hobby gearboxes with 14 wheels and a LiPo battery? Instead of speculating an answer, we can just check out one of [rctestflight’s] projects.

He came across those hobby gearboxes and thought it would be fun to build a 14 wheel drive contraption. Each gearbox has its own motor and is wrapped up in a nice tidy package also including the axle and wheels. All of the wheels mounted on a straight board wouldn’t be much fun so [rctestflight] used heavy duty zip ties that act as a flexible frame to connect one gearbox to the next. This allows the vehicle to bend and climb over obstacles while keeping as many wheels in contact with the ground as possible.

14 Wheel Drive

All 7 motors are powered by a single cell LiPo battery. In the video after the break it appears the vehicle can steer or that it is remotely controlled, but that is not the case. Once the battery is plugged in it just goes forward. This isn’t the first time one of [rctestflight’s] projects has been featured on Hackaday, check out his Free Falling Quadcopter Experiment.

Continue reading “14 Wheel Drive Vehicle Climbs Over Most Things”

RaspPi2 Keyboard

RaspPi/Keyboard Project Called Kiiboard, Still Pronounced ‘keyboard’

[b10nik] wrote in to tell us about a pretty sweet project that he just finished up. It’s a mechanical keyboard with an integrated Raspberry Pi 2 Model B inside.

[b10nik] purchased a new Filco Ninja Majestouch-2 keyboard just for this project. Although it may make some people cringe, the keyboard was immediately taken apart in order to find an open cavity for the Raspberry Pi. Luckily there was space available towards the left rear of the keyboard case.

RaspPi2 Keyboard insideIf you are familiar with the Raspberry Pi 2 Model B, you know that all of the connections are not on the same side of the board. The USB, audio, HDMI and Ethernet jacks were removed from the PCB. The Ethernet port is not needed since this hack uses WiFi, but those those other ports were extended and terminated in a custom 3D printed I/O panel . The stock keyboard case had to be cut to fit the new panel which results in a very clean finished look.
There’s one more trick up this keyboard’s sleeve, it can be used with the internal Raspberry Pi or be used as a standard keyboard. This is done by way of a FSUSB30MUX USB switch IC that completely disconnects the Raspberry Pi from the keyboard’s USB output.

For another RaspPi/Keyboard solution, check out this concept from a few years ago using a Cherry G80-3000 mechanical keyboard.


DIY Bearing Puller

DIY Car Wheel Bearing Puller

Cars are the greatest. They get you to where you need to go… most of the time. They can also let you down at the worst moment if a critical part fails.  Wheel bearings get a lot of use while we drive and [Dmitriy] found out the hard way how quickly they can fail. Instead of getting cranky about it, he set out to change the damaged bearing himself. In the process he made a pretty neat DIY bearing puller.

Some wheel bearings, on the front of a 2WD truck for example, are only held on by one large nut and easily slide off the spindle. This was not the case for the rear of [Dmitriy’s] AWD Subaru. The rear bearings are press-fit into a bearing housing. These are hard to remove because Outer Diameter of the bearing is actually just slightly larger than the Inner Diameter of the bearing housing. This method of retaining parts together is called an ‘interference fit‘.

BearingPuller2

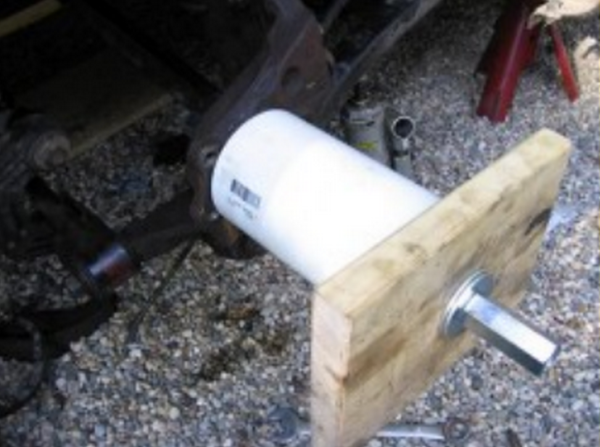
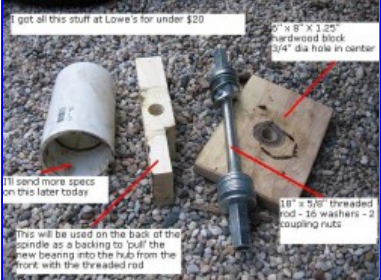
[Dmitriy’s] gadget uses one of Hackaday’s favorite simple machines, the screw, to slowly force the bearing out of its housing. It works by inserting a threaded rod through the bearing and bearing housing. Each side has a large washer and nut installed as well as a PVC pipe spacer providing support for the threaded rod. As the opposing nuts are tightened, one washer presses against the bearing and the bearing slowly slides out of the housing. Installation of the new bearing is the same except the tool is reversed to press the bushing into the housing.

Continue reading “DIY Car Wheel Bearing Puller”

SnowSled

Uber-Cheap FPV Snow Sled

Has the winter blues got you RC vehicle guys down? Well, cheer up! Spring is just around the corner. In the meantime though, you can take a page out of [BenNBuilds’] book and build an FPV Snow Sled.

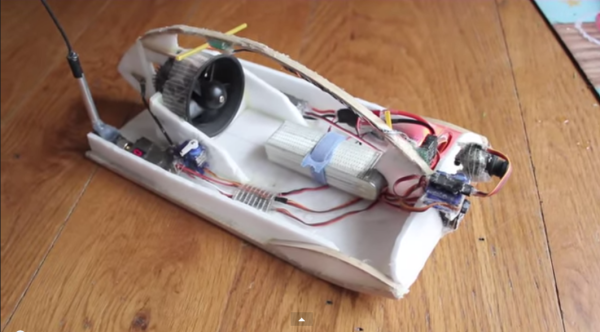
So how is using this Snow Sled in the winter different from any other RC vehicle? [BenNBuilds] controls it from inside his house where he stays warm and toasty. The on-board FPV camera sends video back to a receiver in the house where it can be either displayed on an LCD screen or on FPV goggles. Plus, being able to see the sled from the window doesn’t hurt either when getting in a sticky situation!

The craft it self was made on the cheap from spare parts that were kicking around. The frame is made from foam board and is powered by a ducted electric fan. A rudder similar to that of a hovercraft or swamp boat provides the steering. Since [BenNBuilds’] transmitter had a couple extra channels, he hooked up a pan and tilt system for his FPV camera. Check out the video of this puppy in action after the break….

Continue reading “Uber-Cheap FPV Snow Sled”

Lathe Tach

Excuse Me, Sir. Do You Know How Fast Your Lathe Was Traveling Back There?

When machining metal, it is important to know how fast the cutting tool is traveling in relation to the surface of the part being machined. This amount is called the ‘Surface Speed’. There are Surface Speed standards for cutting different types of materials and it is good practice to stick with those standards in order to end up with a good surface finish as well as maximizing tool life. On a lathe, for example, having a known target Surface Speed in mind as well as a part finish diameter, it is possible to calculate the necessary spindle speed.

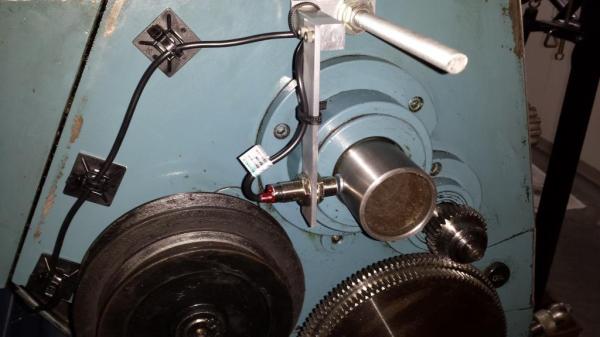
Hobbyist [Paul] wanted a method of measuring his lathe’s spindle speed. Since spindle speed is measured in RPM, it made complete sense to install a tachometer. After browsing eBay for a bit he found one for about $20. His purchase came with the numeric LED display, a mounting bezel and the all important hall effect sensor. The Hall effect sensor measures changes in a magnetic field and in turn varies its output voltage. [Paul] fabbed up an aluminum bracket that supports the sensor just off of the rear of the lathe spindle. A magnet was then glued to the outside diameter of the spindle below the sensor. The once per revolution signal is generated every time the magnet passes the sensor while the lathe is running. The display was mounted to the lathe near eye height by means of another aluminum bracket and case.

After a little work, [Paul] can now keep a close eye on his spindle speed with a quick glance over at his new tachometer display while he’s turning those perfect parts! If this project tickles your fancy, you may want to check out this fantastic DIY tachometer or this one that uses a soundcard.

Off Road Jack

Lift Kits For Car Jacks Do Exist

When needing to change a tire or work under our vehicles we humans reach for a trusty jack. The standard jack in your trunk or mounted behind the seat of your truck works fine 99% of the time. But what happens when the vehicle in need of repair has a lifted suspension, raising the frame in relation to the ground and making the stock jack now too short?

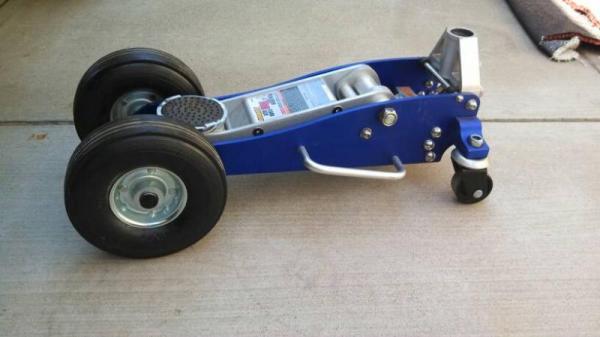
Off-Road enthusiast [am4x4] had that problem and came up with a neat solution. He made a lift kit for a roll-around mechanics jack! He started with a 1.5 ton jack from Harbor Freight. This jack had 2 small casters in the rear and one wide roller in the front. This combination works great on concrete but [am4x4] needed this to work out in the dirt so a few mods were in order.

First the front roller was scrapped and replaced by two large 8 inch diameter tires. To get these to fit the bolt holes for the roller were enlarged to the same diameter as the wheel bearings. A new solid axle was then made from 5/8 inch solid rod. Those may look like pneumatic tires but they are actually solid rubber and only cost $6 each, also from Harbor Freight. These tires not only raise the jack up several inches but also increase the surface area contacting the ground. This better distributes the weight of the vehicle and prevents the jack from pushing itself into the ground.

In the back, the small stock casters were removed and replaced with larger, heavier duty ones. Even with the larger casters, the jack leans rearward. [am4x4] plans on making an extension to level the jack out but for now, it works well and is definitely a conversation piece at the off-road get togethers.