A large PCB with empty sockets

Sensor Playground Keeps Track Of Indoor Air Quality Through The Cloud

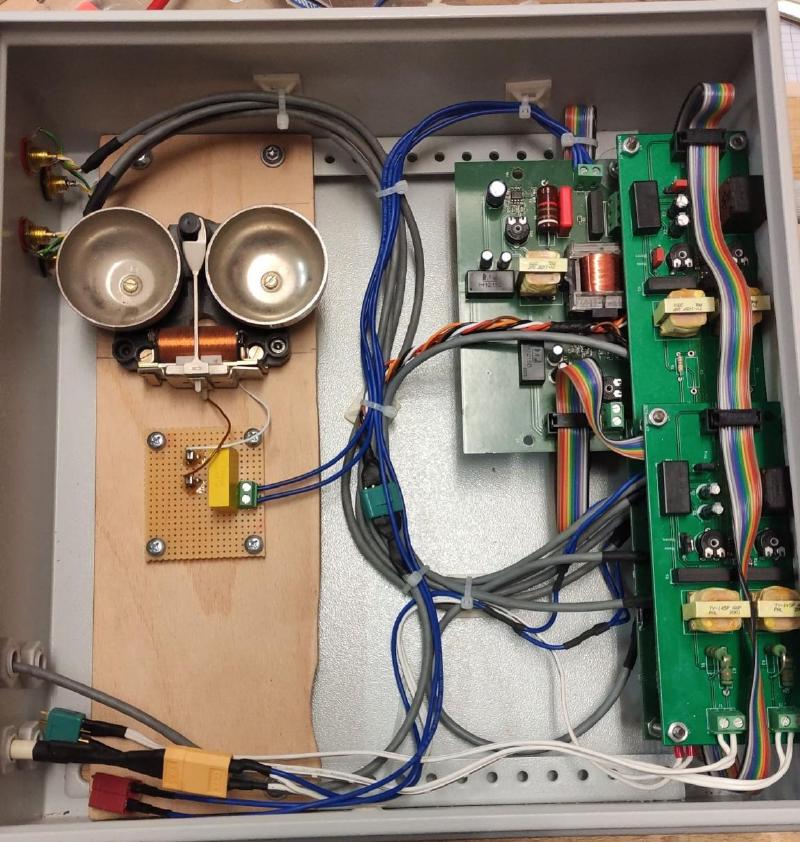
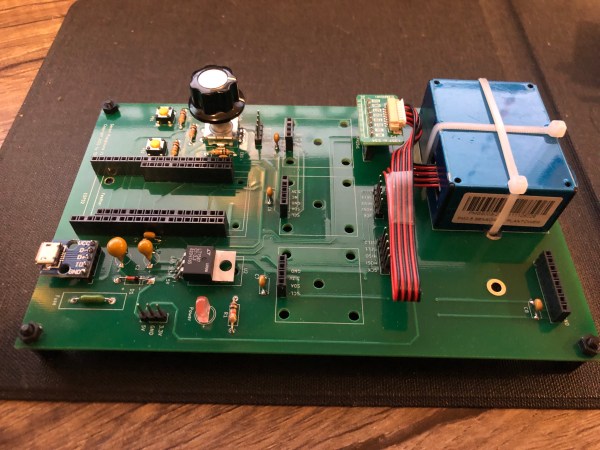
When [tdw] wasn’t feeling well one day, his wife suggested that it might be due to poor air quality in their home. While an ordinary person could have simply opened a window after hearing such an idea, [tdw] instead showed his true hacker spirit and set about measuring the indoor air quality. He began by designing a simple PCB to measure CO2 and volatile organic compound (VOC) levels, but eventually broadened his scope to end up with the Sensor Playground: a plug-and-play platform to read out various sensors and store the results in the cloud.

A large PCB with several sensor modules and a microcontroller
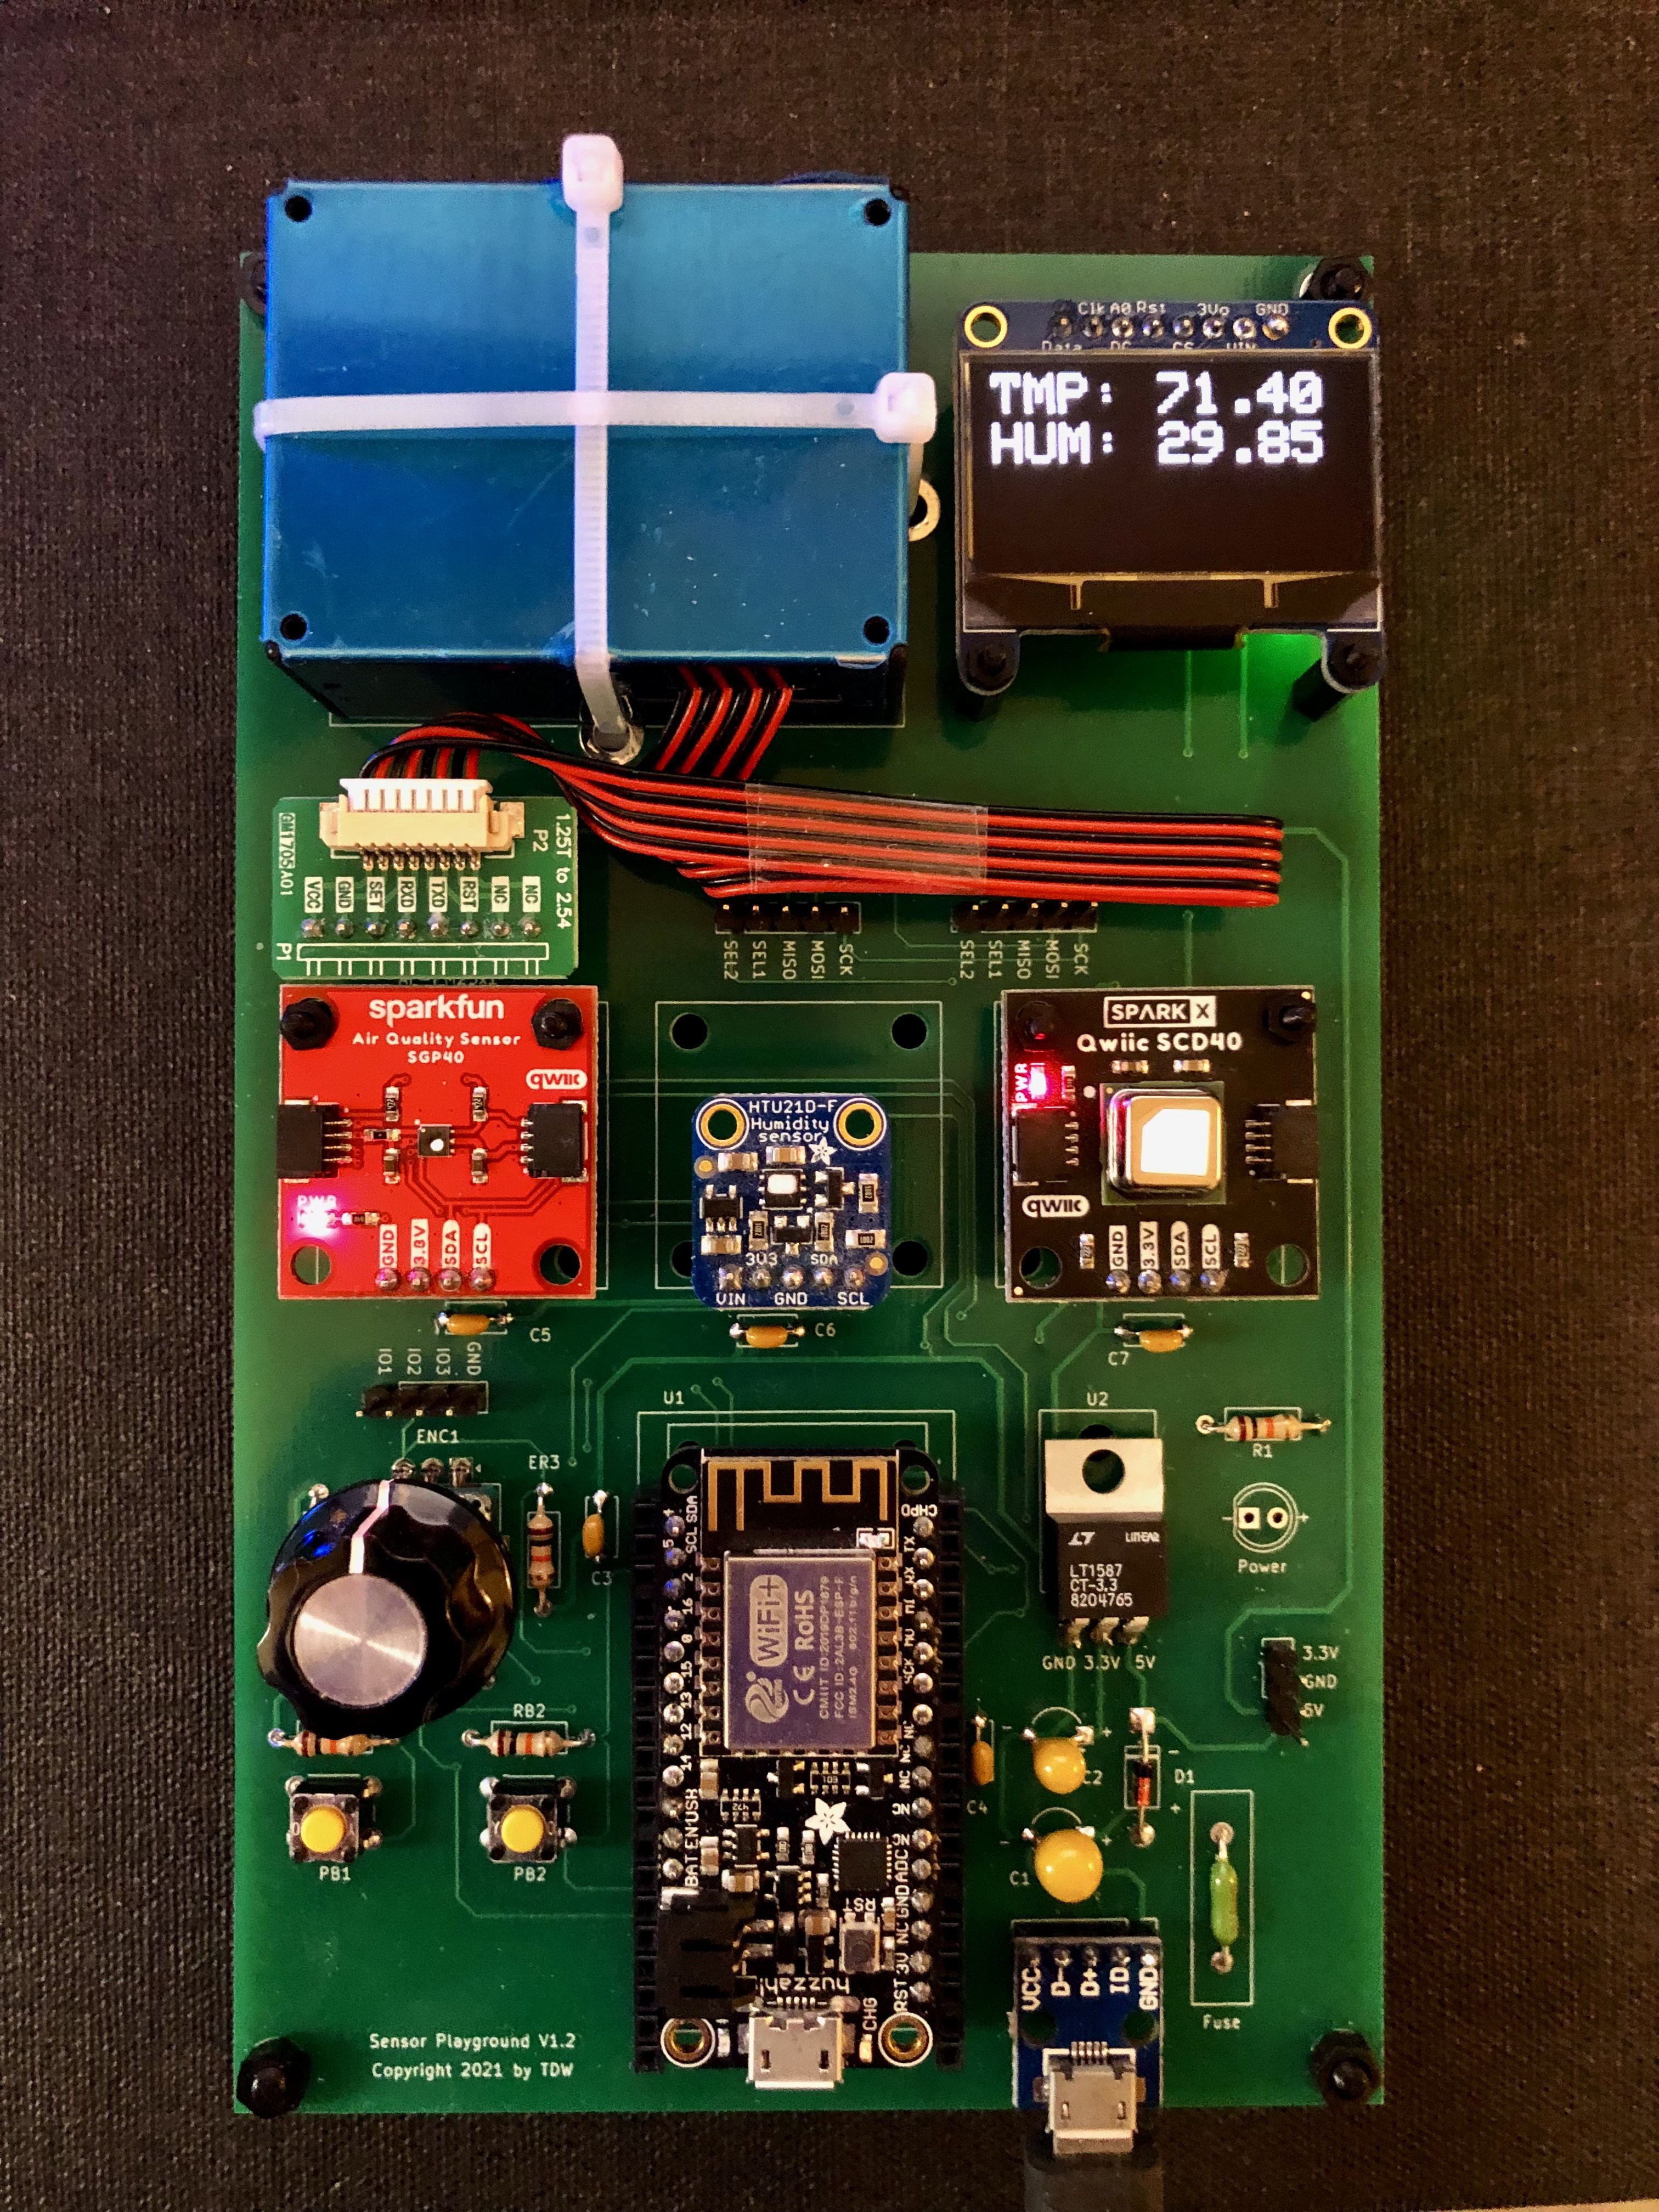
Deliberately designed to be easy to assemble with minimal soldering skills, the Sensor Playground consists of a big two-layer PCB onto which various modules can be plugged. It supports either an ESP32 DevKit or an Adafruit Feather module to provide processing power, and provides sockets for a bunch of sensors, conveniently wired with power and SPI or I2C. It also provides a rotary encoder and two buttons for user input. All source files are available on [tdw]’s GitHub page, ready to be applied to any kind of sensing task.

[tdw] set up his Sensor Playground with sensors measuring CO2, VOC, PM2.5 (particulate matter), as well as temperature and relative humidity. A web interface allows anyone to track these measurements in real-time. The open and modular design should make it easy to extend this system with various other sensor types: we can imagine that things like solar irradiation, outside temperature and wind speed would also add useful data to the mix. Perhaps even a Geiger counter to keep track of radiation levels?

As indoor air quality sensors go, this one is definitely comprehensive and easy to use. We’ve featured other air quality sensors before, some of which also link their data to the cloud.

An input device combining a joystick with several knnobs and buttons

Modular Multi-Input Macro Keypad Integrates Mouse And Joystick

While most computer users make do with just a keyboard and mouse, power users often have multiple additional input devices. Gamers use joysticks or dedicated mice, CAD engineers have specialized gadgets for manipulating 3D objects, while graphic designers might want programmable macro buttons to automate various tasks. [Sascha Nitsch] didn’t fancy cluttering his desk with a whole bunch of input devices and therefore decided to combine as many functions as possible into the CIMDIT: a Completely Insane Multi Device Input Thingy.

The main components making up the CIMDIT are a 3-axis joystick module, which can double as a 3D CAD mouse, and a set of buttons, knobs and sliders to enable various functions. One rotary encoder is used to choose an operating mode, while four others can be used as programmable inputs. A small OLED display shows which mode is currently selected, but can also be used to display notifications from various programs.

An Arduino Pro Micro provides a USB interface to a PC and reads out the various input units. The entire design is modular, so it can be customized to any desired combination of analog and digital inputs. [Sascha] made a neat 3D printed enclosure to hold the 3-axis module along with 26 buttons, five rotary encoders and one analog slider. KiCAD files for the PCBs and the FreeCAD source for the enclosure are available under an open-source license on [Sascha]’s Git repo.

The same thing applies to the software driving the CIMDIT, though adding functionality to it might turn out to be tricky: [Sascha] had to perform some serious code optimization to fit everything into the Arduino’s 32 kB of program flash. The Git repo also includes a convenient tool to create key mappings to be programmed into the controller, saving you from having to compose a binary file by hand.

Love macro keypads? Check out these cool examples with gesture detection, an e-ink display or simply beautiful wooden keys.

An electromechanical wall clock on a workbench, showing "8888"

Silent Stepper Motors Make Electromechanical Clock Fit For A Living Room

Large mechanical seven-segment displays have a certain presence that you just don’t get in electronic screens. Part of this comes from the rather satisfying click-click-clack sound they make at every transition. Unfortunately, such a noise quickly becomes annoying in your living room; [David McDaid] therefore designed a silent electromechanical seven-segment clock that has all the presence of a mechanical display without the accompanying sound.

As [David] describes in a very comprehensive blog post, the key to this silent operation is to use stepper motors instead of servos, and to drive them using a TMC2208 stepper motor driver. This chip has a unique method of regulating the current that does not introduce mechanical vibrations inside the motor. A drawback compared to servos is the number of control wires required: with four wires going to each motor, cable management becomes a bit of an issue when you try to assemble four seven-segment displays.

Continue reading “Silent Stepper Motors Make Electromechanical Clock Fit For A Living Room”

A purple 3D-printed case with an LCD screen on the front and Pikachu on top

Avoid Repetitive Strain Injury With Machine Learning – And Pikachu

The humble mouse has been an essential part of the desktop computing experience ever since the original Apple Macintosh popularized it in 1984. While mice enabled user-friendly GUIs, thus making computers accessible to more people than ever, they also caused a significant increase in repetitive strain injuries (RSI). Mainly caused by poor posture and stress, RSI can lead to pain, numbness and tingling sensations in the hand and arm, which the user might only notice when it’s too late.

Hoping to catch signs of RSI before it manifests itself, [kutluhan_aktar] built a device that allows him to track mouse fatigue. It does so through two sensors: one that measures galvanic skin response (GSR) and another that performs electromyography (EMG). Together, these two measurements should give an indication of the amount of muscle soreness. The sensor readout circuits are connected to a Wio Terminal, a small ARM Cortex-M4 development board with a 2.4″ LCD.

However, calculating muscle soreness is not as simple as just adding a few numbers together; in fact the link between the sensor data and the muscles’ state of health is complicated enough that [kutluhan] decided to train a TensorFlow artificial neural network (ANN), taking into account observed stress levels collected in real life. The network ran on the Wio while he used the mouse, pressing buttons to indicate the amount of stress he experienced. After a few rounds of training he ended up with a network that reached an accuracy of more than 80%.

[kutluhan] also designed a rather neat 3D printed enclosure to house the sensor readout boards as well as a battery to power the Wio Terminal. Naturally, the case was graced by a 3D rendition of Pikachu on top (get it? a mouse Pokémon that can paralyze its opponents!). We’ve seen [kutluhan]’s fondness for Pokémon-themed projects in his earlier Jigglypuff CO2 sensor.

Although the setup with multiple sensors doesn’t seem too practical for everyday use, the Mouse Fatigue Estimator might be a useful tool to train yourself to keep good posture and avoid stress while using a mouse. If you also use a keyboard (and who doesn’t?), make sure you’re using that correctly as well.

Continue reading “Avoid Repetitive Strain Injury With Machine Learning – And Pikachu”

The control panel of a glider winch

A Custom Radio And Telephone System For Glider Winch Operators

While gliding might be the most calm and peaceful way of moving through the air, launching a glider is a rather noisy and violent process. Although electric winches do exist, most airfields use big V8-powered machines to get their gliders airborne. [Peter Turczak] noticed that the winch operators at his airfield often had to juggle multiple communication channels while pressing buttons and moving levers, all with the deafening roar of a combustion engine right next to them. To make their life easier, he built a single communication device that combines multiple radio inputs and an analog telephone .

A stack of circuit boards next to an old phone ringer
The inside of the cabinet. Note the classic phone ringer

The main user interface is a sturdy headset that dampens engine noise significantly. This headset is connected to a cabinet that contains several modules connecting to different audio sources: an analog telephone line, an aircraft radio receiver, a PMR handheld radio, and even a music source in case the other lines are quiet. The system contains automatic switchover circuits based on a priority system, ensuring that important messages are never missed.

The electronic design is based on classic analog components like NE5532 and TL084 op amps, all mounted on small, custom-made PCBs. Audio transformers are used to avoid ground loops between the various signal sources while relays mute sources that are not prioritized. To ensure seamless compatibility with the telephone network, [Peter] used components from old desk phones, including line transformers, a DTMF keypad and even a mechanical ringer. His blog post is full of details that will be of interest to anyone working with op amps and audio, such as how to stabilize an amplifier that has significant wiring capacitance on its input.

At heart this whole project is “just” an audio mixer, although optimized for a very specific purpose. But designing even a simple mixer is by no means an easy task, as we reported a few years back. If you’re more into winches, you’ll be delighted to find that smaller ones can also be used for sledding and even wakeboarding.

A 3D-printed mechanical system that moves weather symbols around

3D Printed Mechanical Contraption Shows Live Weather Forecast

“What’s the weather going to be like today?” is a question that’s near-permanently on the mind of those living in places like Britain, where brilliant sunshine can follow thick clouds, only to turn into drizzle an hour later. Nowadays you simply need to glance at your phone to know whether you need to pack an umbrella, but where’s the fun in that? Why not have a huge mechanical display to show you a summary of today’s weather?

As a fan of automatons and other contraptions filled with gears and pulleys, [Mike] decided to build just such a machine for his latest Mikey Makes video. It uses brightly coloured indicators inspired by the BBC’s famous “fluffy cloud” symbols that can show various combinations of sunshine, clouds, rain and snow. These symbols are moved around by dozens of gears, levers, swinging arms and other moving parts which were all 3D printed. We especially like the system that folds out rays of sunshine from behind the cloud; you can see it working in the video embedded below.

Live weather data is fetched through an open weather API by an Arduino MKR WiFi 1010. This then drives the mechanical system through a pair of motor driver ICs. The heavy work is performed by stepper motors and servos, while micro-switches and optical detectors determine the end point of each movement.

If you’re into weather displays, you’re in luck: we’ve featured many different styles over the years, including e-paper screens, analog gauges, split-flap displays and even a miniature recreation of the local weather.

Continue reading “3D Printed Mechanical Contraption Shows Live Weather Forecast”

A mailbox with a solar cell on top

IoT-Enabled Mailbox Lets You Check Your Mail Without Leaving Your House

Whether you live in an apartment downtown or in a detached house in the suburbs, if your mailbox is not built into your home you’ll have to go outside to see if anything’s there. But how do you prevent that dreadful feeling of disappointment when you find your mailbox empty? Well, we’re living in 2022, so today your mailbox is just another Thing to connect to the Internet of Things. And that’s exactly what [fhuable] did when he made a solar powered IoT mailbox.

The basic idea was to equip a mailbox with a camera and have it send over pictures of its contents. An ESP32-Cam module could do just that: with a 1600 x 1200 camera sensor, a 160 MHz CPU and an integrated WiFi adapter, [fhuable] just needed to write an Arduino sketch to have it take a picture every few hours and upload it to an FTP server.

A pile of components making up an IoT Mailbox
The components inside: a solar cell, battery, power controller, LDO and ESP32-Cam module with WiFi antenna

But since running a long cable all the way from the house was not an attractive option, the whole module had to be completely wireless. [fhuable] decided to power it using a single 18650 lithium ion cell, which gets topped up continuously thanks to a 1.5 W solar panel mounted on the roof of the mailbox. The other parts are housed in a 3D-printed enclosure that’s completely sealed to keep out moisture.

The enclosure had to be made from a material that does not degrade in direct sunlight, which is why [fhuable] decided to try ASA filament; this should be very resistant against UV rays, but proved tricky to process. It warped so much during cooling that the only way to get a solid piece out of the printer was to enclose the entire machine in a cardboard box to keep it warm inside.

The end result was worth it though: a neat little extension on the back of the mailbox that should keep sending photos of its insides for as long as the Sun keeps shining. The camera should also give a good indication as to the contents of the mailbox, allowing the user to ignore any junk mail; this is a useful improvement over previous IoT-enabled mailboxes that use proximity sensors, microswitches or optical sensors.

Continue reading “IoT-Enabled Mailbox Lets You Check Your Mail Without Leaving Your House”