Two-Stage Tentacle Mechanisms Part II: The Cable Controller

A few weeks back, we got a taste for two-stage tentacle mechanisms. It’s a look at how to make a seemily complicated mechanism a lot less mysterious. This week, we’ll take a close look at one (of many) methods for puppeteering these beasts by hand. Best of all, it’s a method you can assemble at home!

Without a control scheme, our homebrew tentacle can only “squirm around” about as much as an overcooked noodle. It’s pretty useless without some sort of control mechanism to keep all the cables in check at proper tension. Since the tentacle’s motion is driven by nothing more than four cable pairs, it’s not too difficult to start imagining a few hobby servos and pulleys doing the job. To get us started, though, I’ve opted for hand controllers just like the puppeteers of the film industry.

Enter Manual Control

Hand controllers? Of all the possibilities offered by electronics, why select such an electronics-devoid caveman approach? Fear not. Hand controllers offer us a unique set of opportunities that aren’t easy to achieve with most alternatives.

Continue reading “Two-Stage Tentacle Mechanisms Part II: The Cable Controller”

The Bootup Guide To Homebrew Two-Stage Tentacle Mechanisms

What’s not to love about animatronics? Just peel back any puppet’s silicone skin to uncover a cluster of mechatronic wizardry that gives it a life on the big screen. I’ve been hunting online for a good intro to these beasts, but I’ve only turned up one detailed resource–albeit a pretty good one–from the Stan Winston Tutorials series. Only 30 seconds into the intro video, I could feel those tentacles waking up my lowest and most gutteral urge to create physical things. Like it or not, I was hooked; I just had to build one… or a few. This is how you built a very real animatronic tentacle.

29172101050_b8d50d333e_z
I built this. And you can too!

If you’re getting started in this realm, I’ll be honest: the Stan Winston Tutorial is actually a great place to start. In about two hours, instructor Richard Landon covers the mindset, the set of go-to components, and the techniques for fabricating a tentacle mechanism with a set of garage tools–not to mention giving us tons of real-film examples along the way [1].

We also get a sneak peek into how we might build more complicated devices from the same basic techniques.  I’d like to pick up exactly where he left off: 4-way two-stage tentacles. And, of course, if you’ve picked up on just how much I like a certain laser-cuttable plastic at this point, I’m going to put a modern twist on Landon’s design. These design tweaks should enable you to build your own tentacle and controller with nothing more but a few off-the-shelf parts, some Delrin, and a laser cutter… Ok, fine, a couple 3D printed parts managed to creep their way in too.

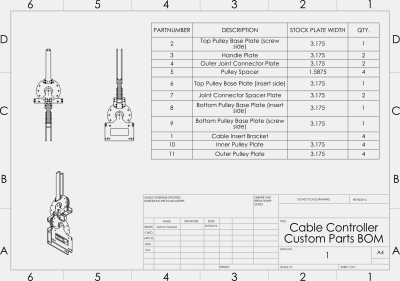
bom_graphicIn a good-ol’ engineers-for-engineers fashion, I’m doing something a little different for this post: I’m finishing off this series with a set of assembly videos, a BOM, and the original CAD files to make that beast on the front page come to life. As for why, I figured: why not? Even though these mechanisms have lived in the robotics community and film industry for years, they’re still lacking the treatment of a solid, open design. This is my first shot at closing that gap. Get yourself a cup of coffee. I’m about to give you every bleeding detail on the-how-and-why behind these beasts.

All right; let’s get started.

Continue reading “The Bootup Guide To Homebrew Two-Stage Tentacle Mechanisms”

Wazer: The Waterjet For Your Garage

Most hobbyists don’t have waterjets in their garage, but they would if they could! A Waterjet (or Water Jet Cutter) is a marvelous tool. Simply mount a high-pressure stream of grit and water on an x-y gantry, and the pressure generates enough erosion to cut through just about any thin material. Unfortunately, claiming your own waterjet will erode away a nice big hole in your pocketbook too. Machines up to this point start at about $75K, not to mention that they’d claim the better part of your workspace in a two-car garage.

Most of us everyday hackers that want to play with the benefits of this tool send their parts out to a professional shop. Consequently, we don’t often hear about everyday hackers using waterjets, or waterjet-cut parts all that often, with one exception. Back in 2014, a crew of students from UPENN built a functional waterjet with a parts-list that could make it affordable for about $5000. Now that same team is back. This time, they’ve spun together not just a one-off, but a fully-featured product called Wazer, which just launched its Kickstarter campaign minutes ago and has already nearly quadrupled the $100k goal. How could it do that? The full package starts at modest $3599-$4499. This is crowd-funding, after all, but a 20x undercutting of price is a powerful motivator.

Continue reading “Wazer: The Waterjet For Your Garage”

EL Wire Gets Some Touching After Effects

If you thought glowy wearables have had their time, guess again! After a few years designing on the side, [Josh] and [his dad] have created a nifty feature for EL wire: they’ve made it touch sensitive. But, of course, rather than simply show it off to the world, they’ve launched a Kickstarter campaign to put touch-sensitive El Wire in the hands of any fashion-inspired electronics enthusiast.

El Wire (and tape) are composed of two conducting wires separated by a phosphor layer. (Starting to sound like a capacitor?) While the details are, alas, closed for now, the interface is Arduino compatible, making it wide open to a general audience of enthusiasts without needing years of muscled programming experience. The unit itself, dubbed the Whoaboard, contains the EL Wire drivers for four channels at about 10ft of wire length.

El Wire has always been a crowd favorite around these parts (especially in Russia). We love that [Josh’s] Whoaboard takes a conventional material that might already be lying around your shelves and transforms it into a fresh new interface. With touch-sensitivity, we can’t wait to see the community start rolling out everything from costumes to glowy alien cockpits.

Have a look at [Josh’s] creation after the break!

Continue reading “EL Wire Gets Some Touching After Effects”

Magnet-o-Boots Kick You One Step Closer Towards Fighting Crime

While most of us stick to electronics around here, the few and the proud can also manage to stick to walls and ceilings. [Jen] is among these folk with the beginnings of a pair of magnetic boots that will easily keep her hoisted up in the iron rafters à la Dracula. And all this is just to get folks excited about STEAM education at her local science center.

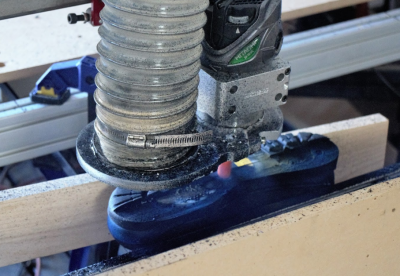
cnc_bootTo engineer this pair, [Jen] started by giving each boot just over 130 pounds of pull such that each boot could independently hold her weight. She then shaved down a few mils off the boot with the nearby Science Center’s CNC router. A few drilling operations later and [Jen] is ready to show the world how to collect those hard-to-reach rupees on the ceiling.

It’s one thing to dream about these shoes; it’s a whole different world to make this pair come to life. In case you’re looking to add a few other nifty pairs of footware to your closet, have a look at this springloaded pair that improves your walking efficiency.

Commodore PET Mods At VCF West 2016

28193708113_821f852139_zHere at the Vintage Computer Festival, we’ve found oodles of odds and ends from the past. Some, however, have gotten a modern twist like [bitfixer’s] recent Commodore PET project upgrades.
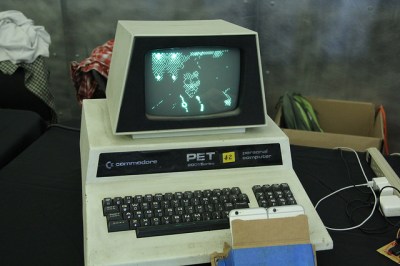
First off is [bitfixer’s] Augmented Reality upgrade. By the power of two iPhones and one raspberry Pi, the user dons a Google-Cardboard-esque heads-up-display and can visualize a 3D, ASCII rendering of the world before them. Not only does this view show up in the HUD, however, it’s also streamed to a Raspberry Pi whch then serializes it info a video display on the Commodore PET.

28191391174_7186b4758d_z
TRON Legacy, can you tell??

This hack builds on some of [bitfixer’s] prior work getting ASCII video streaming up-and running. Of course, the memory on the Commodore PET is nowhere near capable of being able to process these images. In fact, streaming and storing the video data onto the PET’s memory would fill it up in under one second! Instead, [bitfixer] relies on some preprocessing thanks to the far-more-powerful (by comparison) Raspberry Pi and iPhone processors that are capturing the images.


Next off is [bitfixer’s] full-color video display on the same Commodore PET. Again, leveraging another RaspPi to encode and reduce the video to bitmap images, the Commodore PET simple grabs these images and streams them to the screen as fast as possible–at a beloved 5.8 frames per second.


Differential Analyzer Cranks Out Math Like A Champ At VCF 2016

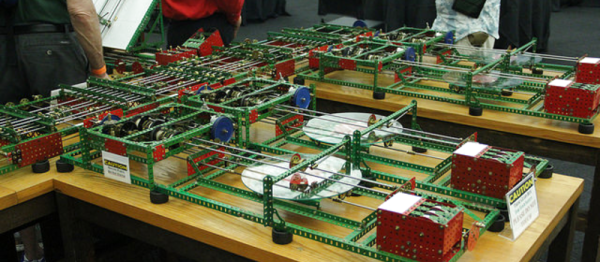
Here at VCF, we stumbled across a gigantic contraption that spanned several tables. Rube Goldberg machine this was not. Instead, this device actually does something useful! [Tim Robinson’s] differential analyzer can solve differential equations through several stages of mechanical integrators. The result is a pen-plot graph of the solution to the input equation, input by displacing a rod as a function of time.

Differential analyzers have been around for over a century. [Tim’s] claim to fame is that this particular DA is constructed entirely from Meccano-branded parts. We’re thrilled to see Meccano, over 100 years old at this point, continue to find new uses outside the toy box.

diff_analyzer
The Torque Amplifier

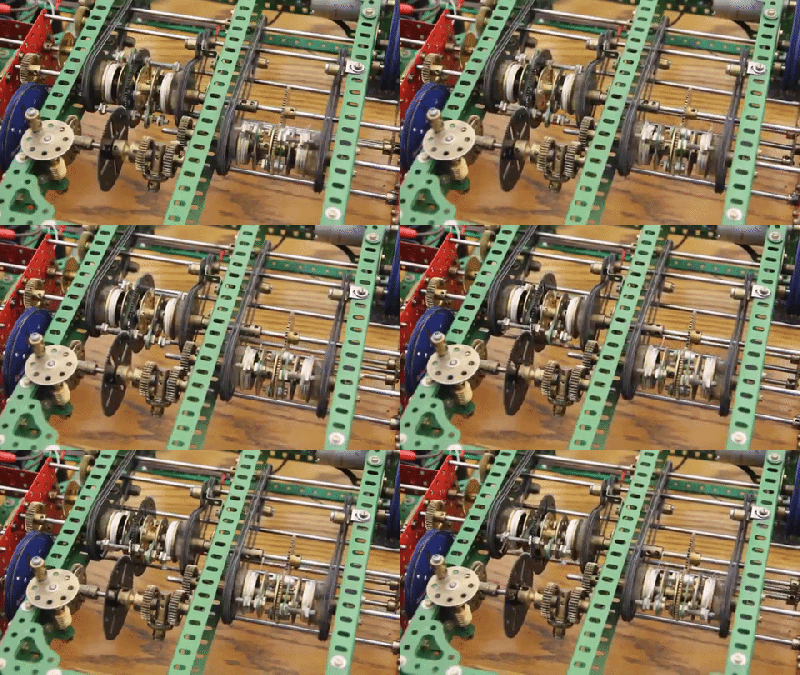
The differential analyzer is riddled with mechanisms that are bound to swing some heads for a double-take. Since the input shaft that transmits the input function f(x), has very little friction, the result can only be carried through the remainder of the machine with some means of torque amplification. To do so, [Tim], and most other DA designers implement a torque analyzer. For [Tim], though, this feat proved to be more difficult (and more triumphant) than other solutions, since he’s using a set of parts that are entirely from Meccano. In fact, this feature took [Tim] through about 20 iterations before he was finally satisfied.

VCF West continues to run through the end of the weekend at the Computer History Museum in Mountain View, CA. If you haven’t already packed your bags for DEF CON, stop by for a few more bewildering brain teasers.