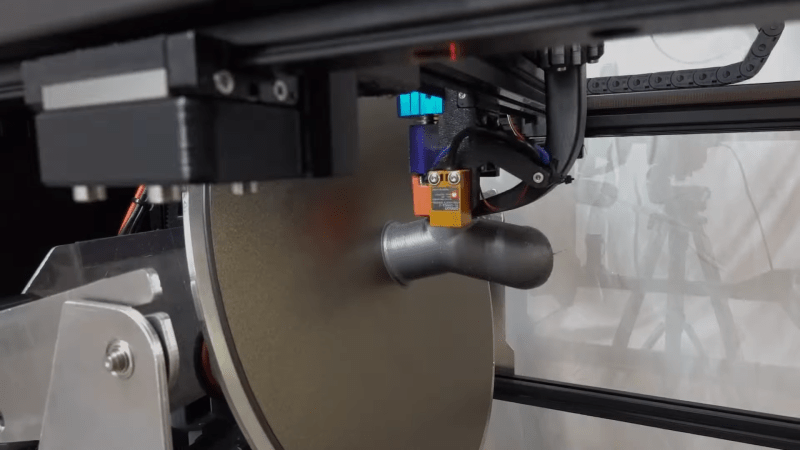
Open Source 5-Axis Printer Has Its Own Slicer

Three-axis 3D printing has been with us long enough that everybody knows the limitations, but so far, adding extra axes has been very much a niche endeavor. [Daniel] at Fractal Robotics wants to change that, with the Fractal 5 Pro 5-axis printer, and its corresponding Fractal Cortex slicer.

The printer looks like an extra-beefy Voron from a distance, which is no surprise as [Daniel] admits to taking heavy inspiration from the Voron Trident. The Fractal 5 shares a core-XY geometry with the Voron, using beefy 30 mm x 30 mm extrusions. Also like the Voron, it runs Klipper on a Raspberry Pi hiding in the base. Under a standard-looking printhead using a BondTech extruder and E3D volcano hotend, we find the extra two axes hiding under the circular build plate. The B axis is a gantry that can pivot the build plate assembly a full 90 degrees; the A axis spins the plate without limit thanks to the slip rings built into the design.

The extruder may look fairly normal, but it has actually been designed very carefully to allow the nozzle to get as close as possible to the build plate when the B-axis is at 90 degrees. It looks like the E3D hotend is actually the limiting factor there, which gives plenty of design freedom when planning prints in the accompanying Fractal Cortex slicer.

Continue reading “Open Source 5-Axis Printer Has Its Own Slicer” →

Rebuilt Batteries For The Cutest Clamshell At The Cafe

Keeping retrocomputers going can be tricky enough, but when you’re talking retro laptops, the battery packs add an extra challenge. While one could simply live without the battery, that’s not going to give you the full retro experience. Replacement batteries are long out of stock, so what can one do? Well, one can check out this excellent tutorial by [lazd] on rebuilding an iBook G3 Clamshell battery.

Even if you don’t have this particular laptop, the general process is likely to be similar for PC laptops of similar vintage. (Which we still can’t believe is a whole quarter-century ago.) Luckily for retrocomputer enthusiasts, even Apple used standard 18650 cells in those bygone, halcyon days when computers were allowed to be more than a few atoms thick. They do need to be unprotected, flat-top cells, but that’s easy enough to source.

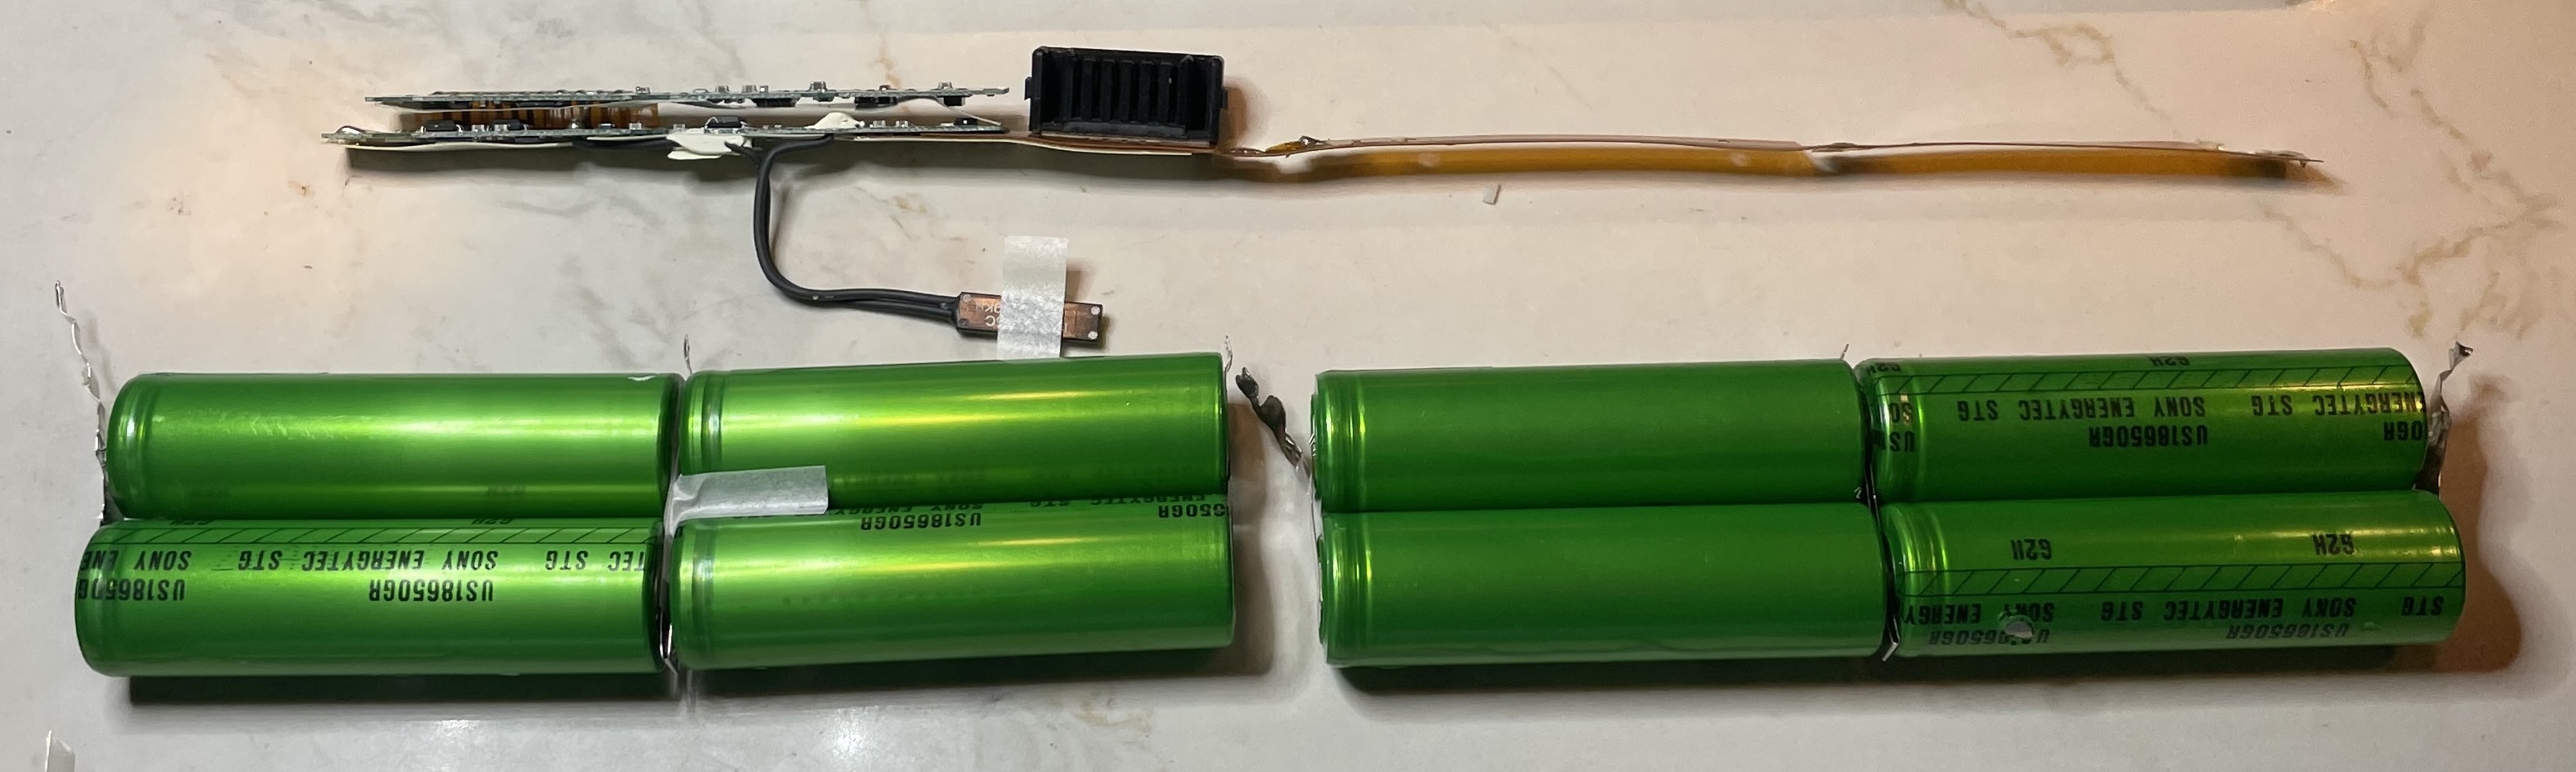
So it’s really a matter of carefully prying apart the casing (apparently it needs to be Apple-branded; aftermarket cases can’t survive being opened), removing the old batteries, and welding nickel tabs onto the new cells in the proper configuration. One thing that surprised us is that, apparently, Apple did not go in for balancing in those days — so make sure your cells are all in perfect condition and all equally charged before you start, or things won’t end nicely.

As always, battery orientation matters! The cells are welded into two sets in this Clamshell iBook battery.

Assuming you can pull it off (and your battery pack’s control chip has lasted the 300 moons since its manufacture), you’ll get a not-insignificant 5-hour battery run out of what’s sure to be the cutest clamshell computer at the cafe.

If you are repairing an iBook, while you’re at it, why not upgrade the RAM? You might even be able to fix the screen if it’s succumbing to the sadly-too-common vinegar syndrome.

2025 One Hertz Challenge: Learn Morse Code One Second At A Time

Learning Morse Code is no longer a requirement for HAMs in many jurisdictions, but it’s still a nice skill to have. [I_void(warranties)] wanted to learn, but couldn’t find a trainer that fit his style. What to do but build it yourself? Since we’re in the midst of a challenge, he took up the gauntlet and turned his need to learn Morse into a 1 hertz Morse code game.

In concept it is quite simple: a message beeps out in Morse, with a corresponding LED flash, all in one second. The player then has one second to type think they heard. Get it done fast enough, and a character LCD will tell you if you scored.

The project is based around an Arduino Nano; thanks to easily-available libraries, a PS/2 keyboard can serve as input and a 2×16 LCD as feedback with no real effort expended. For the audible component of the Morse challenge, an 8-ohm speaker is driven right off a pin on the Arduino. We won’t claim this efficient design only took one second to put together, but it probably didn’t take too long.

Of course this trainer, unlike some we’ve seen, only helps you learn to listen to the stream of dots and dashes. None of the others ever tried to fit a One Hertz theme, or [I_void(warranties)]’s particular learning style. For some, decoupling send and receive might be just the ticket to finally learning Morse one second at a time.

This Plane Flies Slow Because Its Wings Really Blow

The key to Short Takeoff and Landing (STOL) operations is the ability to fly slow– really slow. That’s how you get up fast without a long takeoff roll to build up speed. Usually, this involves layers of large flaps and/or leading edge slats, but [rctestflight] on YouTube decided he wanted to take a more active approach with a fully blown wing.

The airplane in question is R/C, of course, and good thing: these wings would be a safety nightmare for a manned aircraft. With a blown wing, air is blown out of a slot on the top end of the wing, producing a high-speed, high-pressure zone that keeps the wing flying when it would otherwise be completely stalled out. As long as everything works, that’s great! If an engine fails, well, suddenly you aren’t flying anymore — and you’re going too slow to glide. It ends badly.

[rctestflight] doesn’t have to worry about that, though, because this foamboard and pink styro R/C aircraft carries nothing that can’t survive a crash. (A couple of electric ducted fans (EDCs), an Ardupilot, a radio, and a battery are all pretty shock-resistant.) The EDCs sit midway down the chord of the wings, and blow air into a plenum carved into the foam. On each wing, the exhaust from the fans is driven rearward from a slot created by a piece of carbon fiber. This air serves not only as a lift-enhancement but also as the plane’s sole propulsion and a component of its control system.

Continue reading “This Plane Flies Slow Because Its Wings Really Blow” →

Universal Control For The Last Mac You’d Ever Expect

Universal control is a neat feature on Macintosh computers, allowing you to slide your mouse seamlessly from device to device. Of course you need a relatively recent version of MacOS to make it work, right? Not necessarily– thanks to [Bart Jackobs] MacFriends, universal control has come to the Macintosh Classic.

The Arduino is perfect for this purpose, but choosing it ruined a perfectly good pun and we can never forgive that.

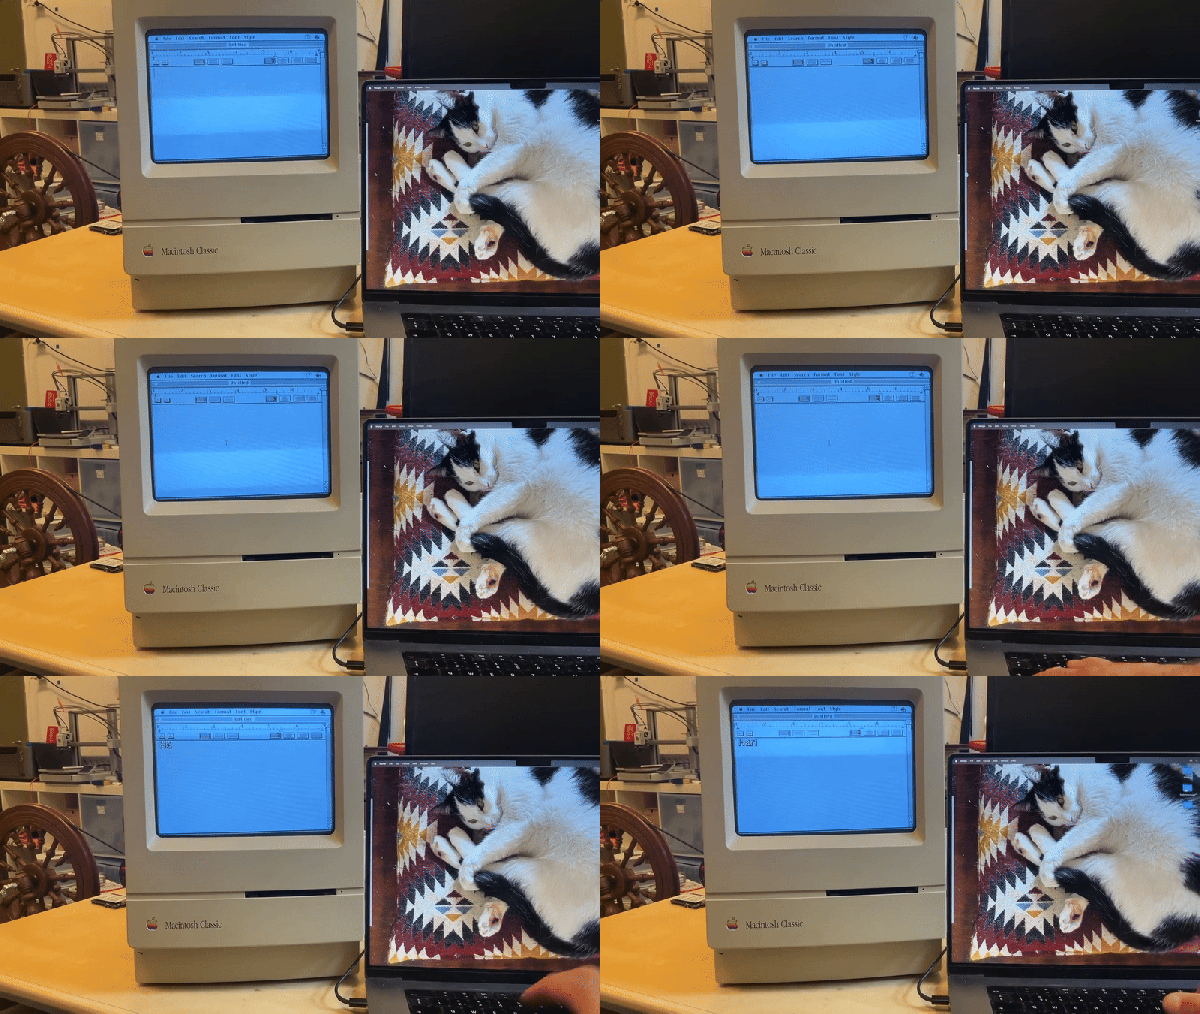
Well, not exactly universal control, but similar functionality at any rate. [Bart] can slide his mouse from one side of his retina display over onto the glorious 512 x 342, 1-bit display of his Macintosh Classic, just as if the 68k powered antique was a modern device. As you might expect, the Motorola 68000 in that old Mac is getting a teensy bit of help– though sadly for our love of puns, from an Arduino Nano and not any kind of Teensy.

The Arduino is emulating a mouse and keyboard on the Apple Desktop Bus using code based on the abduino by [akuker]. [Bart]’s custom software on the modern Mac captures the mouse and keyboard inputs to pipe to the Arduino via USB serial. Apple’s Universal control doesn’t require a wired connection between the two machines, of course, but then, it doesn’t work on the Classic. One could imagine redoing this project for Bluetooth communication to have that a same Clarkian feeling of technological magic Apple has always wanted to convey– but nothing was wireless in 1990 except for telegrams and a handful of telephones, so the project is appropriate as-is.

As much as we might resent that micro-controller for ruining a pun, if you want to hook into the ADB– perhaps to use old peripherals with an emulated Macintosh— an Arduino will do the job. So would a Teensy, though, and then we’d have our pun.

Our thanks to [Bart Jakobs] for the tip. Don’t forget to send in your own: the endless maw of the tipsline is always hungry.

Digital Guitar Of The Future Has No Strings

Electric guitars are great, but they’re just so 20th century. You’d think decades of musicians riffing on the instrument would mean there are no hacks left in the humble axe. You’d think so, but you’d be wrong. [Michael], for one, has taken it upon himself to reinvent the electric guitar for the digital era.

Gone are the strings, and the frets have vanished as well. The neck of this guitar is one long custom PCB, looking very sleek with black solder mask. Gold pads serve as touch sensors to give tone data over i2c (from unspecified touch sensing chips) to the Amtel Mega 32u4 at the heart of the build.

With no strings, strumming won’t work, so a laptop-style touchpad serves instead. That means every user interaction with this guitar is with capacitive touch sensors talking i2c. The X and Y coordinates of the touch, along with pressure are sent to the processor over the i2c bus, triggering an interrupt and offering quite a bit of opportunity for sound control.

Said sound control is, of course, done in MIDI. This lets the guitar control a whole variety of synths and/or software, and of course [Michael] is using more futuristic-sounding synths than a pack of guitar samples. That said, what exactly goes on with the MIDI controls is left frustratingly vague. Obviously fretting provides note selection, but does the touchpad just send a “note start” command, or are the X, Y and pressure data used in interesting ways? Is there multitouch support? The video doesn’t say.

How, exactly, the obviously-plastic body of the guitar was manufactured is also left unsaid. Is it a large resin print? SLS? It looks injection-molded, but that makes no sense for a one-off prototype. On the other hand, it looks like he’s selling these, so it may very well be an injection-molded production case we’re seeing being assembled here, and not a prototype at all.

For all the video leaves us wanting more information, we can’t help but admit the end product both looks and sounds very cool. (Skip to the 4:50 mark in the embedded video to hear it in action.) The only thing that would improve it would be a hurdy-gurdy mode. Thanks to [Michael] for the tip, and remember  we want to hear tips about all the weird and wonderful hacked-together instruments you make or find on the web.

Continue reading “Digital Guitar Of The Future Has No Strings” →

Double The Sensors, Double The Fun, With 2-in-1 Panoramic Camera

When film all came in rolls, it was fairly easy to play with the frame of the image. Companies like Hasselblad (and many others) made camera backs that would expose longer strips of 35 mm film to create stunning panoramic images in one single shot. [snappiness] wanted to bring that style of camera into the digital age, and ended up with a 2-in-1 Sony-based frankencamera.

Sensors just aren’t readily available in the wide aspect ratio [snappiness] was looking for, and even if they were, bare sensors are hugely expensive compared to consumer cameras. Lacking the budget for high-res scientific CMOS, [snappiness] did what any of us would do, and hacked two Sony A7ii full-frame mirrorless cameras together to get a combined 24x72mm sensor frame.

Conceptually, the hack is really very simple: a 3D print acts like a T-fitting, with the two cameras held parallel off the arms of the T and the lens making the shaft. Inside, the only optics are a pair of mirrors serving as a beam splitter. Each camera sees half the FOV of the lens in its corresponding mirror, which means the images can be stitched together later to make the double-wide pictures [snappiness] is after.

Of course both cameras must be triggered at the same time, but with what looks like a headphone splitter and an aftermarket remote shutter button, that part works perfectly. The optics, not so much– as always with conceptually simple projects, the devil is in the details, and here it’s the mirror alignment where you’ll find Old Nick. [snappiness] made no provision for adjustments, so everything needed to be designed and built with very stringent tolerances. Somewhere along the way, those tolerances were exceeded; as a result, the two cameras don’t share a focal plane.

That means half the composite image will always be out of focus, or that the main lens needs to be refocused and two snaps taken, rather defeating the point the frankencamera. If [snappiness] attempts a version two, perhaps an adjustment mechanism to focus each sensor would be in order. Still, even if it didn’t work perfectly, he’s proven that the idea is sound, and we can’t imagine many people will see this and argue it isn’t a hack.

The world of film did make all of this easier, perhaps– we’ve seen large-format film cameras out of lego, and a panorama made from four full rolls of 35 mm film. If you know of any other great photography hacks– film or digital– don’t hesitate to send us a tip.

Continue reading “Double The Sensors, Double The Fun, With 2-in-1 Panoramic Camera” →