Internet Of Washing Machines Solves An Annoyance

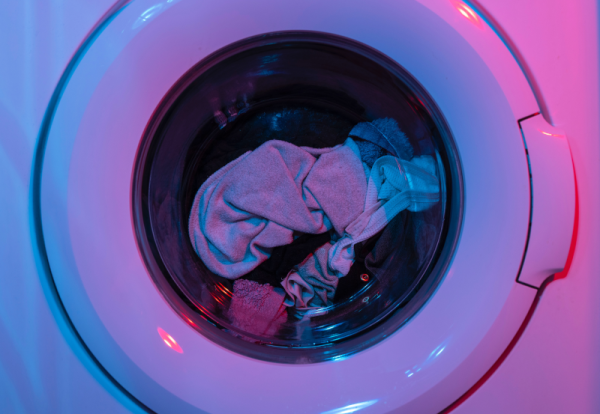
[Laurence Tratt]’s washing machine blew up, so he sprung for a brand new model with all the bells and whistles. Of course, these days, that means it has an Internet connection and an API. While we’re not quite convinced our washing machine actually needs such a thing, at least [Laurence] is making the most of it by creating an interface to the washer’s API that provides a handy countdown on the computer.

Honestly, there was one other option. The washer’s phone app — that sounds funny when you say it out loud — will notify you when the clothes are done. But it doesn’t provide a countdown, and it seems to regularly log you off, which means you don’t get the notifications anymore. You can see the minimal interface in the video below.

The exact combination of curl, jq, and pizauth probably won’t help you unless you have the same washer. On the other hand, it is a good example of how to hit some alien API and work out the details. Any API that uses OAuth2 and JSON won’t look too different. Speaking of OAuth2, that’s the purpose of the pizauth program — which, it turns out, [Laurence] is the author of.

Of course, you can refit an old washing machine to do this, too. We are more likely to steal the machine’s motor than to want to talk to it but to each their own!

Continue reading “Internet Of Washing Machines Solves An Annoyance”

Better Laser Cuts: Know Your Kerf

The recent crop of laser cutters are nothing short of miraculous. For a few hundred dollars you can get a machine that can easily engrave and — subject to materials — cut well, too. [Nate] has been taking advantage of a laser to make boxes that join together using finger joinery. The problem is, the pieces have to fit exactly to get a good box. While setting dimensions in software is fine, you need to account for how much material the laser removes — something traditional woodworkers and machinists know as kerf.

You can, of course, employ trial and error to get good results. But that’s wasteful and potentially time-consuming. [Nate] built a “tolerance fence” that is quick to cut out and allows accurate measurement of kerf. You can quickly use the tolerance fence to make measurements and increase your chances of nailing your boxes on the first cut.

You have to customize the fence based on the thickness of your material. [Nate] uses Lightburn, which probably has a kerf offset already set by default in your layers. If not, you’ll need to turn it on and set an estimate of your kerf size. Then you are ready to cut the fence pieces and see how they fit together.

If the fit is too loose, you want to raise the kerf setting and try again. If it is too tight, you lower the kerf setting. As [Nate] says, “Lower equals looser.”

The results speak for themselves, as you can see in the treasure chest image [Nate] provided. Well worth the effort to get this parameter right. We do enjoy laser cutting and engraving things. If you are cutting and don’t have air assist, you really need to hack up something.

Kicad Autorouting Made Easy

One of the most laborious tasks in PCB layout is the routing. Autorouting isn’t always perfect, but it is nice to have the option, even if you only use it to get started and then hand-tune the resulting board. Unfortunately, recent versions of Kicad have dropped support for autorouting. You can, however, still use Freerouting and the video from [Mr. T] below shows you how to get started.

There are three ways to get the autorouting support. You can install Java and a plugin, you can isntall using a ZIP file, or you can simply export a Specctra DSN file and use Freerouting as a standalone program. Then you import the output DSN file, and you are done.

Continue reading “Kicad Autorouting Made Easy”

Retro Gadgets: The 1983 Pocket Oscilloscope

In the 1980s, an oscilloscope was typically a bulky affair with a large CRT, and a heavy power supply. So it probably grabbed a lot of attention in 1983 when Calvert Instruments Incorporated ran an ad in magazines like Radio Electronics. The ad touted a 5 MHz scope that was pocket-sized and weighed 4 ounces. The ad proudly proclaimed: CRT oscilloscopes just became obsolete!

Indeed they would, but if you are wondering who Calvert Instruments was, so are we. We have never heard of them before or since, and we don’t know for certain if any of these devices were ever actually produced. What did it use instead of a CRT? The CI Model 210 Pocket-O-Scope was not only solid state but used an LED screen 1.5 inches square. That’s small, but it packed in 210 LEDs for “high resolution.” We assume that was also the genesis of the model number. Judging from the product picture, there were 14 LEDs in the X direction and 15 in the Y direction. High resolution, for sure!

There were some early LCD scopes (like the Iskrascope and one from Scopex) around the same time, but it would be the 1990s before we would see LCD oscilloscopes and even longer before CRTs were totally squeezed out.

Continue reading “Retro Gadgets: The 1983 Pocket Oscilloscope”

Tinkercad Gets A Move On

Going to the movies is an experience. But how popular do you think they’d be if you went in, bought your popcorn, picked your seat, and the curtain would rise on a large still photograph? Probably not a great business model. If a picture is worth 1,000 words, then a video is worth at least a million, and that’s why we thought it was awesome that Tinkercad now has a physics simulator built right in.

Look for this icon on the top right toolbar.

It all starts with your 3D model or models, of course. Then there’s an apple icon. (Like Newton, not like Steve Jobs.) Once you click it, you are in simulation mode. You can select objects and make them fixed or movable. You can change the material of each part, too, which varies its friction, density, and mass. There is a play button at the bottom. Press it, and you’ll see what happens. You can also share and you have the option of making an MP4 video like the ones below.

We, of course, couldn’t resist. We started with a half-sphere and made it larger. We also rotated it so the flat side was up. We then made a copy that would become the inside of our bowl. Using the ruler tool, we shaved about 2 mm off the length and width (X and Y) of the inner sphere. We also moved it 2 mm up without changing the size.

Using the alignment tools, you can then center the inner piece in the X and Y axis. Change the inner color to a hole and group the objects. This forms a simple bowl shape. Then we moved the workplane to a random part of the inner surface of our bowl and dropped a sphere. Nothing complicated.

Continue reading “Tinkercad Gets A Move On”

Tech In Plain Sight: Field Guide To Power Plugs

It is the bane of worldwide travel: there isn’t just one way to get AC power from the wall. The exact connector — and what you can expect when you plug in — differs from country to country. Even if you stay home, you must account for this if your designs go places and expect to plug into the wall. If you’ve ever looked at a universal adapter, it is full of prongs and pins like a metallic porcupine. Where do all those pins go?

Of course, there are some easy ways to sidestep the whole issue if you don’t need AC power. Much low-power gear now just provides a USB or barrel connector. Then you can use an area-appropriate adapter or charger to power your device. Batteries work, too. But if you need to plug in, you will run into other kinds of plugs.

Switching power supplies have helped. In the old days, many things expected either 125V or 250V and didn’t work with the opposite voltage. Switching power supplies often allow a wide input range or have a switch to select one range or the other. These two voltages will cover almost any situation. If you have something that must have one voltage or the other, you’ll need a transformer — also called a converter — to step the voltage up or down. But most often, these days, you just need an adapter. There are slight variations. For example, some countries supply 100V or 110V, but that usually doesn’t make much difference. You also need to understand if your equipment cares if the AC is 50 Hz or 60 Hz.

Most of the power sockets you’ll find around the world will fall into one of several categories. The categories range from A to N. Even among these, however, there are variations.

Type A

For example, the common type A plug and socket are what Americans call “two prong.” If you live in the US, you’ve probably noticed that the plug is polarized. That is, one pin is slightly wider than the other so the plug can only go in one way. The wide pin is connected to the circuit neutral. The maximum load for this connector is 15A. It is difficult to find type A sockets anymore, other than on cheap extension cords or things like lamps that pass through their electrical connections to a second socket. Type B is far more common and type A plug will fit in a type B socket.

Continue reading “Tech In Plain Sight: Field Guide To Power Plugs”

Dual Extrusion Support Without PVA

If you have an FDM printer that features multiple hotends or can otherwise switch between different filaments, you’ve surely thought about using the capability to lay down dedicated support material. Historically the filament of choice for this is PVA, since it can be dissolved in water once the print has finished. But if you’ve ever used it, you’ll know it’s not without its own challenges. Luckily, there may be an alternative — [ModBot] had heard that it is possible to use PLA to support PETG and vice-versa so he decided to try it. You can see how it works in the video below.

Of course, you can simply use PLA to support PLA and PETG to support PETG. Depending on the supports and slicer settings, though, it can be hard to remove the support after printing cleanly. Slicers have made major improvements in this area, but it still isn’t ideal. Some use HIPS for support, but that requires a solvent to dissolve and is also a bit exotic compared to PLA and PETG.

To illustrate, [ModBot] printed some test articles with the alternate support and did more reference prints using the same material with different parameters. The typical gap slicers use is 0.2 mm, but when using the different materials you can set the gap to zero. For the reference parts he set the gap to zero and 0.1 mm, both closer than you would normally print.

The PLA-only prints were essentially impossible to separate. While the PETG prints separated with tools, the resulting surfaces were ugly, with support residue and scarring. But the prints with two materials and zero gap pulled apart readily with no tools and left a beautiful surface underneath.

If you have the ability to do dual extrusion, this could be a great trick to have in your toolbox. Granted, PVA will still be of interest if you have support buried deep inside some structure where it is physically difficult to get to. Water can go where tweezers can’t. But for supporting large accessible areas, this looks like a game-changer.

Sometimes automatic supports can use a little help. There are plenty of supports and best practices for supports if you want to fine-tune your process.

Continue reading “Dual Extrusion Support Without PVA”