How To Get Started With Fadecandy And LEDs

The internet is awash with millions of stunning LED projects, and for that, we are all very thankful. For those outside the hacker/maker matrix, it can be difficult to know how to approach such a build. Never fear, for [Amy Goodchild] has put together a beginner’s guide to building pretty glowables, using Fadecandy and Processing.

Fadecandy is a platform specifically designed to drive WS2812B LEDs for artistic purposes. This allows users to focus on the visual side of things without getting bogged down with the hassle of selecting the right microcontroller and choosing the applicable libraries. It works great in combination with Processing, a piece of software designed for coders experimenting with visual arts. Through a USB link, any graphics drawn by processing can be mapped to the LEDs attached to the Fadecandy controller.

[Amy] does a great job of explaining how to do everything required, from purchasing the right equipment, through wiring everything up, and then getting it all humming along with the correct software. If you’ve ever wanted to build a big flashy project with a ton of LEDs, this would be a great place to start.

We’ve seen Fadecandy put to good use before, too. Video after the break.

Continue reading “How To Get Started With Fadecandy And LEDs” →
Mt Everest Lamp Recreates The Famous Peak

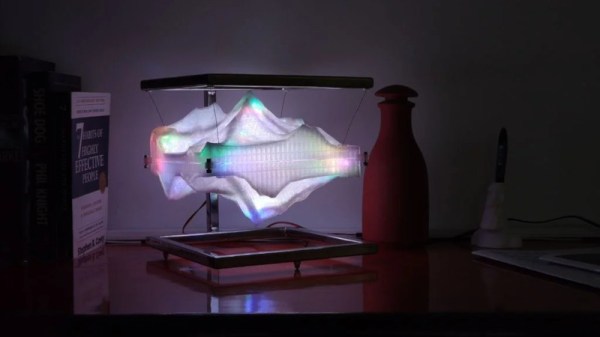
Anyone who has travelled to distant mountain peaks has marvelled at the beauty of the natural, rugged terrain. [apoorvas15] is no different, and created a lamp that celebrated the awe of the largest mountain on earth.

When it comes to reproducing an accurate geometrical representation of the landscape, the easiest approach is to reach for some variety of CNC machinery. Here, a 3D printer is used to create a translucent shell replicating the mountain. A reverse shell is then laced on the bottom to create an effect akin to that of a reflection in a lake. The assembly was fitted with WS2812 LEDs run by an Arduino Nano, and suspended from a stainless steel frame for an attractive floating look.

It’s a great piece, one that would look suitably impressive on any desk or coffee table. The 3D printer has served many makers well when it comes to producing attractive home lighting. We’ve seen many great builds — from the 8-bit to the floral-inspired. Video after the break.

Continue reading “Mt Everest Lamp Recreates The Famous Peak” →

Modular Camera Remote Is Highly Capable

Many cameras these days have optional remotes that allow the shutter release to be triggered wirelessly. Despite this, [Foaly] desired more range, and more options for dealing with several cameras at once. As you’d expect, hacking ensued.

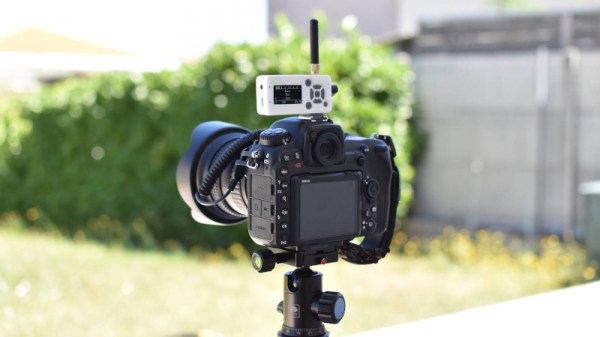
[Foaly] uses Silver modules to photograph rocket launches safely.
The system goes by the name of Silver, and is modular in nature. Each Silver module packs a transmitter and receiver, and can send and receive trigger orders to any other module in range. This allows a module to be used to trigger a camera, or be used as a remote to control other modules. There’s even a PC interface program that controls modules over USB.

Modules are also capable of sharing configuration changes with other modules in the field, making it easy to control a large battery of cameras without having to manually run around changing settings on each one. Oh, and it can run as a basic intervalometer too.

LoRa is used for wireless communications between modules, giving them excellent range. [Foaly] successfully used the remotes at ranges over 500 meters without any dropouts, capturing some great model rocket takeoffs in the process.

Silver is a highly robust project that should do everything the average photographer could ever possibly need, and probably a good deal more. Firmware and board files are available for those eager to make their own.

We’ve seen several very impressive camera augmentations entered into the 2019 Hackaday Prize, from ultra high-speed LED flash modules to highly flexible automatic trigger systems.

This Lightning Detector Is Remarkably Sensitive

Lightning strikes are quite high energy events, and release plenty of radio frequency energy when they go off in the atmosphere. This makes them easy to detect, and the magnitude of the energy release means it can be done at impressive range. [Jay] decided to build a device of his very own, and was impressed at its detection performance.

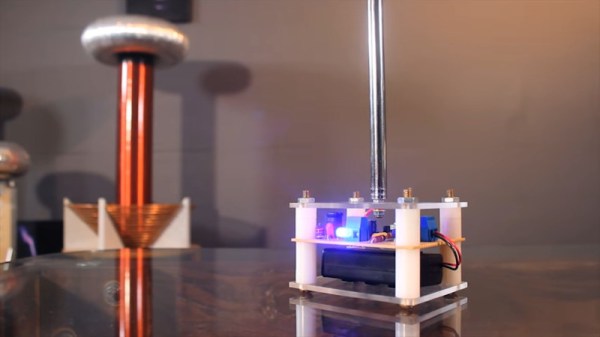
The device is a simple but effective design. An antenna is used to capture RF signals, and these are then amplified through a single transistor stage. This is connected to a basic transistor flasher circuit, which is biased to only flash when tipped over the edge by an incoming signal. After building the circuit, [Jay] noticed that the device wasn’t just picking up signals from lightning, but also those from many other smaller discharges. The device was able to detect a shock from wearing socks on a wood floor, as well as discharges from a Van de Graff generator and even just from getting out of a chair!

Lightning detectors have been around for a long time now; we’ve seen others grace these pages before. Video after the break.

Continue reading “This Lightning Detector Is Remarkably Sensitive” →

Weather Alert Lamp Keeps An Eye On What’s Brewing

Whether you’re getting ready for work in the morning, or heading out on a camping trip in the woods, it’s nice to know what to expect when the weather rolls over the horizon. To keep abreast of things, [natethecoder] built a lamp system to stay across weather alerts.

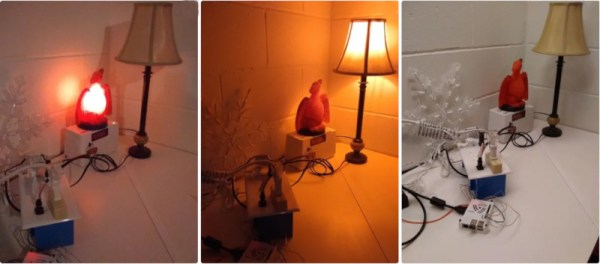
A Raspberry Pi 3 acts as the heart of the system, with Node Red responsible for running the show. Querying the web every 5 minutes for updated weather data, it keeps track of weather alerts, as well as incoming snowfall. For a basic weather watch, a yellow lamp is lit, while there’s a red lamp for more serious warnings. A Christmas decoration serves as the indicator for snow. The lamps are all controlled by mains-rated solid state relays, making it easy to swap out the lamps for other devices if so desired down the track. There’s also a lamp test subroutine that fires on startup to ensure everything is working correctly.

It’s a handy way to get your weather info at a glance, and would prove useful to anyone living in a storm-prone area. For something more portable, consider this umbrella that tells you the weather.

Super Nice LED Lamp Is Super Simple

If you’re looking for a fancy LED lamp, the Internet can provide in spades. There are all manner of flashy-this and glowing-that, often with wild and impressive designs made with high-end tools. However, when it came time to decorate the apartment, [thebigpotatoe] wanted to build something simple that anyone could attempt. From this, the Super Simple RGB WiFi Lamp was created.

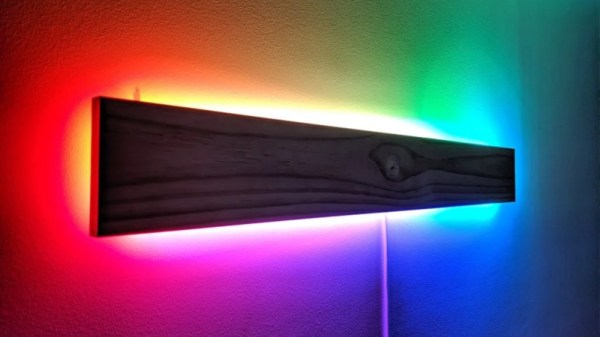
The body of the lamp consists of a plank of wood. It may not sound like much, but thanks to a nifty design, it actually comes out looking remarkably stylish. The plank is fitted with aluminium angle on the back, and a strip of WS2812B LEDs are wrapped around the perimeter of the board. An ESP8266 NodeMCU is fitted to run the show, and powered from a mains supply to allow it to run all day.

The trick here is that the LEDs are mounted on the back of the board, where they are out of direct sight. The light from the LEDs is projected onto the wall the lamp is mounted on, giving a nice smooth effect without requiring any dedicated diffusers. There’s a series of animations coded in, which look great, particularly when the animations wrap around the end of the lamp.

It’s a great addition to the apartment’s feature wall, and goes to show that you don’t need world-beating crafting skills to make a great piece for your home. You can even go all out, and light your whole room this way. Video after the break.

Continue reading “Super Nice LED Lamp Is Super Simple” →

X-Printer Fits In A Backpack

3D printers are great for rapid prototyping, but they’re not usually what you’d call… portable. For [Malte Schrader], that simply wouldn’t do – thus, the X-printer was born!

The X-printer is a fused-deposition printer built around a CoreXY design. Its party piece is its folding concertina-style Z-axis, which allows the printer to have a build volume of 160x220x150mm, while measuring just 300x330x105mm when folded. That’s small enough to fit in a backpack!

Getting the folding mechanism to work took some extra effort, with the non-linear Z-axis requiring special attention in the firmware. The printer runs Marlin 1, chosen for its faster compile time over Marlin 2. Other design choices are made with an eye to ruggedness. The aluminium frame isn’t as light as it could be, but adds much needed rigidity and strength. We’d love to see a custom case that you could slide the printer into so it would be protected while stowed.

It’s a build that shows there’s still plenty to be gained from homebrewing your own printer, even in the face of unprecedented options on the market today. We’ve seen other unique takes on the portable printer concept before, too. Video after the break.

Continue reading “X-Printer Fits In A Backpack” →