Injection Molding With A Hot Glue Gun

Injection molding is an industrial process used the world over for the quick and economical production of plastic parts. [Nikodem Bartnik] wanted to experiment with this at home, so whipped up some molds and got to work (Youtube link, embedded below).

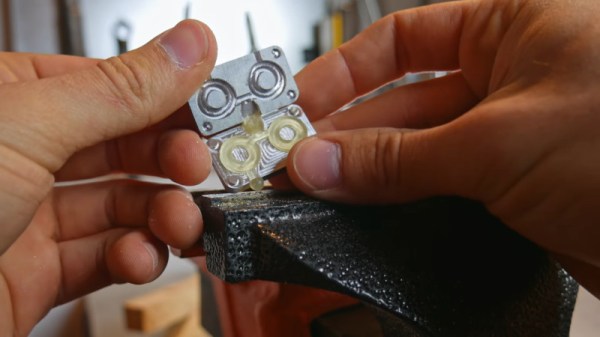
[Nikodem] produced aluminium molds, using a Dremel-based CNC platform. This allowed for the design to be created in CAD software, and helps with the production of the geometry for both the part, as well as the gates and vents. Having learned about thermal issues with an early attempt, the mold was then clamped in a vice. Wood was used as an insulator to minimise heat lost to the vice.

With this setup, it was possible to mold M5 washers using hot glue, with good surface finish. Later attempts with a larger mold were unsuccessful, due to the glue cooling off before making it through the entire mold. [Nikodem] has resolved to improve his setup, and we look forward to seeing what happens next. We’ve seen others experiment in this area before, too. Video after the break.
Continue reading “Injection Molding With A Hot Glue Gun” →

Google Home Mini Gets A Headphone Jack

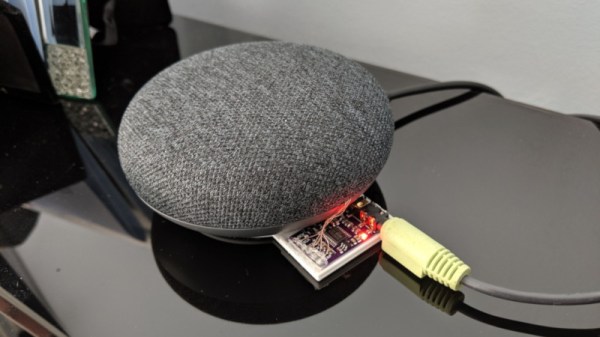
The Google Home Mini can be a useful home assistant device. It can set reminders, tell you the weather, and even play you music. [Brian] had a few lying around, and decided he wanted to hook one up to a beefier set of speakers. Thus, he installed a headphone jack into the Google Home Mini.

The quick and dirty approach to such a task is to solder a jack to the speaker connections. However, this is an amplified signal, rather than a line level signal suitable for feeding to an amplifier. It’s also mono only. The Google Home Mini uses the TAS5720L mono digital amplifier chip, and some investigation with a logic analyzer and a datasheet allowed [Brian] to figure out the format of the I2C digital audio signal.

With this knowledge in hand, [Brian] hacked in a PCM5102A digital amplifier chip to the Google Home Mini. It can accept audio data in the same format as the TAS5720L, and is readily available on eBay for use with the Raspberry Pi and other maker platforms. With a 3D printed baseplate and some careful soldering, [Brian] was able to integrate the stereo amplifier and a headphone jack neatly into the Google Home.

Unfortunately, the audio output is only two mono channels rather than true stereo, as the device outputs the same data on both left and right  channels in the I2C data. Regardless, the hack works, and [Brian] now has a high-quality voice assistant that he can hook up to a decent pair of speakers.

Adding Bluetooth Control To A Benchtop Power Supply

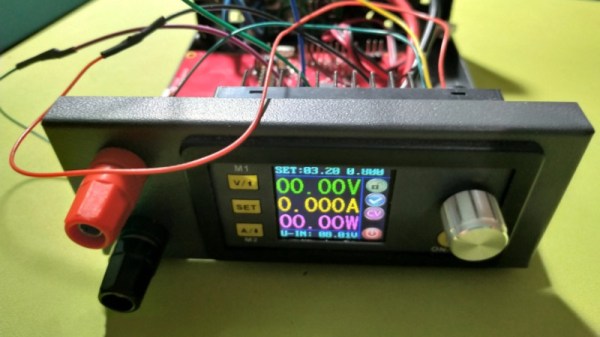
In 2019, it’s possible to kit out a lab with all the essentials at an even cheaper price than it has ever been. The DPS3005 is one such example of low-cost equipment – a variable power supply available for less than $50 with a good set of features. [Markel Robregado] wanted a little more functionality, however, and got down to work.

The crux of [Markel]’s project is improved connectivity. A Texas Instruments CC2640R2F Launchpad is employed to run the show, with its Bluetooth Low Energy capability coming in handy. A custom smartphone app communicates with the Launchpad, which then communicates with the power supply over its Serial Modbus interface. Through the app, [Markel] can set the voltage and current limit on the power supply, as well as switch it on and off. This could prove useful, particularly for remote triggering in the case of working with dangerous projects. Sometimes it pays to take cover, after all.

We’ve seen power supplies modified before; this pot mod for higher precision is a particular treat. If you’ve hacked your bench hardware for better performance, let us know. Video after the break.

Continue reading “Adding Bluetooth Control To A Benchtop Power Supply” →

Creating A Laser Cutter From A 3D Printer

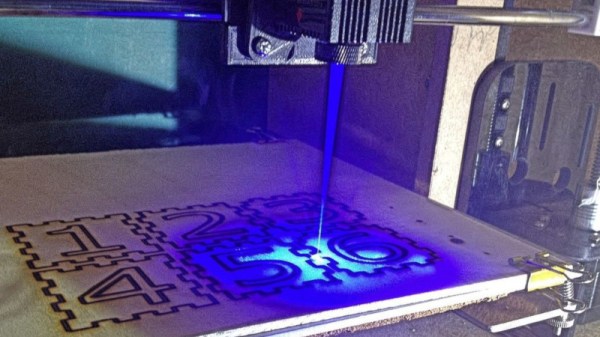
The average FDM 3D printer is not so different from your garden variety laser cutter. They’re often both Cartesian-coordinate based machines, but with different numbers of axes and mounting different tools. As [Gosse Adema] shows, turning a 3D printer into a laser cutter can actually be a remarkably easy job.

The build starts with an Anet A8 3D printer. It’s an affordable model at the lower end of the FDM printer market, making it accessible to a broad range of makers. With the help of some 3D printed brackets, it’s possible to replace the extruder assembly with a laser instead, allowing the device to cut and engrave various materials.

[Gosse] went with a 5500 mW diode laser, which allows for the cutting and engraving of wood, some plastics and even fabrics. Unlike a dedicated laser cutter there are no safety interlocks and no enclosure, so it’s important to wear goggles when the device is operating. Some tinkering with G-Code is required to get things up and running, but it’s a small price to pay to get a laser cutter on your workbench.

We’ve seen [Gosse]’s 3D printer experiments before, with the Anet A8 serving well as a PCB milling machine.

Takata’s Deadly Airbags: An Engineering Omnishambles

Engineers are, for the time being, only human. This applies even more so to executives, and all the other people that make up a modern organisation. Naturally, mistakes are made. Some are minor, while others are less so. It’s common knowledge that problems are best dealt with swift and early, and yet so often they are ignored in the hopes that they’ll go away.

You might have heard the name Takata in the news over the last few years. If that name doesn’t ring a bell you’ve likely heard that there was a major recall of airbag-equipped vehicles lately. The story behind it is one of a single decision leading to multiple deaths, scores of injuries, a $1 billion fine, and the collapse of a formerly massive automotive supplier.

Continue reading “Takata’s Deadly Airbags: An Engineering Omnishambles” →

Solder SMDs With A Pan O’ Sand

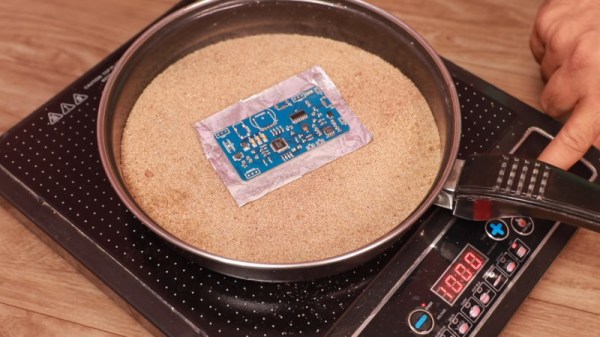
For those that grew up working with through-hole components, surface mount parts can be challenging to deal with. However, there are plenty of techniques out there that are more than accessible to the DIY set. With the right gear, soldering SMD boards is a snap – just get yourself a hot pan of sand (Youtube link, embedded below)!

The process starts with a professionally manufactured PCB, and accompanying stencil. All major PCB CAD packages are capable of generating stencil files these days, and many manufacturers will throw in a laser cut stencil for minimal extra cost with a PCB order. The board is first mounted on a stable surface, and has solder paste applied, before components are placed with tweezers. Perfect placement isn’t necessary, as the surface tension of the molten solder pulls components into their correct orientations. The populated board is then placed on a bed of sand in a frying pan, which is placed on an induction cooktop. The board is then heated until the solder melts, and all the components are neatly reflowed. Once allowed to cool, the board is done!

The trick is that the sand helps evenly heat the circuit board, while keeping it a safe distance away from the heat source. Results are good, and the process is far quicker than hand soldering. It’s easy to keep an eye on the process too. Of course, the traditional method is still to use the humble toaster oven, but new techniques are always useful. We’ve seen it done with a Bunsen burner, too. Video after the break.

Continue reading “Solder SMDs With A Pan O’ Sand” →

Gamifying Household Chores Helps Get The Kids To Pitch In

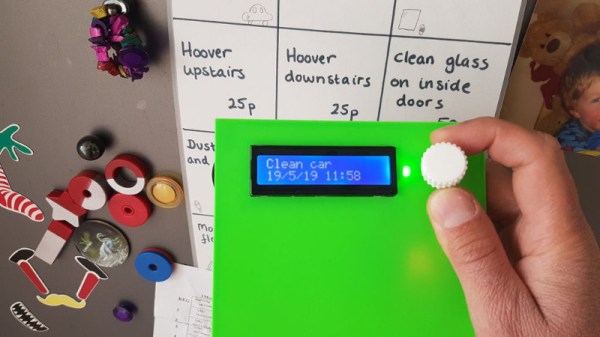
It’s rare to find anyone that gets excited about doing chores. This can lead to members of a household abrogating their duties. In these cases, enforcement is a common tactic. Tired of laminated chore grids and inconsistent results, [alastair-a] decided to tech up with an electronic chore tracking system.

[alastair-a]’s Task Manager is based around an Arduino Nano, fitted with the ever-popular HD44780-compatible LCD screen. Interfacing with the unit is via rotary encoder and RFID tag, while a real-time clock module keeps track of the time.

A custom data structure is used to manage tasks. This allows varying frequencies to be set for different tasks, as well as keeping track of the time of completion by different users. Each user has their own personal RFID tag, which can be swiped across the reader to indicate when a chore has been done.

The initial intent was to have the device print reports each week in order to reward the best performing members of the household. However, [alastair-a] reports the device was so popular with the younger members of the household, that they seem to have forgotten about rewards entirely!

We’ve seen chore reminders before; it’s often popular to build them as IoT devices.