Replacement Audi Plastics Thanks To 3D Printing

Old cars can be fun, and as long as you drive something that was once moderately popular, mechanical parts can be easy enough to come by. Things like filters, spark plugs, idle air solenoids – they’re generally available for decades after a car is out of production as long as you know where to look. However, plastics can be much harder to come by. 20 to 30 years into a car’s lifetime, and you’ll be hard pressed to find a radio surround or vent trim in as-new condition – they’ve all long ago succumbed to the sun and air like the cracked and discoloured piece in your own car. What is a hacker to do? Bust out the 3D printer, of course!

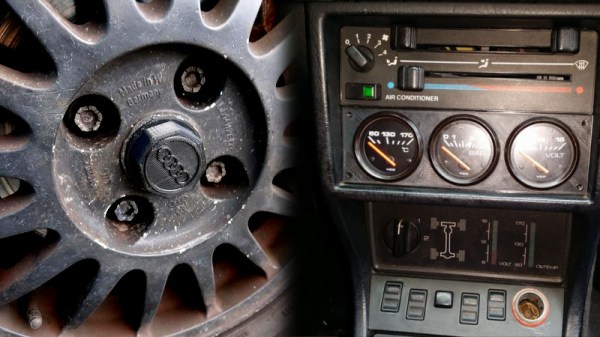
[Stephen Kraus] has developed a series of parts for his Audi, ready to print on the average home 3D printer. There’s the triple gauge mount which fits in the radio slot for that classic tuner look, to the printed wheel caps which are sure to come in handy after you’ve lost the originals. There are even useful parts for capping off the distributor if you’re switching to a more modern ignition setup. [Stephen] also reports that his replacement shifter bushing printed in PLA has lasted over a year in normal use.

This is an excellent example of what 3D printers do best – obscure, bespoke one-off parts with complex geometries are no trouble at all, and can be easily made at home. We’ve seen this done to great effect before, too – for example with this speedometer correction gear in an old truck.
Gamers Rejoice: Here’s A Fix For ASUS Strix Vega 64 Thermal Issues

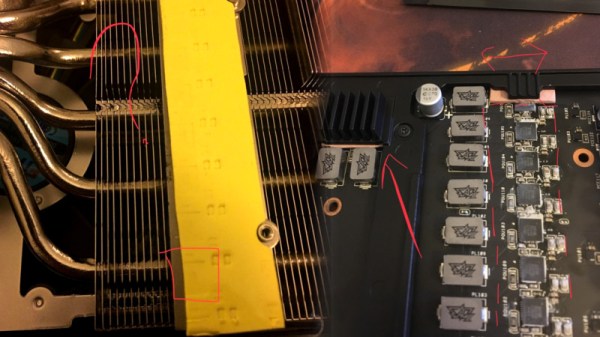
Every year, we demand our computers to be ever faster, capable of delivering progressively more eye-watering graphics and doing it all as reliably as ever. Unfortunately, sometimes, new designs miss the mark. [Cloakedbug] was having issues with voltage regulator temperatures on an ASUS Strix VEGA 64 — one of the latest RADEON graphics cards on the market — and decided to investigate.

Right away, issues were apparent; one of the main thermal pads was making poor contact with the FETs it was intended to carry heat for, and was poorly sized to boot. In a show of poor quality, the pad wasn’t nicely sized for the aluminium plate it was attached to, and was applied in a rather haphazard manner. Suspecting this was perhaps one of the root causes of the card running hot, the decision was made to replace the pad with something more suitable.

Specifying a thicker pad that was properly sized to the heatsink plate was the order of the day, and a couple of other smaller heatsink pads were also replaced, all with Thermal Grizzly Minus Pad 8. [Cloakedbug] reports a temperature drop of over 30 degrees C under load on the VR SOC bank, down from 115 C initially. It sounds like this will go a long way to keeping the card happy and healthy over time. Looking around the web, there’s definitely a few reports of thermal issues out there, so this could be a useful fix if you’re having trouble with the same card at home.

In the end, it’s a simple, tidy fix to an expensive piece of hardware that really should have shipped with this sorted from the factory. We’ve seen a fair few thermal fixes over the years here, like this one involving a thermal camera as a diagnosis tool.

[Thanks to Keith O for the tip!]

Mechanical Issues For A Pi CNC

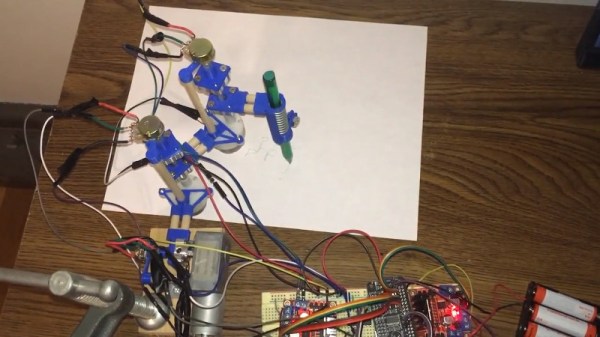
The Raspberry Pi platform has become popular in the maker community for various CNC projects. The single board computers are readily suited to acting as a server for a small CNC setup or 3D printer, though it’s fair to say that for heavy work they probably aren’t quite up to the task of driving the steppers in a serious rig directly. [Danny] set out to try to build a CNC plotter of his own, using a Pi Zero, and learned a few things along the way.

The plotter uses 3D printed parts combined with brushed DC motors which are geared down. Potentiometers are added to allow the Pi to keep track of the location of the pen. This enables the position to be corrected through feedback.

While the plotter does move and accept commands, it does have some issues. There is significant play in the gear train which [Danny] suspects of causing the poor output results. If you’ve got any ideas as to how this could be improved or overcome, throw them down in the comments!

We’ve seen another take on CNC control with the Raspberry Pi, too. Video after the break.

Continue reading “Mechanical Issues For A Pi CNC” →

Regenerative Braking Charges Your Phone

Way back when, if you wanted lights on your bike, you’d head off to the local bicycle store and purchase yourself a bottle dynamo. This would consist of a magneto that was attached to a bracket on the back of the bike and would rotate by rubbing against the rear tire, generating power for the lights. These fell out of favor over the years as batteries got better and cheaper and people grew tired of the increased drag and maintenance required. Despite this, the idea of generating power onboard a bicycle has never really gone away, and [Javier] has decided to have a crack with his imPulse project.

The formerly popular bottle dynamo had one advantage over contemporary models located in bicycle hubs – they were geared down to allow the generating device to make multiple turns for each revolution of the bicycle wheel. This is useful to allow the generating device to operate in its ideal range of rotational speed. Going for a more modern take, however, [Javier] has decided to leverage a stepper motor as his generating device of choice. Further taking advantage of modern technology, the imPulse system is designed to fit on to the caliper mounts of modern bicycles with disc brakes, allowing easy fitment while also leaving room for a geared-down drive.

[Javier] hasn’t just stopped at power generation, however – there are also plans for lighting systems and power distribution to enable the generated power to be used for a variety of purposes. It even has turn signals – though that’s not the first time we’ve seen them on a bike! Video after the break.

Continue reading “Regenerative Braking Charges Your Phone” →

Twitch Plays Battling Robots?

Audience interaction reached an all-time high in 2014 with Twitch Plays Pokemon, an online gaming stream where viewers were able to collaboratively command an emulated Game Boy playing Pokemon Red. Since then, the concept has taken off. Today, we see this extended to robots in the real world, with [theotherlonestar]’s Twitch Chat Controlled Robots.

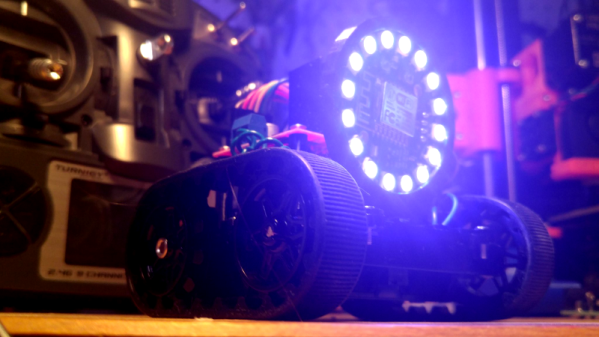
The build is one that takes advantage of modern off-the-shelf components – an ESP8266 provides the brains, while a Pololu Zumo provides a ready to go robot chassis to save time on the mechanical aspects of the build. An L298N dual motor controller then handles motive power.

The real ingenuity though, is teaching the robots to respond to commands from Twitch chat. The chat is available in a readily parsable IRC format, which makes programming around it easy. [theotherlonestar] created a command set that enables the robots to be driven remotely by stream viewers, and then outfitted the ‘bots with hammers with which to fight, as well as a fedora to tip, if one is so inclined.

It’s a cool build, and one which shows further promise as Twitch continues to reduce stream & chat latency. We look forward to seeing future battles, but the first one already excites.

Interested in where it all began? Check out our Twitch Plays Pokemon coverage from way back when. Video after the break.

Continue reading “Twitch Plays Battling Robots?” →

Automatic Sunglasses, The Electromechanical Way

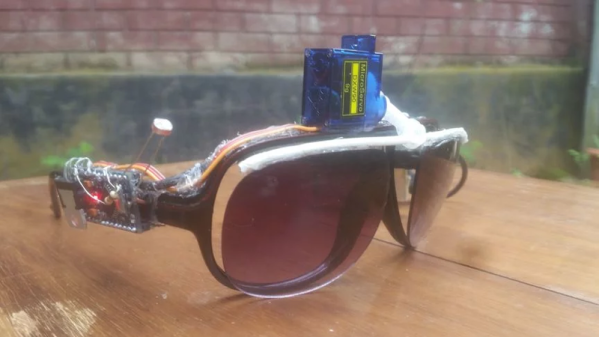
These days, photochromic lenses are old-hat. Sure, it’s useful to have a pair of glasses that automatically tints due to UV light, but what if you want something a little more complex and flashy? Enter [Ashraf Minhaj]’s SunGlass-Bot.

The build is simple, beginning with an Arduino Pro Mini for reasons of size. Connected to the analog input is a light-dependent resistor for sensing the ambient light level. This reading is then used to decide whether or not to move the servo which controls the position of the lenses. In low light, the lenses are flipped up to allow clear vision; in brighter light, the lenses flip down to protect the eyes. Power is supplied by a homebrew powerbank that it appears [Ashraf] built from an old phone battery and a small boost converter board. All the files to recreate the project are available on Github, too.

It’s a fun build that [Ashraf] shows off in style. While this may not be as effortless as a set of Transition lenses or as quick as a welding mask filter, it has a certain mechanical charm that wouldn’t be out-of-place in a certain sci-fi aesthetic.

Hungry for more? Check out these self-blending sunglasses we featured a while back. Video after the break.

Continue reading “Automatic Sunglasses, The Electromechanical Way” →

Looking At Wind Turbines From A Different Angle

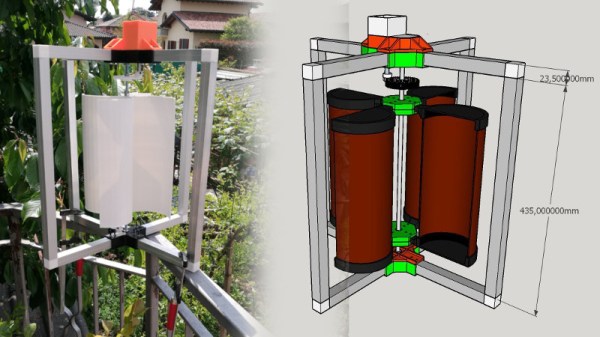
When we think of wind turbines, the first thing that usually comes to mind is the typical Sim City-esque type – 3 blades, gigantic, and wired into the municipal power grid. In truth, the world of wind power generation is far more varied indeed – as [Vittorio]’s vertical-axis wind turbine shows us.

So what exactly is a vertical-axis wind turbine, you ask? Well, rather than the typical setup with blades rotating about a horizontal axis, as in typical utility turbines or a classic electric fan you might use to cool off on a sunny day, instead a vertical axis is used. This necessitates a very different blade design due to the orientation of the rotational axis relative to the flow, so such turbines can be quite visually striking to those unfamiliar with such designs.

[Vittorio]’s design is a great way to get to grips with the type. The blades and supports were initially created out of PVC gutter channel, though 3D printed versions have also been developed. The motion is turned into electricity by using a simple brushed DC motor as a dynamo.

While the scale is small and the output only in the tens of watts, it goes to show that there’s always more than one way to do things.  We’ve seen some vertical-axis wind projects before, too. Video after the break.

Continue reading “Looking At Wind Turbines From A Different Angle” →