Lasercut Gears – A Learning Experience

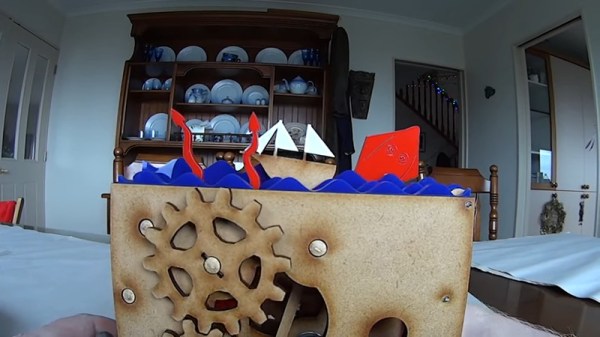
Lasercutters are fantastic tools: they’re highly useful for making flat things, or even flat things that you later bend! This makes them particularly well suited for making gears out of flat stock. [sharvfish] needed to get his hands dirty with producing some gears for his automaton, and decided to share what he learned in the process.

The gears in question are cut out of MDF board, which is readily usable on all but the feeblest lasercutters you’ll find in the average makerspace. The first problem faced was when producing gears with low tooth counts – depending on the exact geometry used, teeth with lower counts can tend to jam easily. For [sharvfish]’s gears, 6 teeth seems to be just a touch too small to work well. Other issues cropped up around the kerf of the cuts affecting the gear mesh and the use of pins to improve the coupling of the gears to the shaft, which [sharvfish] expands upon in the video. There’s also a cheeky cephalopod cameo, too.

It’s always interesting to see the unique challenges faced in the undertaking of a project; we could see six more lasercut projects this week, and we’d likely see six unique problems the builders faced as well. It’s a great insight into the build process and it’s great when makers share their journey as well as the finished product. Video after the break.

Wondering what lasercut gears can do for you? Check out this build that rotates an entire television.
Continue reading “Lasercut Gears – A Learning Experience” →

Homebuilt CNC Software, Brewed To Taste

Mainstream productivity software from the big companies is usually pretty tight, these days. Large open source projects are also to a similar standard when it comes to look and feel, as well as functionality. It’s when you dive into more niche applications that you start finding ugly, buggy software, and CNC machining can be one of those niches. MillDroid is a CNC software platform designed by someone who had simply had enough, and decided to strike out on their own.

The build began with the developer sourcing some KFLOP motion control boards from Dynomotion. These boards aren’t cheap, but pack 16MB of RAM, a 100-gate FPGA, and a microcontroller with DSP hardware that allows the boards to control a variety of types of motor in real time. These boards have the capability to read GCODE and take the load off of the computer delivering the instructions. With the developer wanting to build something robust that moved beyond the ’90s style of parallel port control, these boards were the key to the whole show, also bringing the benefit of being USB compatible and readily usable with modern programming languages.

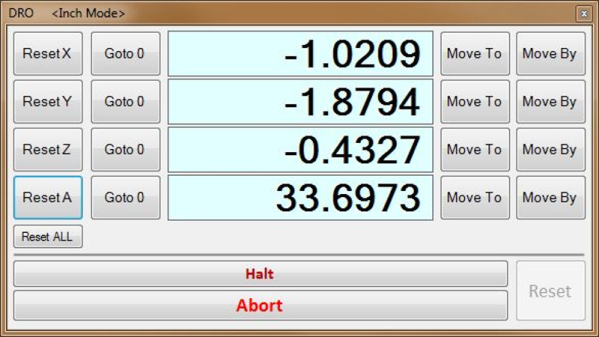
To keep things manageable and to speed development, the program was split into modules and coded using the author’s existing “Skeleton Framework” for windowed applications. These modules include a digital readout, a jogging control panel, as well as a tool for editing G-code inside the application.

For the beginner, it’s likely quite dense, and for the professional machinist, industry standard tools may well surpass what’s being done here. But for the home CNC builder who is sick of mucking around with buggy, unmaintained software from here and there, it’s a project that shows it doesn’t have to be that bad. We look forward to seeing what comes next!

Want to see what else is out there? We’ve done a run down of DIY-appropriate CNC software, too.

Need A Tiny CRT? Karaoke Might Just Help

[Brett] is working on a video installation, and for the past few months, has been trying to get his hands on tiny CRTs any way he can. After initially coming up short, he happened across a karaoke machine from 2005, and got down to work.

Karaoke machines of this vintage are typically fairly low-rent affairs, built cheaply on simple PCBs. [Brett] found that the unit in question was easy to disassemble, having various modules on separate PCBs joined together with ribbon cables and headers. However, such machines rarely have video inputs, as they’re really only designed to display low-res graphics from CD-G format discs.

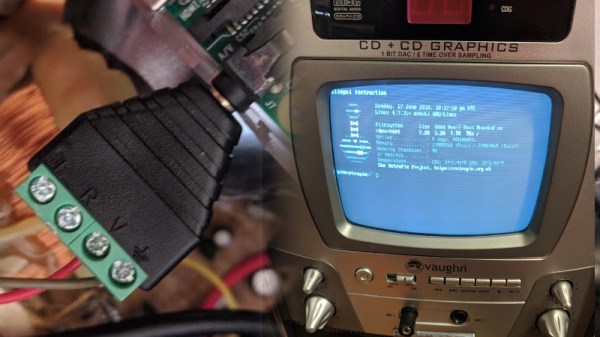
While investigating the machine, initial research online proved fruitless. In the end, a close look at the board revealed just what [Brett] was looking for – a pin labeled video in! After throwing in a Raspberry Pi Zero and soldering up the composite output to the karaoke machine’s input pin, the screen sprung to life first time! This initial success was followed by installing a Raspberry Pi 3 for more grunt, combined with a Screenly install – and a TRS adapter the likes of which we’ve never seen before. This allows video to be easily pushed to the device remotely over WiFi. [Brett] promises us there is more to come.

Karaoke is a sparse topic in the Hackaday archives, but we’ve seen a couple builds, like this vocal processor. If you’ve got the hacks, though? You know where to send ’em.

Building The Terminator’s Arm

The Cyberdyne Systems Series 800 Terminator is a highly capable robot that happens to look an awful lot like Arnold Schwarzenegger. It boasts an advanced metallic endoskeleton, which has been the inspiration for many DIY prop builds over the years. [KenToonz] has decided to take on just such a project and invites viewers along for the ride. (YouTube, embedded below.)

The project is a particularly interesting one, as it involves the recreation of a robotic imitation of a human hand and arm. Thankfully, due to the hard work of dedicated individuals, blueprints of the original movie item are available online. These aren’t fully functional, per se, but give the aspiring builder a strong basis to get the look and feel right, while leaving room for modifications for those who wish to build something that moves and operates in the expected way. [KenToonz] intends to do exactly that, and contemplates the installation of various springs and other mechanisms to enable the joints to extend and retract properly.

[KenToonz] starts from the fingers, working back towards the forearm before beginning to add the various interstitial pieces that make it all work together as an assembly. The machining involved covers everything from small metal pieces of the digits to producing custom springs for the moving parts. We can’t wait to see the finished product once it’s all finished!

We’ve seen some great prop builds before, too – like this tricorder worthy of Mr Spock.

Continue reading “Building The Terminator’s Arm” →

Air Quality Readings At A Glance

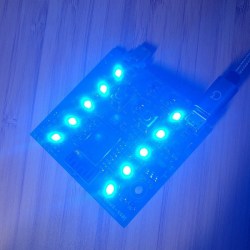
Since the industrial age, air pollution has increasingly become a problem on society’s radar. Outside of concerns about global warming and greenhouse gases, particulate emissions can be highly hazardous to human health. Over time, various organizations have set up measuring systems to check and report the particulate pollution level in cities around the world – but what if you could get an immediate idea on the pollution in your immediate vicinity? Enter less-smog.org.

The prototype under test.

In an integration sense, it’s a straightforward project. An ESP-12F is used as the brains behind the operation. This then talks to a combination of sensors to measure the local air quality. The system is set up to use a variety of temperature or humidity sensors depending on what the builder has to hand. As for particulate concentration measurements, those are achieved with the use of a PMS7003 sensor. This device shines a laser into a cavity containing an air sample from the surrounding environment and measures the scattered light to determine the concentration of particles in the PM2.5 range. This is the range most commonly used to make judgments on air quality regarding human health.

Data is collected and then output to a series of bright RGB LEDs. By turning the numerical PM2.5 reading into a color output, it becomes much simpler to get an instant idea of the pollution conditions in the immediate area. This has the benefit of being readable by even very young children, or those with poor eyesight, at the cost of leaving the colorblind and otherwise vision impaired at a loss.

The project presents a tidy way to create a series of indicators in a modern public environment that can give the average person an at-a-glance reading of whether its advisable to stay out or to head inside until conditions improve. We’d love to see this project deployed in cities to both collect data and help people gain a better understanding of the air quality around them.

A Graph Plotting Metal Detector

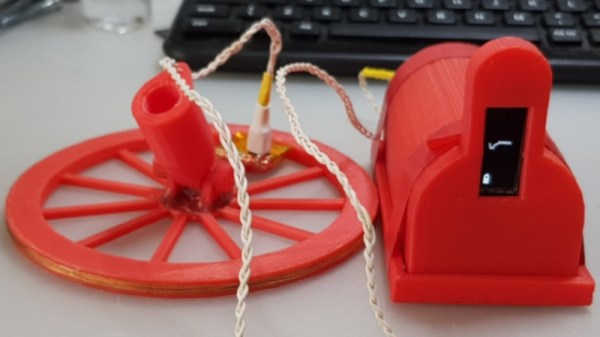
Metal detectors can be a great source of fun, and occasionally even found wealth. They allow the detection of metal objects at a distance, enabling hidden treasures to be discovered. They’re also highly critical to the work of minesweepers and unexploded ordnance disposal teams. [Andrius] wanted to add such a device to his kit when motorcycling through the woods of Lithuania, and thus decided to undertake a build of his own. (Editor’s note: original link went bad, this is through the Wayback Machine.)

The detector is a thoroughly modern one – fans of the 555 may want to look away now. A Collpits oscillator, built from two transistors, is used to generate a frequency that is passed through the detection coil. This frequency is measured by an Arduino that plots a graph of the received frequency on an OLED display. As the coil is passed near metal objects, the oscillator frequency changes, and this is visible on the frequency plot on-screen.

Not only is it a quick and easy build that is achievable from what are now junkdraw components, it’s also one that would be readily usable by the hearing-impaired, too. It’s a great project to tackle if you’re looking to get to grips with basic oscillators, frequency measurement, or just microcontroller programming in general.

Still need more inspiration? We’ve seen a similar concept executed before.

LEDs Make An “Analog” Wristwatch

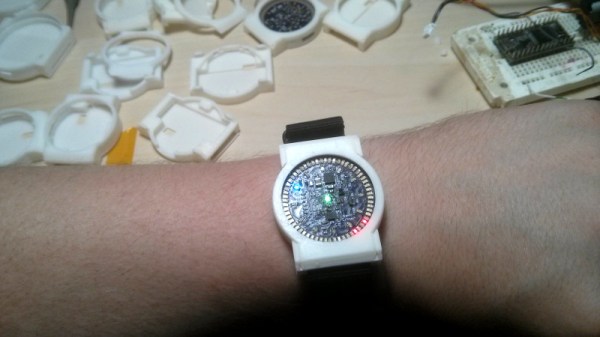
If you just came down in the last shower, you’re probably used to living in a world where LEDs are cheap, awesome, and practically everywhere. Spare a thought for those of us who lived before the invention of high brightness LEDs – these things still amaze us! A great example of how far we’ve come is this “analog” watch build by [Kevin], featuring no less than 73 of the critters.

The microcontroller running the watch is an STM32, chosen for its easy programmability. It’s running the LEDs in an emulation of the dial of an analog clock, hence the high part count. Naturally, it’s no simple task to cram 73 LEDs and all the necessary connections into the confines of a watch-sized PCB. [Kevin] goes into great detail about the challenges involved, from routing the traces to a tricky power draw problem caused by some odd blue LEDs.

Watch builds are always fun, and they make great conversation pieces for when you want to amaze strangers with your tales of battles fought in the PCB design suite. Now check out this similar build with an entirely different style.