Pixel Graphics From An HD44780, By Cutting Wires

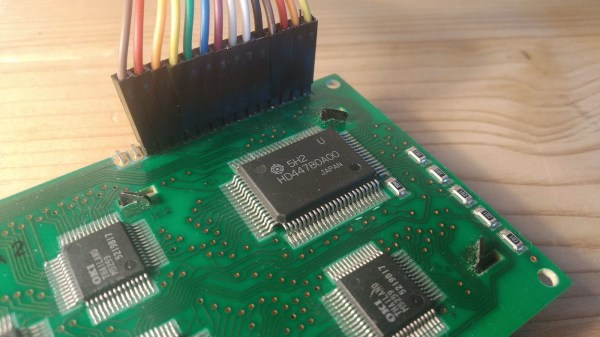
[Felipe Tavares] wasn’t satisfied with the boring default fonts on an HD44780-based display. And while you can play some clever tricks with user-defined characters, if you want to treat the display as an array of pixels, you’ve got to get out your scalpel and cut up a data line.

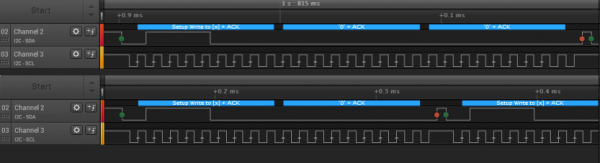
The hack builds on work from [MisterHW] who documented the bits going from the common display driver to the display, and suggested that by cutting the data line and sending your own bits, you could send arbitrary graphics. The trick was to make sure that they’re in sync with the display, though, which means reading the frame sync line in user code.

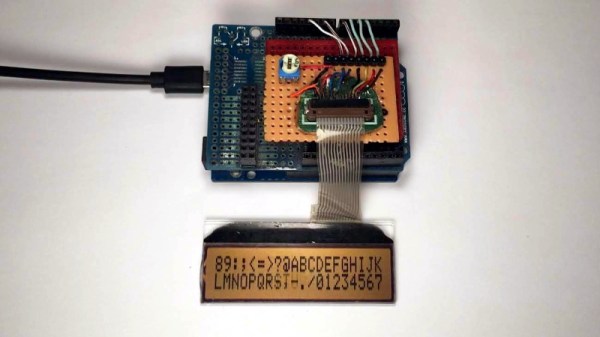
This done, it looks like [Felipe] has it working! If you can read Rust for the ESP32, he has even provided us with a working demo of the code that makes it work.

We can’t help but wonder if it’s not possible to go even lower-level and omit the HD44780 entirely. Has anyone tried driving one of these little LCD displays directly from a microcontroller, essentially implementing the HD44780 yourself?

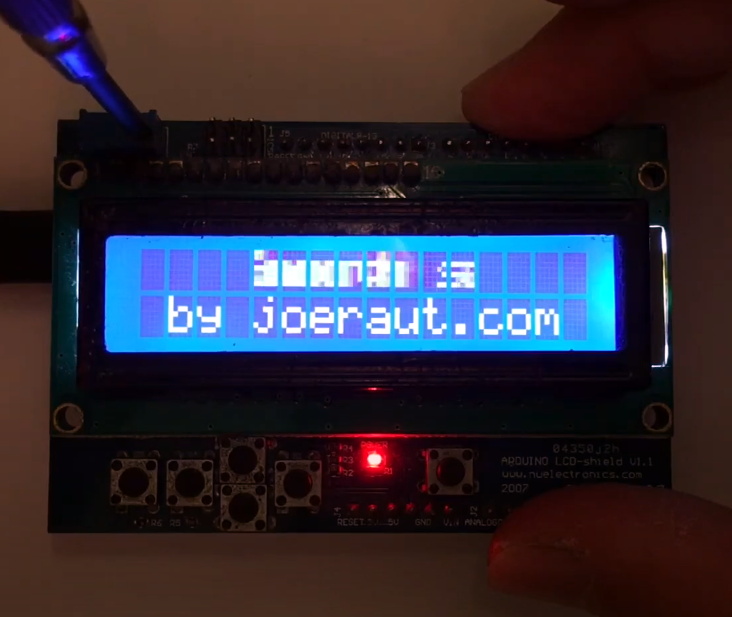
Any way you slice it, this is a cool hack, and it opens up the doors to DOOM, or as [MisterHW] suggests, Bad Apple on these little displays . If you do it, we want to see it.

If your needs aren’t so exotic, the classic HD44780 display is a piece of cake to get working, and an invaluable tool in anyone’s toolbox.

Displays We Love Hacking: The HD44780 Family

There are too many different kinds of displays – some of them, you already know. I’d like to help you navigate the hobbyist-accessible display world – let’s take a journey together, technology by technology, get a high-level overview of everything you could want to know about it, and learn all the details you never knew you needed to know. In the end, I’d like you to be able to find the best displays for any project you might have in mind, whatever it could be.

There’s a HD44780 clone IC under this epoxy blob! CC0 1.0

Today, let’s take a look at a well-known LCD technology – the HD44780 displays, a type of display that we hobbyists have been working with since the 1980s. Its name comes from the HD44780 driver chip – a character display driver IC that connects to a raw display panel and provides an easy interface.

HD44780 displays are not known for power efficiency, cutting-edge technology, ultimate flexibility, or small size, for that matter. However, they’re tried and true, easy to drive, require little to no computing power on your MCU, and you will be able to buy them for the foreseeable future. They’re not about to get taken off the market, and they deserve a certain kind of place in our parts boxes, too.

If you work with HD44780 displays for a project or two, you might acquire a new useless superpower – noticing just how many HD44780 displays are still in use in all sorts of user-facing devices, public or private. Going out and about in your day-to-day life, you can encounter a familiar 16 x 2 grid of characters in cash registers, public transport ticket machines, home security panels, industrial and factory equipment, public coffee machines, and other microcontroller-assisted places of all kinds! Continue reading “Displays We Love Hacking: The HD44780 Family”

Smooth(er) Text Scrolling On HD44780 LCDs

Most Hackaday readers are likely to be familiar with character LCDs driven by the extremely common Hitachi HD44780 controller chip. If you’re looking for a cheap and easy way for your microcontroller project to display some data, they’re pretty much the go-to solution. But as popular as these displays are, there’s no denying that they’re starting to look a bit dated in 2020. Which is why the tweaks [Joseph Rautenbach] is working on are so interesting.

With one of these displays, the controller puts a single character on each 5×8 block of pixels. There’s also support for creating custom characters, which can be used for rudimentary icons. You’re pretty limited by the per-block resolution, but with a little imagination, you can usually get the point across. With a bit of dead space between each block of the display there’s little point in trying to make icons that “bridge” multiple blocks, as they’ll always be segmented.

Hardware support is not guaranteed.

But as [Joseph] realized, that’s less of a problem for scrolling text. So he wrote some code that takes an ASCII string and breaks it down into partial letters and numbers which can be displayed as custom characters. The controller only has space for 8 of these characters though, so the code needs to continually step through the string and generate the appropriate offset characters as the position of the text changes.

While the effect looks pretty good in the video after the break, [Joseph] has found that real-world utilization is a bit finicky. He tried the same code on one of the displays that uses white text on a blue background, and the scrolling text ended up ghosting together so it looked like gibberish. So while he’s released the source code for others to experiment with this trick, your mileage may vary.

This certainly isn’t the first time we’ve seen somebody make clever use of custom characters on the HD44780. We’ve seen it used for an exceptionally tiny game of Tetris, a rendition of Conway’s Game of Life, and even a horizontal space-shooter.

Continue reading “Smooth(er) Text Scrolling On HD44780 LCDs”

Fail Of The Week: Reset Issues With 595 And HD44780

fotw-reset-issues-595-character-lcd

We really like to see hardware hackers stepping out of the safe and polished boundaries of available Arduino libraries. One example of this is a project which [Matteo] thought worked: using a shift register to drive a character LCD. This can be a desirable way to do things, because it takes the GPIO usage down from six to just three connections. If you don’t remember seeing that one earlier this month take another look. The gist of it is that [Matteo] hacked one function in the LiquidCrystal library to make it happen.

What makes this a truly great fail is that the problem was not immediately apparent, and is difficult to reliably reproduce. The LCD is unstable depending on how the Arduino board is reset. When connecting the Arduino to a computer the screen doesn’t work until you press the reset button. But press the reset button repeatedly and you get a non-functional screen plus the gibberish seen above.

There’s not much to go on here, but we think it’ll be a lot of fun to state your theory on the malfunction and suggesting for testing/fixing the issue. This could be a lot of things, the controller on the display getting mixed-up, the 595 missing an edge (or something along those lines). Do you fix this with hardware (ie: capacitor to avoid voltage dip), a software issue (need a longer delay after startup), or a combination of the two?


2013-09-05-Hackaday-Fail-tips-tileFail of the Week is a Hackaday column which runs every Wednesday. Help keep the fun rolling by writing about your past failures and sending us a link to the story — or sending in links to fail write ups you find in your Internet travels.

Using An HD44780 Character LCD With The Raspberry Pi

[Tech2077] is one of the lucky ones who already got his hands on a Raspberry Pi. He’s been looking into different interface options with the GPIO header and just posted a guide to using an HD44780 character display with the RPi. We like this approach because instead of doing some hard-core LCD work he’s using prototyping equipment you probably already have on hand.

Getting a character LCD running should be really simple. The gotcha is the logic level gap between the devices. If you’ve been working with Arduino, your add-ons are probably meant for a 5V power rail  and logic levels. The RPi outputs 3.3V logic. You could use a level converter (you’d need at least 7 pins to be converted in this case) or you can be a bit more clever. [Tech2077] grabbed an I2C port expander that uses just 2 of the RPi lines to address even lines of the display (four data bits plus three control bits). This is a bit of a hack, as the 3.3V logic is 0.2V below the recommended minimum for a digital 1 on the port expander. But it seems to work just fine! If it didn’t, a couple of NPN transistors would do the trick as well.

Addressing the new peripheral is just a matter of loading the i2c module and writing some Python.

Spectrum Analyzer Users Custom Characters On An HD44780 Display

[Camilo] built a spectrum analyzer to use with his audio system (translate). The hardware is quite simple, using an op-amp, microcontroller and LCD display. He chose an LMV324M low-voltage op-amp which connects to the incoming audio signal and feeds its output to the microcontroller’s ADC. In this case, he chose a Freescale microcontroller from the HCS08 family which is running at 20 MHz. This gives the project enough speed to properly analyze the incoming audio. He mentions that he’s following the guidelines set forth in the Nyquist-Shannon sampling theorem and using the Fast Fourier Transform when processing the samples.

This isn’t the first time we’ve seen a character LCD used as a display for a frequency analyzer. This other ATmega8-based rendition supported several different screen layouts. These displays have enough RAM to store eight custom characters. Each character is 5×8 pixels, lending eight levels to each character for a total of 16 for each column seen above. We love the simplicity of the hardware in the project but we wouldn’t mind seeing an additional potentiometer to fine-tune how the data is displayed on the screen to take advantage of its full range. See the project in action in the clip after the break.

Continue reading “Spectrum Analyzer Users Custom Characters On An HD44780 Display”

I2C For Hackers: Digging Deeper

Last time, I gave you an overview of what you get from I2C, basics like addressing, interface speeds, and a breakdown of pullups. Today, let’s continue looking into I2C capabilities and requirements – level shifting, transfer types, and quirks like combined transfers or clock stretching.

Level Shifting

Continue reading “I2C For Hackers: Digging Deeper”