High-Power Laser Salvaged From Headlights

[DiodeGoneWild]’s latest video lives up to the name. He takes apart a laser headlight to recover a pretty powerful blue laser. You can see the video, below.

The headlights work with blue laser diodes that excite phosphor to produce white light. Removing the outside trappings revealed a three-pin laser diode (the case is the third pin). There’s also a substantial heatsink. Removing the diode from the assembly is difficult, but it is easy enough to leave it in the heatsink and use the existing connector.

Of course, the phosphor and a filter have to go. Some destructive work with a screwdriver and pliers broke out the optics from a diode he’d destroyed trying to remove it. Then he replaced the optics on the remaining diode with the modified housing.

With a low-current test, the diode didn’t lase but did act as a regular LED. More current did the trick, though. The laser without the optics made a line rather than a spot but still had enough power to melt some plastic and light matches. To get a parallel beam, the internal lens needs to move closer to the diode, and a drill bit allowed that to happen, which reduced the beam’s divergence quite a bit, but didn’t create the best result.

With the proliferation of cheap laser modules, it is really worth scrapping a headlight? Maybe. But it is an interesting look inside of a modern headlight, either way. We’ve peeked inside these headlights before. Maybe you can turn those old headlights into an oven.

Continue reading “High-Power Laser Salvaged From Headlights”

More Mirrors (and A Little Audio) Mean More Laser Power

Lasers are pretty much magic — it’s all done with mirrors. Not every laser, of course, but in the 1980s, the most common lasers in commercial applications were probably the helium-neon laser, which used a couple of mirrors on the end of a chamber filled with gas and a high-voltage discharge to produce a wonderful red-orange beam.

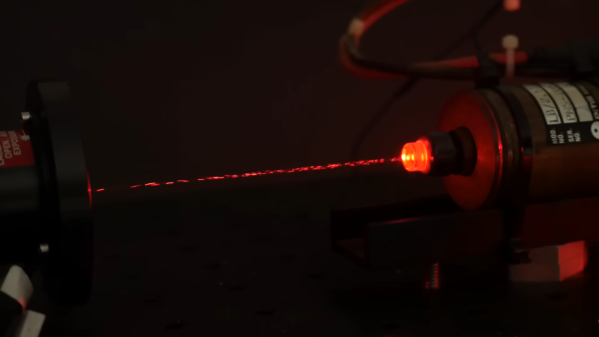
The trouble is, most of the optical power gets left in the tube, with only about 1% breaking free. Luckily, there are ways around this, as [Les Wright] demonstrates with this external passive cavity laser. The guts of the demo below come from [Les]’ earlier teardown of an 80s-era laser particle counter, a well-made instrument powered by a He-Ne laser that was still in fine fettle if a bit anemic in terms of optical power.

[Les] dives into the physics of the problem as well as the original patents from the particle counter manufacturer, which describe a “stabilized external passive cavity.” That’s a pretty fancy name for something remarkably simple: a third mirror mounted to a loudspeaker and placed in the output path of the He-Ne laser. When the speaker is driven by an audio frequency signal, the mirror moves in and out along the axis of the beam, creating a Doppler shift in the beam reflected back into the He-Ne laser and preventing it from interfering with the lasing in the active cavity. This forms a passive cavity that greatly increases the energy density of the beam compared to the bare He-Ne’s output.

The effect of the passive cavity is plain to see in the video. With the oscillator on, the beam in the passive cavity visibly brightens, and can be easily undone with just the slightest change to the optical path. We’d never have guessed something so simple could make such a difference, but there it is.

Continue reading “More Mirrors (and A Little Audio) Mean More Laser Power”

Faux Silkscreen On A PCB Made With A Laser Cutter

If you’re getting PCBs professionally made, silkscreen usually comes free as part of the package. However, if you’re making your own, the job is on you. [Tony Goacher] makes his own PCBs on a CNC router, so he’s not getting any silkscreening as part of that bargain. But he wondered—could he do something analogous with a laser cutter?

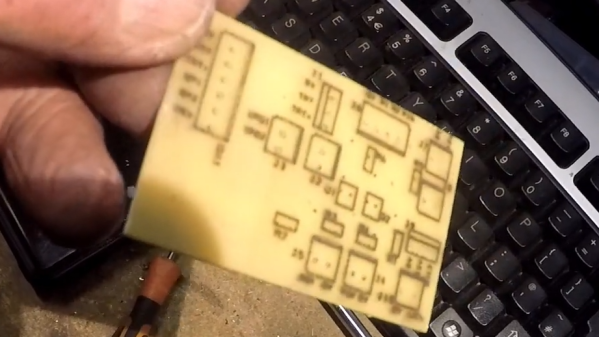
The answer is yes. The silkscreen layer was first exported from DesignSpark, with the file then sent to LightBurn to prep it for laser cutting. The board outline layer was first engraved on to a piece of scrap as an alignment aid. Then, the board was placed in the laser cutter, with the silkscreen scorched directly on to the fiberglass.

The results are encouraging, if imperfect. [Tony] says he ran at “quite fast speed at quite high power.” The markings are all there, but they’re a little melty and difficult to read. He noted at lower speeds and lower power, the results were a bit more readable.

PCBs aren’t really an ideal engraving or laser marking material, but this technique could be servicable for some basic markings on DIY PCBs. We look forward to seeing how [Tony] improves the process in future. Video after the break.
Continue reading “Faux Silkscreen On A PCB Made With A Laser Cutter”

High-Voltage Fun With An Inexpensive Power Supply

It used to be that nearly every home had at least one decent high-voltage power supply. Of course, it was dedicated to accelerating electrons and slamming them into phosphors so we could bathe ourselves in X-rays (not really) while watching Howdy Doody. These days the trusty tube has been replaced with LEDs and liquid crystals, which is a shame because there’s so much fun to be had with tens of thousands of volts at your disposal.

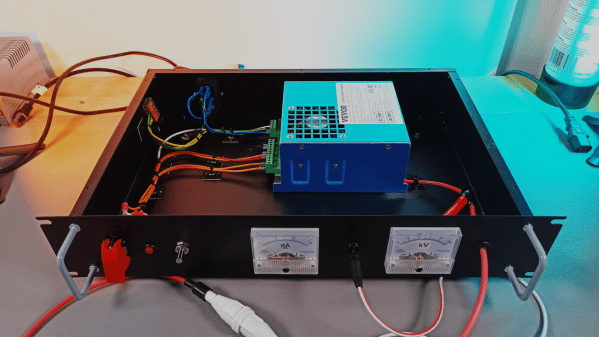
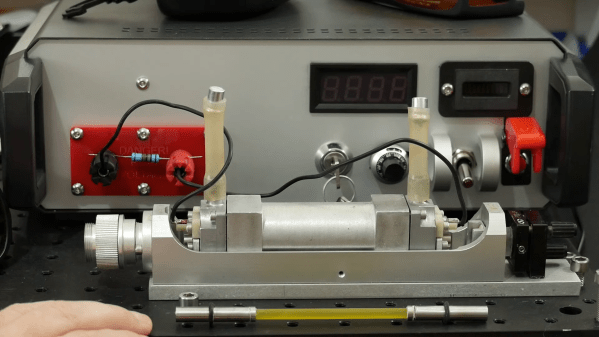
That’s the impetus behind this inexpensive high-voltage power supply by [Sebastian] over at Baltic Labs. The heavy lifting for this build is done by a commercially available power supply for a 50-watt CO2 laser tube, manufactured — or at least branded — by VEVOR, a company that seems intent on becoming the “Harbor Freight of everything.” It’s a bold choice given the brand’s somewhat questionable reputation for quality, but the build quality on the supply seems decent, at least from the outside. [Sebastian] mounted the supply inside a rack-mount case, as one does, and provided some basic controls, including the obligatory scary-looking toggle switch with safety cover. A pair of ammeters show current and voltage, the latter with the help of a high-voltage resistor rated at 1 gigaohm (!). The high-voltage feedthrough on the front panel is a little dodgy — a simple rubber grommet — but along with the insulation on the high-voltage output lead, it seems to be enough.

The power supply’s 30 kV output is plenty for [Sebastian]’s current needs, which from the video below appear to mainly include spark gap experiments. He does mention that 50 kV commercial supplies are available too, but it would be tough to do that for the $150 or so he spent on this one. There are other ways to go, of course — [Niklas] over at Advanced Tinkering recently shared his design for a more scratch-built high-voltage supply that’s pretty cool too. Whatever you do, though, be careful; we’ve been bitten by a 50 kV flyback supply before and it’s no joke.

Continue reading “High-Voltage Fun With An Inexpensive Power Supply”

Hackaday Podcast Episode 249: Data By Laser And Parachute, Bluetooth Hacks, Google’s Gotta Google

‘Twas the podcast before Christmas, and all through the house, the best hacks of the week are dancing around Elliot and Tom’s heads like sugar-plums. Whatever that means.

I’d just like to interject for a moment. What you’re referring to as Christmas is, in fact, Happy/Holidays.

Before settling their brains in for a long winter’s nap, they’ll talk about the open source software podcast that now calls Hackaday home, the latest firmware developments for Google’s Stadia controller, high-definition cat videos from space, and upgrades for the surprisingly old-school battery tech that powers the Toyota Prius.

Out on the lawn, expect a clatter about the the state-of-the-art in DIY camera technology, the acoustic properties of hot chocolate, and a storage media from the 1990s that even Al Williams had never heard of.

Finally, after tearing open the shutters and throwing up the sash, the episode wraps up with a discussion about wiring techniques that let you leave the soldering iron at home, and the newest chapter in the long history of transferring data via parachute. Miniature sleigh and eight tiny reindeer sold separately.

Download the gift you really want this year: this week’s podcast in DRM-free MP3.

Continue reading “Hackaday Podcast Episode 249: Data By Laser And Parachute, Bluetooth Hacks, Google’s Gotta Google”

Homemade Raman Laser Is Shaken, Not Stirred

You wouldn’t think that shaking something in just the right way would be the recipe for creating laser light, but as [Les Wright] explains in his new video, that’s pretty much how his DIY Raman laser works.

Of course, “shaking” is probably a gross oversimplification of Raman scattering, which lies at the heart of this laser. [Les] spends the first half of the video explaining Raman scattering and stimulated Raman scattering. It’s an excellent treatment of the subject matter, but at the end of the day, when certain crystals and liquids are pumped with a high-intensity laser they’ll emit coherent, monochromatic light at a lower frequency than the pumping laser. By carefully selecting the gain medium and the pumping laser wavelength, Raman lasers can emit almost any wavelength.

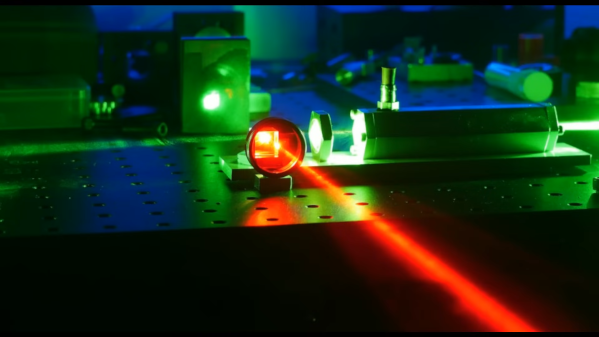
Most gain media for Raman lasers are somewhat exotic, but luckily some easily available materials will work just fine too. [Les] chose the common solvent dimethylsulfoxide (DMSO) for his laser, which was made from a length of aluminum hex stock. Bored out, capped with quartz windows, and fitted with a port to fill it with DMSO, the laser — or more correctly, a resonator — is placed in the path of [Les]’ high-power tattoo removal laser. Laser light at 532 nm from the pumping laser passes through a focusing lens into the DMSO where the stimulated Raman scattering takes place, and 628 nm light comes out. [Les] measured the wavelengths with his Raspberry Pi spectrometer, and found that the emitted wavelength was exactly as predicted by the Raman spectrum of DMSO.

It’s always a treat to see one of [Les]’ videos pop up in our feed; he’s got the coolest toys, and he not only knows what to do with them, but how to explain what’s going on with the physics. It’s a rare treat to watch a video and come away feeling smarter than when you started.

Continue reading “Homemade Raman Laser Is Shaken, Not Stirred”

Tattoo-Removal Laser Brought Out Of Retirement For A Megawatt Of Fun

We’ve got to say that [Les Wright] has the most fun on the internet, at least in terms of megawatts per dollar. Just look at his new video where he turns a $30 eBay tattoo-removal laser into a benchtop beast.

The junk laser in question is a neodymium:YAG pulse laser that clearly has seen better days, both externally and internally. The original pistol-grip enclosure was essentially falling apart, but was superfluous to [Les]’ plans for the laser. Things were better inside the business end of the gun, at least in terms of having all the pieces in place, but the teardown still revealed issues. Chief among these was the gunk and grunge that had accumulated on the laser rod and the flash tube — [Les] blamed this on the previous owner’s use of tap water for cooling rather than deionized water. It was nothing a little elbow grease couldn’t take care of, though. Especially since the rest of the laser bits seemed in good shape, including the chromium:YAG Q-switch, which allows the lasing medium to build up a huge pulse of photons before releasing them in one gigantic pulse.

Cleaned up and with a few special modifications of his own, including a custom high-voltage power supply, [Les]’ laser was ready for tests. The results are impressive; peak optical power is just over a megawatt, which is enough power to have some real fun. We’ll be keen to see what he does with this laser — maybe blasting apart a CCD camera?

Continue reading “Tattoo-Removal Laser Brought Out Of Retirement For A Megawatt Of Fun”