Faux Silkscreen On A PCB Made With A Laser Cutter

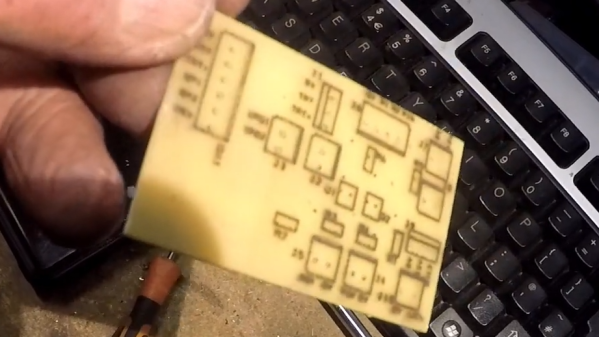
If you’re getting PCBs professionally made, silkscreen usually comes free as part of the package. However, if you’re making your own, the job is on you. [Tony Goacher] makes his own PCBs on a CNC router, so he’s not getting any silkscreening as part of that bargain. But he wondered—could he do something analogous with a laser cutter?

The answer is yes. The silkscreen layer was first exported from DesignSpark, with the file then sent to LightBurn to prep it for laser cutting. The board outline layer was first engraved on to a piece of scrap as an alignment aid. Then, the board was placed in the laser cutter, with the silkscreen scorched directly on to the fiberglass.

The results are encouraging, if imperfect. [Tony] says he ran at “quite fast speed at quite high power.” The markings are all there, but they’re a little melty and difficult to read. He noted at lower speeds and lower power, the results were a bit more readable.

PCBs aren’t really an ideal engraving or laser marking material, but this technique could be servicable for some basic markings on DIY PCBs. We look forward to seeing how [Tony] improves the process in future. Video after the break.
Continue reading “Faux Silkscreen On A PCB Made With A Laser Cutter”

Kerfmeter Measures Laser Cutter Kerf Allowances On The Fly

Nothing beats a laser cutter and a sheet of Baltic birch plywood or MDF when it comes to making quick, attractive enclosures. Burning out all the pieces and fitting them together with finger joints is super satisfying — right up until you realize that you didn’t quite get the kerf allowance right, and your pieces don’t fit together very nicely. If only there was a way to automate kerf measurement.

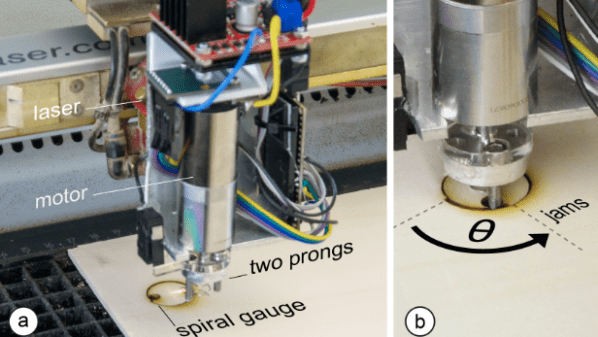
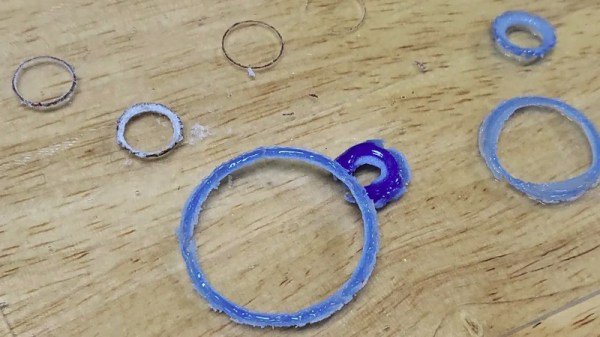
There is, in the form of Kerfmeter. It comes to us by way of the lab of [Patrick Baudisch] at the University of Potsdam, where they’ve come up with a clever way to measure the kerf of a laser cutter right during the cutting session. With the Kerfmeter mounted directly to the laser cutter head, a small test artifact based on an Archimedean spiral is cut into a corner of the workpiece. Pins on a small motor engage with the object and turn it until it jams in its hole; the wider the kerf, the greater the angle. Once the kerf is calculated, the rest of the design can be dilated by the proper amount to achieve a perfect fit. The video below shows it better than words can explain it.

What we like about this is its simplicity — all it involves is a motor and a microcontroller, plus a little software. It seems much faster than using a traditional kerf gauge, not to mention more precise. And while it does use up a little bit of material, the test pattern is really pretty small, all things considered. Seems like a reasonable trade-off to us. Still, if you want to figure out your kerfs the old-fashioned way, we’ve got you covered.

Continue reading “Kerfmeter Measures Laser Cutter Kerf Allowances On The Fly”

This Found-Sound Organ Was Made With Python And A Laser Cutter

Some readers will no doubt remember attaching a playing card to the front fork of their bicycle so that the spokes flapped the card as the wheel rotated. It was supposed to sound like a motorcycle, which it didn’t, but it was good, clean fun with the bonus of making us even more annoying to the neighborhood retirees than the normal baseline, which was already pretty high.

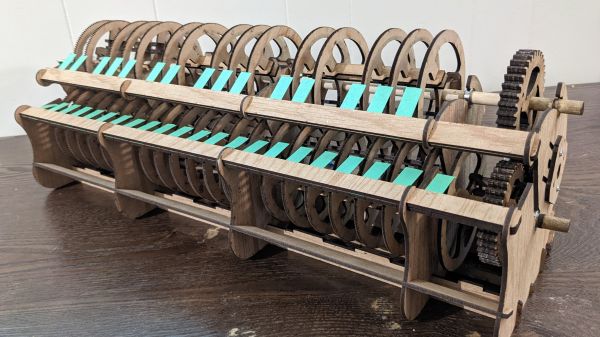
[Garett Morrison]’s “Click Wheel Organ” works on much the same principle as a card in the spokes, only with far more wheels, and with much more musicality. The organ consists of a separate toothed wheel for each note, all turning on a common shaft. Each wheel is laser-cut from thin plywood, with a series of fine teeth on its outer circumference. The number of teeth, as calculated by a Python script, determines the pitch of the sound made when a thin reed is pressed against the spinning wheel. Since the ratio of teeth between the wheels is fixed, all the notes stay in tune relative to each other, as long as the speed of the wheels stays constant.

The proof-of-concept in the video below shows that speed control isn’t quite there yet — playing multiple notes at the same time seems to increase drag enough to slow the wheels down and lower the pitch for all the notes. There appears to be a photointerrupter on the wheel shaft to monitor speed, so we’d imagine a PID loop to control motor speed might help. That and a bigger motor that won’t bog down as easily. As for the sound, we’ll just say that it certainly is unique — and, that it seems like something [Nicolas Bras] would really dig.

Continue reading “This Found-Sound Organ Was Made With Python And A Laser Cutter”

Owen with his laser cutter

A Home Made Laser Cutter For $700

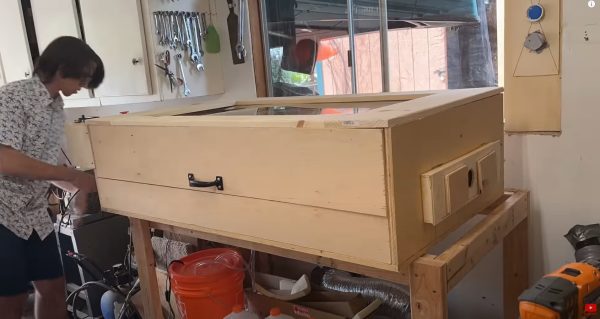
While some decent lasers are out there for under $400 USD, they tend to be a little small. What if you wanted something a little nicer but didn’t want to jump to the $2,000 category? The answer for [Owen Schafer] was to build it with parts he had lying around and a few strategic purchases.

While he was initially planning on using a diode laser, doing anything more than engraving is tricky. He purchased a cheap 40 W CO2 laser tube, but it meant that he needed water cooling, mirrors, and more complex stuff that a diode doesn’t need. The frame is aluminum extrusion held together with 3D printed plates. Given there was a powerful laser bouncing around with mirrors, a plywood box formed the enclosure.

The stepper controller is an Arduino Mega running the Marlaser firmware, though [Owen] admits perhaps a laser cutter-specific driver board would have been better as he spent many hours trying to get the Arduino to do what he wanted. Air ventilation is a tube with a fan that vents out a nearby window. Water cooling is just a bucket of water with a pump in it. A simple nylon hose connected to a compressor with a maximum airflow valve provides an air assist while cutting. Finally, we’re happy to report that [Owen] bought safety glasses specific to his laser to protect his eyes and researched how to ground the high voltages generated.

We particularly loved seeing all of [Owen’s] test cuts. He proudly displayed his boxes, sharks, and lamp shades like anyone with their new laser cutter is wont to do. If you’re looking to upgrade your laser, there’s an add-on for detecting materials optically or a relatively cheap laser bed you can throw in your laser.

Continue reading “A Home Made Laser Cutter For $700”

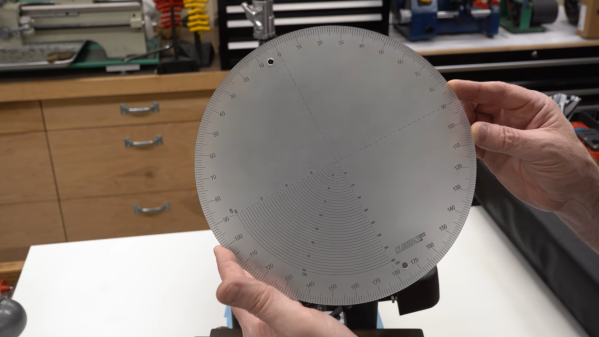
A frosted glass disk with geometrical markers

Using A Laser Cutter To Replicate An Optical Comparator Screen

Precision instruments often contain specialized components that are essential to their function, but nearly impossible to replace if they fail. [Andre] had just such a problem with an optical comparator, which is an instrument typically used in machine shops to help check the tolerances of a finished part. It does this by projecting a magnified picture of an object onto a glass screen with markings showing angles and distances.

In the old comparator [Andre] bought on eBay, the markings on the glass had faded to such a degree that the instrument was almost unusable. So he contacted [James] over at Clough42, who was able to create a near-perfect replacement screen by using a laser cutter, as shown in the video embedded below.

The first step was to replicate the screen’s markings in a CAD program. [James] explains the process in Fusion 360, demonstrating how you can generate all the different scales nearly automatically through the proper use of constraints, variables and patterns. He then transferred the drawing to Lightburn, which drives the laser cutter and etches the markings into a sheet of glass covered with CerMark, a marking solution that turns a deep black when heated by a laser.

After etching, the final step was to apply frosting to the glass to turn it into a projection screen. While there are several ways to achieve this, [James] went for a simple spray-based method that gave surprisingly good results. It took a few experiments to find out that etching the markings on the back of the glass and applying the frosting on that side as well gave the best combination of sharpness and durability.

[James]’s project shows that even delicate instruments with custom glass components can be repaired, if you just have the right tools. A similar strategy might also work for creating custom scales for analog meters, or even old radio dials. If you’re not familiar with laser cutters, have a look at our experiments with an Ortur model. Thanks for the tip, [poiuyt]!

Continue reading “Using A Laser Cutter To Replicate An Optical Comparator Screen”

3D Print Glass With A Laser Cutter

We’re all familiar with FDM 3D printing, and some of the more well-heeled or adventurous among us may even have taken a faltering step into the world of SLA printers. But for most of us there’s a step further in 3D printing that remains beyond our reach. SLS, or Selective Laser Sintering, creates prints from powder by melting it layer by layer using a laser, and has the advantage of opening up more useful materials than the polymer stock of the other methods. It’s not entirely unreachable though, as [Kenneth Hawthorn] shows us by using a laser cutter to produce SLS prints from powdered glass.

He evolved the technique of repeated fast passes with the laser to gradually melt more glass together as opposed to slower passes. He achieved a resolution as low as 0.1 mm, though he found a better glass color when the laser was less tightly focused. It raises the concern that glass powder is abrasive and thus a threat to any mechanism, thus he’s being extremely careful with the fan settings.

This may not be quite in the league of an SLS printer costing thousands of dollars, but it’s a technique that bears more investigation and could no doubt be refined for more custom fused glass creations. He tells us he was inspired by a previous Hackaday post about sintering sand, and of course we’d like to remind readers of a 3D printer that did the same job with the power of the sun.

Squares of sample materials placed on the laser bed awaiting the sensing head

Smart Laser Cutter Ad-on Detects Material Optically

Come on now, admit it. You’ve done it. We’ve done it. You know — you were really sure that sheet of plastic stock you found lying around the hackerspace was acrylic right? You dialled in the settings, loaded the design, set the focus and pushed the little green ‘start’ button. Lots of black smoke, fire, and general badness ensued as you lunged for the red ‘stop’ button, before lifting the lid to work out how you’re going to clean this one up.

That was not acrylic. That was polycarbonate.

What you need is the latest gadget from MIT: SensiCut: A smart laser cutter system that detects different materials automatically.

The technique makes use of so-called ‘speckle imaging’ where a material illuminated by a laser will produce a unique pattern of reflected spots, or speckles into a camera. By training a deep neural model with a large set of samples, it was found possible to detect up to 30 types of material with 98% accuracy.

The pre-baked model runs on a Raspberry PI zero with an off-the-shelf camera all powered from a power bank. This allows the whole assembly to simply drop onto an existing laser cutter head, with no wiring needed.

Even if you’re a seasoned laser cutter user, with a well-controlled stock pile, the peace-of-mind this could give would definitely be worth the effort. A more detailed description and more videos may be found by reading the full paper. Here’s hoping they release the system as open source, one day in the not-to-distant future. If not, then, you know what to do :)

Continue reading “Smart Laser Cutter Ad-on Detects Material Optically”