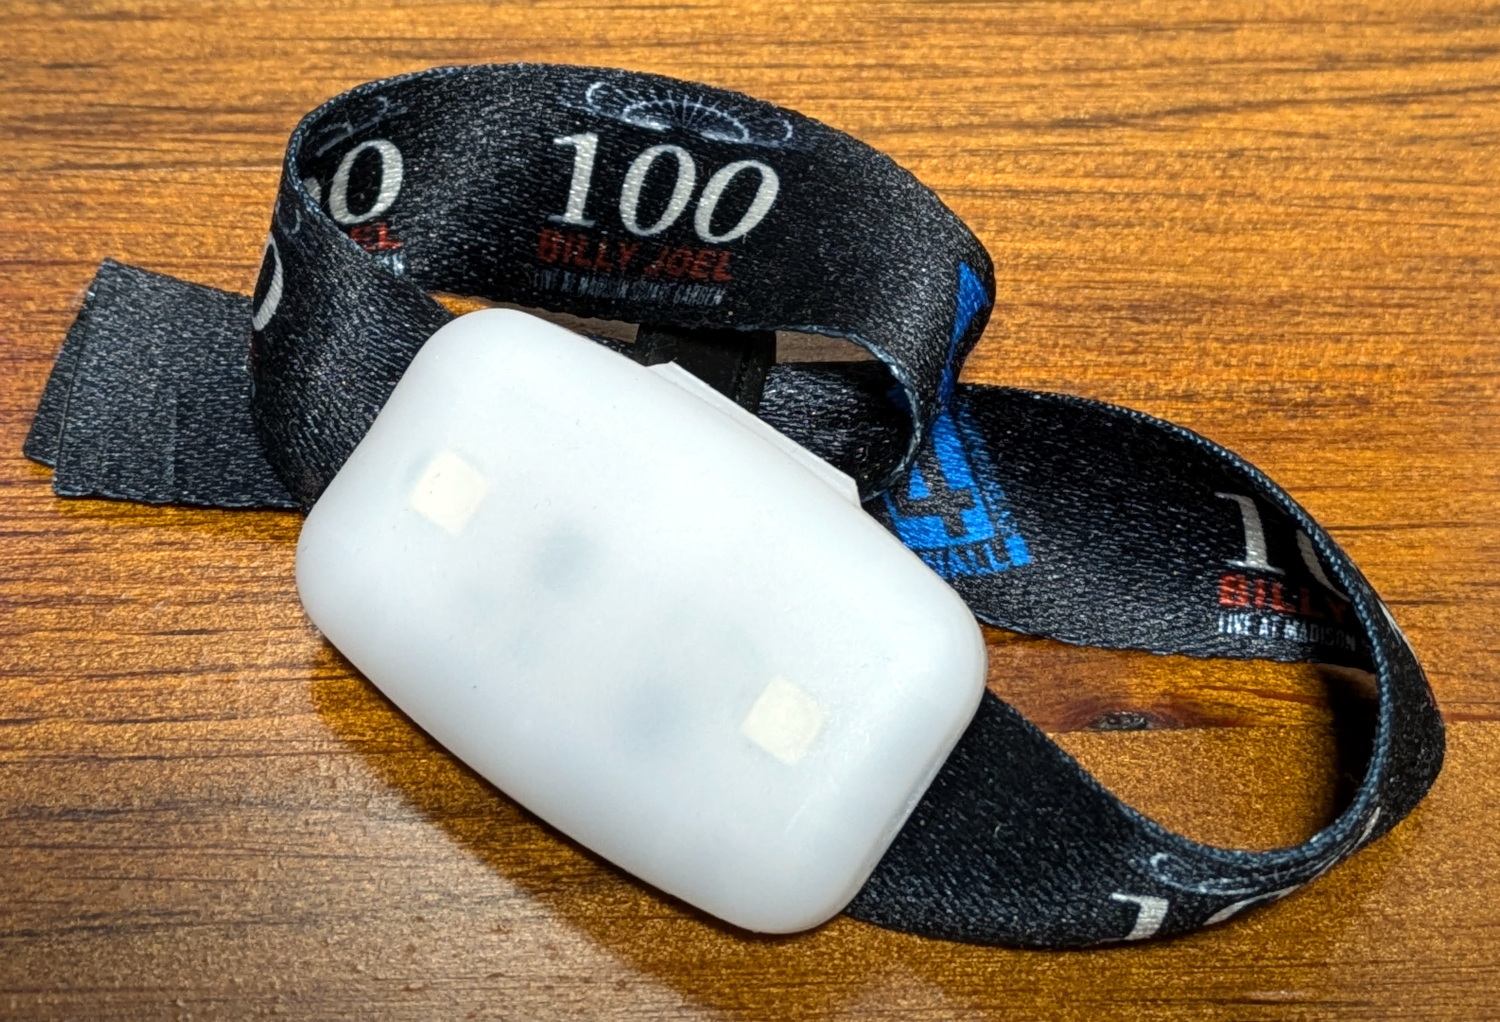
Over the last few years, it’s been increasingly common for concertgoers to be handed a light-up bracelet from PixMob that synchronizes with the others in the crowd to turn the entire audience into a music visualizer. They’re a clever way of enhancing the concert experience, but unfortunately, they don’t do anything once you leave the show. Or at least, that used to be the case.
We’ve seen efforts to reverse engineer the IR (and occasionally radio) signals that drive these PixMob devices, but since we checked in last it seems like things have gotten a lot easier for the home gamer. [David Pride] has recently posted a brief write-up that shows how quickly and easily it is to get these devices fired up using nothing more exotic than an Arduino, an IR LED, and an audio sensor module.
With the audio sensor module connected to the Arduino’s digital input and the IR LED wired to digital out, all you need to do is flash firmware to the board and start playing some beats. The source code [David] has provided is a a remixed version of what’s previously been published by [Carlos Ganoza], which, in this case, has been tweaked to make the lighting patterns less random.
Presumably, this is to make the devices behave more like they do during an actual concert, but since nobody at Hackaday is cool enough to have seen a live musical performance in the last decade, we’re not really sure. All we can say is that the effect looks pretty sweet in the demo video.
Back in 2019, we saw a teardown of an early PixMob device, and by 2022, the efforts to reverse engineer their IR control protocol were well underway. We’re glad to see things have progressed to the point that you can piece together a transmitter from what’s in the parts bin, as it means at least some of these devices will have a lifespan longer than a single concert.
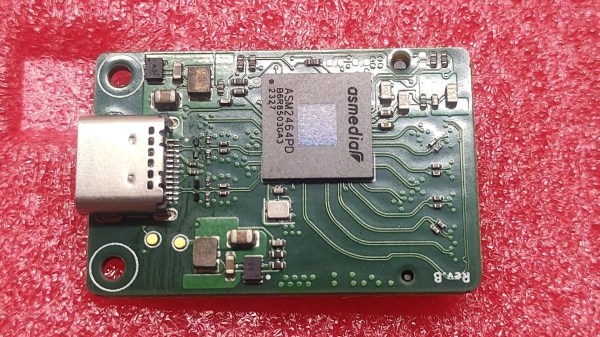
Thunderbolt has always been a functionally proprietary technology, held secret by Intel until “opening” the standard in a way that evidently wasn’t enough for anyone to meaningfully join in. At least, until last year, when we saw announcements about ASMedia developing two chips for Thunderbolt use. Now, we are starting to see glimmers of open source, letting us tinker with PCIe at prices lower than $100 per endpoint.
In particular, this board from [Picomicro] uses the ASM2464PD — a chipset that supports TB3/4/USB4, and gives you a 4x PCIe link. Harnessing the 40 Gbps power to wire up an NVMe SSD, this board shows us it’s very much possible to design a fully functional ASM2464PD board without the blessing of Intel. With minimal footprint that barely extends beyond the 2230 SSD it’s designed for, curved trace layout, and a CNC-milled case, this board sets a high standard for a DIY Thunderbolt implementation.
The main problem is that this project is not open-source – all we get is pretty pictures and a bit of technical info. Thankfully, we’ve also seen [WifiCable] take up the mantle of making this chip actually hobbyist-available – she’s created a symbol, fit a footprint, and made an example board in KiCad retracing [Picomicro]’s steps in a friendly fashion. The board is currently incomplete because it needs someone to buy an ASM2464PD enclosure on Aliexpress and reverse-engineer the missing circuitry, but if open-source Thunderbolt devices are on your wish list, this is as close as you get today – maybe you’ll be able to make an eGPU adapter, even. In the meantime, if you don’t want to develop hardware but want to take advantage of Thunderbolt, you can build 10 Gbps point-to-point networks.
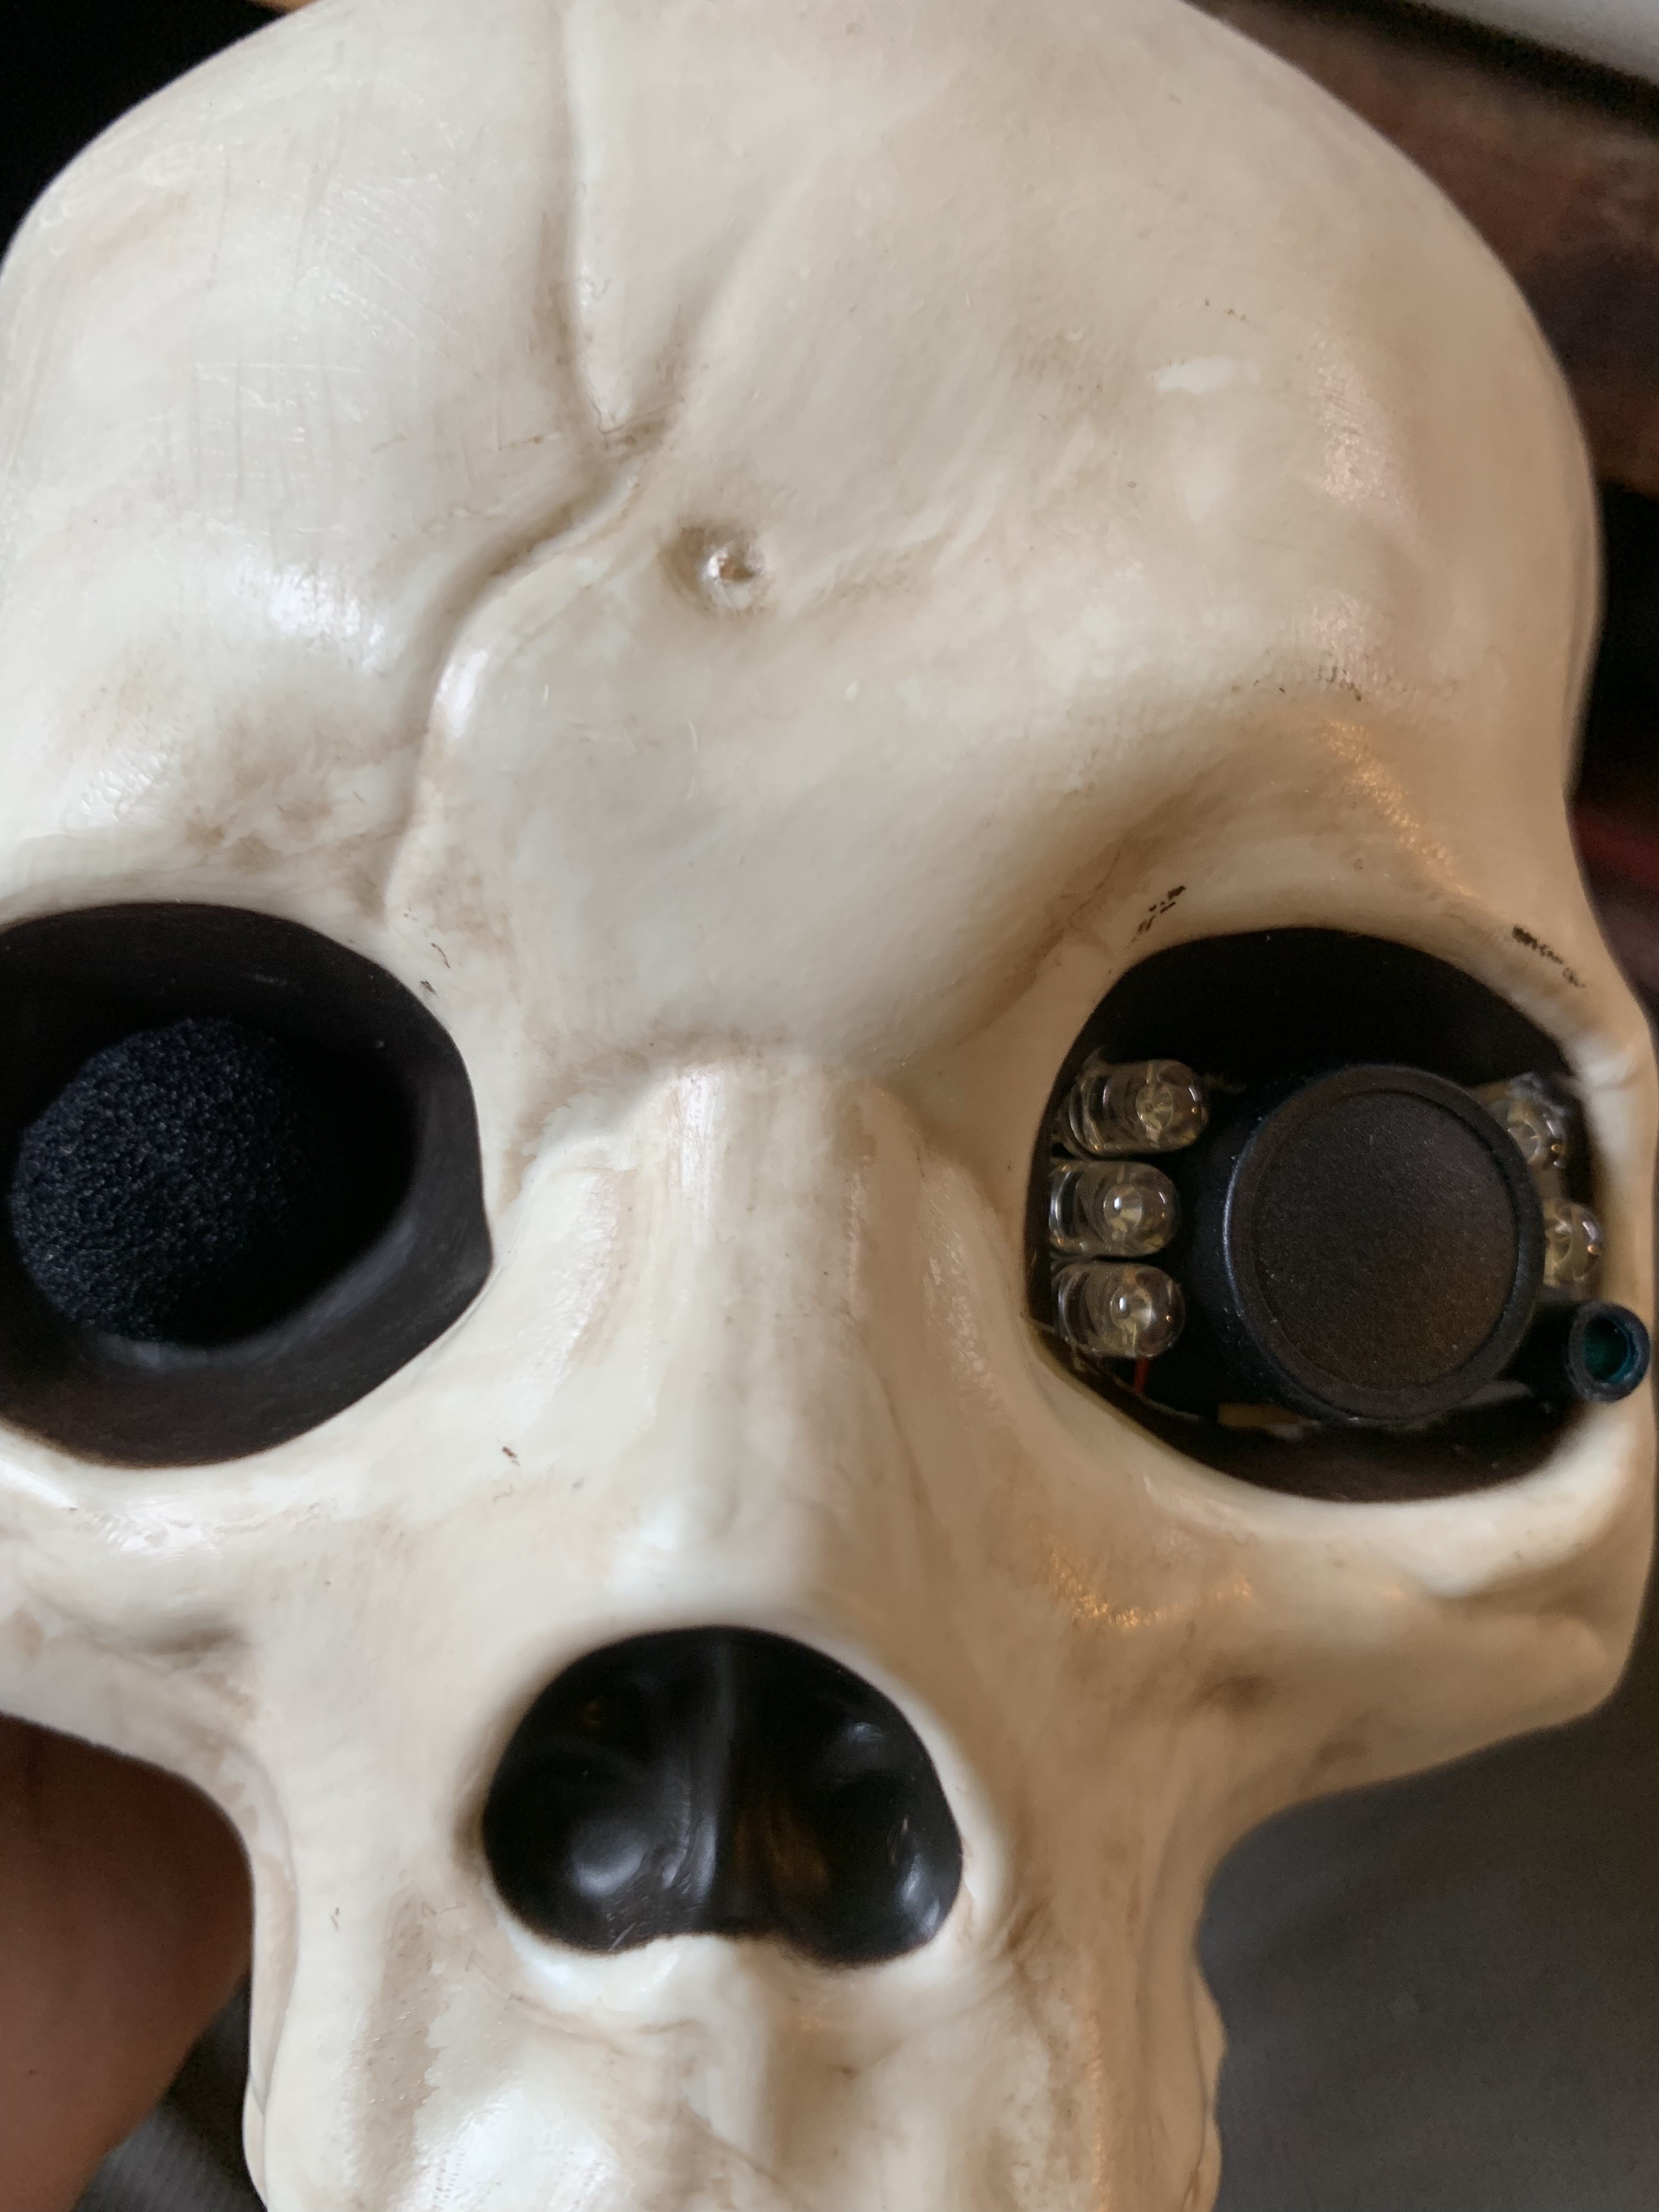
[Matt Vella] has had a talking, non-posable skeleton knocking around for years. As cool as that sounds, [Matt] is really tired of its three stock phrases. Fast forward to this year — [Matt] got a posable skeleton and decided to go all out on this, the hackiest of all holidays. The result? Hack Skellington.
Between the eye socket-mounted camera, the speaker, and servos in the head, jaw, and one arm, Hack Skellington is decked out to scare trick-or-treaters (or anyone who gets close enough) in modern fashion. Thanks to ChatGPT and an AI-generated voice, Hack can recognize people and welcome them by name, look people in the eye, or simply move its arm when someone gets too close.
The brains of this operation is a Radxa Zero SBC programmed in Viam, though any SBC with Wi-Fi, GPIO, I²C, and USB should work just fine. [Matt] only spent about $150 total, half of which went to the skeleton itself. Be sure to check the spooky action out after the break.
You have until 9 AM PT on Tuesday, October 31st to enter the 2023 Halloween Hackfest. Procrastinators unite! Don’t want to animate a whole skeleton? Come to think of it, a severed, animated hand is even creepier, anyway.
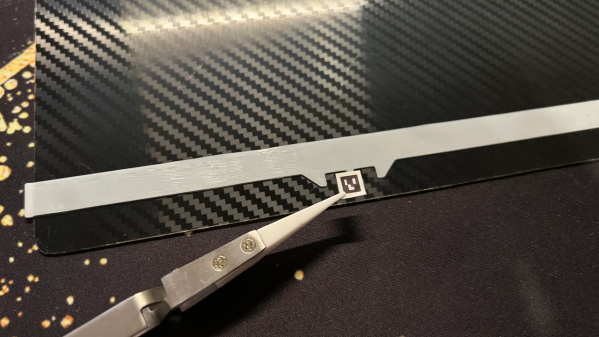
The Bambu X1C 3D printer is a machine known for its speed, and it has a number of useful features like automatic build platform recognition. Factory build platforms are marked with an identifier code, and thanks to [elumspe] it’s now possible to make your own identifiers to stick onto third-party platforms and have the printer recognize them as though they were factory offerings. There’s even a super handy 3D-printable alignment tool that ensures the identifier goes in the correct spot, which is a nice touch.
These codes aren’t DRM so much as they are used by the printer to automatically verify that the installed build plate matches the slicer settings before a job begins. Printing one and sticking it in the right place is an easy way to get third-party plates recognized the same as factory offerings.
The identifier codes aren’t DRM so much as they are a way for the printer to verify that the installed build platform matches the slicer settings before a print begins, and throw up a warning if it doesn’t. The printer is perfectly happy to use third-party build surfaces, but since they lack an identifier, the printer will throw a warning each time. One solution is to simply disable checking the build platform before a print, but for those who would prefer to have the printer see what it expects to see, printing a small 2D barcode to stick on is an easy way to do it.
We see these sometimes called QR codes, but they look more like AprilTags. Both are types of 2D barcode, but while QR codes can encode a variety of information types, AprilTags are simpler and usually represent identifiers. In this case, they’re an appropriate way to let a camera-enabled printer know what kind of build plate is installed.
AprilTags are common in computer vision applications, and even relatively modest hardware can detect and decode them almost in real time. AprilTags are convenient and easy to use, as this gate access system demonstrates.
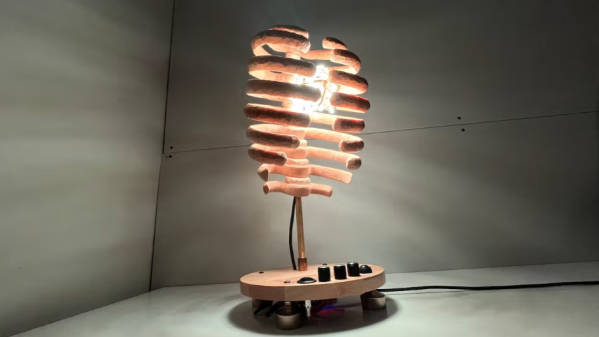
We think [Michelle]’s sound-reactive rib cage lamp turned out great, and the photos and details around how it was made are equally fantastic. The lamp is made of carved and waxed wood, and inside is a bundle of LED lighting capable of a variety of different color palettes and patterns, including the ability to react to sound. Every rib cage should have a party mode, after all.
The LED strip is fashioned into an atom-like structure.
Turns out that designing good rib cage pieces is a bigger challenge than one might think. [Michelle]’s method was to use an anatomical 3D model as reference, tracing each piece so that it could be cut from a flat sheet of wood.
The resulting flat pieces then get assembled into a stack, with each rib pointed downward at a roughly 20 degree angle. This process is a neat hack in itself: instead of drilling holes all at exactly the same angle, [Michelle] simply made the holes twice the diameter of the steel rod they stack on. The result? The pieces angle downward on their own.
The LED lighting is itself a nice piece of work. The basic structure comes from soldered solid-core wire. The RGB LED strip gets wound around that, then reinforced with garden wire. The result is an atomic-looking structure that sits inside the rib cage. An ESP32 development board drives everything with the FastLED library.
Code for everything, including the sound-reactive worky bits, which rely on an INMP441 I2C microphone module is all available on GitHub. And if you want to make your own sound-reactive art, make sure to check out these arms as well.
Want to see the rib cage in action? A short demo video is embedded below that demonstrates the sound reactivity. Equally applicable to either party or relaxation modes, we think.
The community of Hackaday readers is diverse and talented, and supplies us with plenty of motivation, feedback, knowledge, and of course cool stuff to show you. There are many interest streams within it, but it’s safe to say that we’re more directed towards the hardware scene here. One of those parallel streams which has much overlap is the demoscene, that area in which programming, art, and music come together and push computer hardware to the limit of its abilities in pursuit of the most eye-catching works. I took a road trip with a friend to Outline, a small demo party held on a farm in the eastern Netherlands, to take a look at the world of demos up-close as a hardware-focused outsider.
Like A Hacker Camp, But The Music’s Better
A still from Thrive, a 256 byte demo for the TIC-80 fantasy console.
If I wanted to sum up the flavour of Outline, I’d describe it as very similar to a small hacker camp, but with better music and partying. The hackerspaces are replaced by demo groups and awesome graphics take the place of robots and electronics, but the vibe of people with a passionate interest in the low-level understanding of technology is exactly the same. Even some of the same faces make an appearance. On the benches sit modern high-spec PCs alongside classic consoles and microcomputers, on the projector screen are live coding shaders or some of the most recognisable demos past and present, and in the air is an eclectic mix of live-DJ EDM and chiptunes.
As an outsider at a first demoscene event it’s difficult to appreciate the work from a comparative perspective, while like most of us I’m familiar with quite a few demos that have become popular I’m not well-equipped enough to talk about the code and techniques behind them But I can run through the various sections of the competition, and since everything is online I can link to a few of them. The competition is split up into several sections, which are loosely for all-out technology-no-object demos, space-limited 256 byte and 128 byte demos, and old-school demos for retrocomputing hardware. Each is a test of the programmer’s skill in fitting the most into the least of resources, and for those who appreciate such things it’s the cleverness of the technique which produces the demo that’s as much a draw as the look of the thing. I don’t think I have ever exercised such mastery over any of the computers I have owned. So browse the entries, and marvel at their ingenuity. My personal aesthetic favourites were Thrive by [Agenda] for the TIC-80 fantasy console and It’s about time by [Guideline] for Windows, but you may have different tastes.
Don’t Forget The Hardware
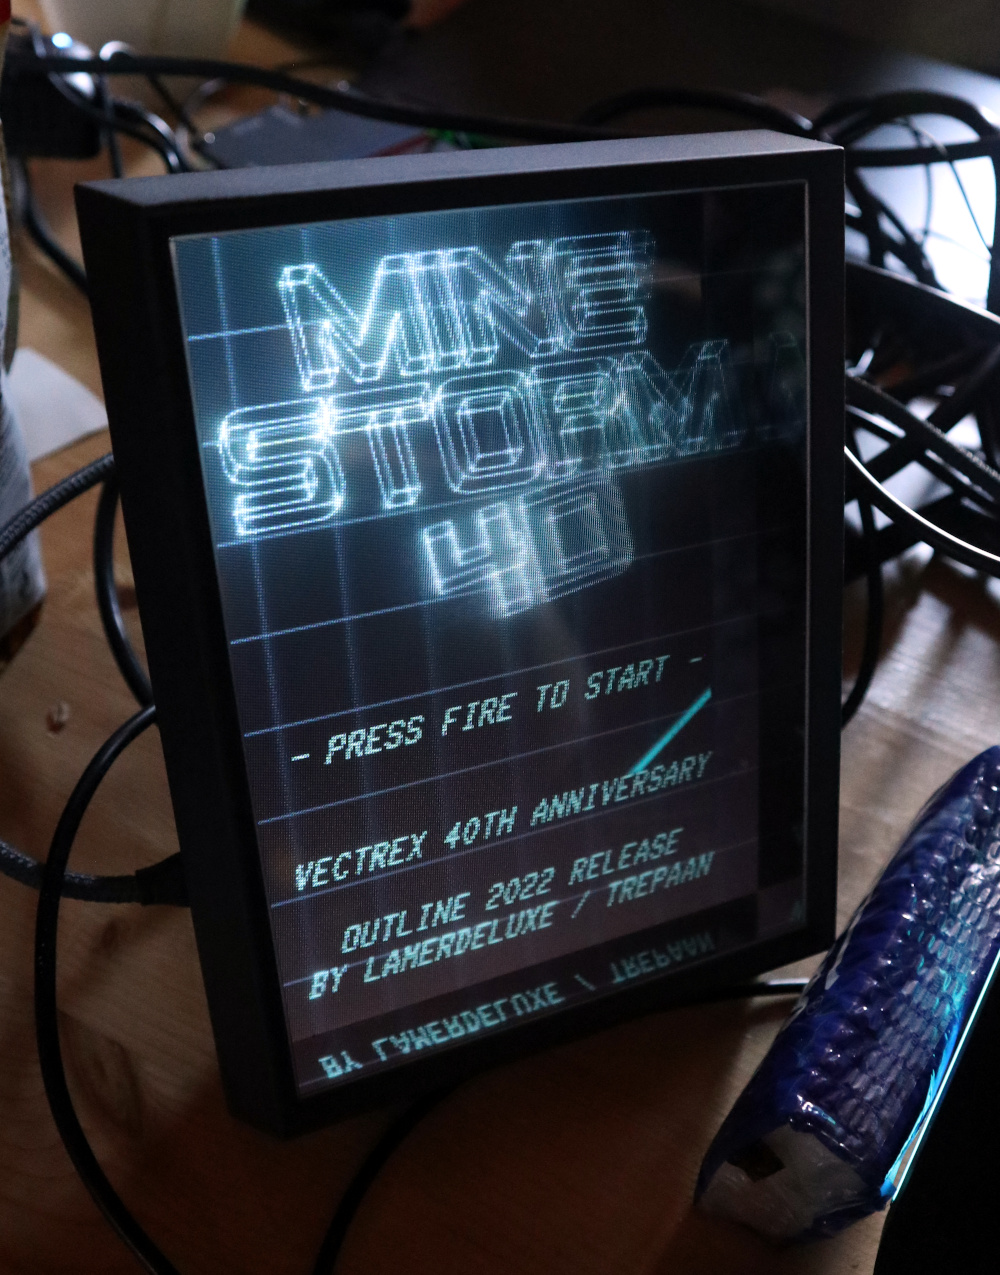
Mine Storm 4D, on a lenticular holographic display.
Beyond the atmosphere and the demos themselves, there was a bit of hardware for the retrocomputer enthusiast. The Atari Falcon and Jaguar were neither destined to set the world on fire when they appeared, but there they were for those of us who drooled over them back in the day to lust for once more.
If the original hardware wasn’t enough then there was some newly minted retrocomputing hardware making a showing, with a couple of minimig Amiga FPGA boards showing Workbench. Star of the hardware show though went to Mine Storm 4D, a version of the classic Vectrex game Mine Storm running on a PC, for the Looking Glass Factory holographic portrait display. With my visual superpower I didn’t quite get a 3D effect, but I definitely got the holographic effect when moving my head.
Having never been to a demo party I didn’t know quite what to expect, but I can safely say I had a fantastic time, saw a lot of really cool stuff, and made some friends along the way. If you’ve never been to a demo party because it’s not quite your scene then all I can say is that you should give it a go. Every hardware hacker should go to a demo party!
Again, let’s just get this out of the way up front: I got this lovely little 75% keyboard for free from a gaming accessories company called Marsback. It’s a functioning prototype of a keyboard that they have up on Kickstarter as of March 2nd. It comes in three color schemes: dark, white and sakura pink, which is white and pink with cherry blossoms.
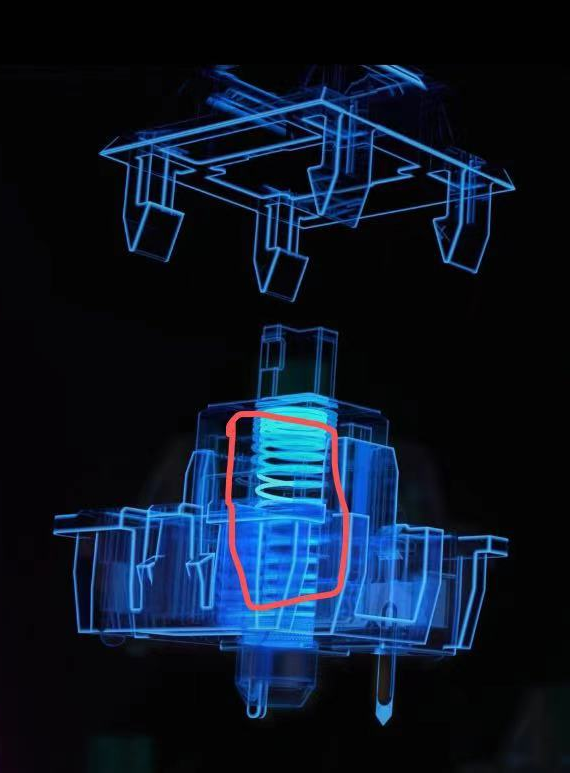
This illustration of the lube points is from my email string with Marsback.
Marsback found me through my personal website and contacted me directly to gauge my interest in this keyboard. I’ll admit that I wasn’t too excited about it until I scrolled further in the email and saw that they are producing their own switches in-house.
I think that’s a really interesting choice given that Cherry MX and other switches exist, and there so many Cherry MX clones out there already. Naturally, I had to investigate, so following a short review, I’ll take it apart.

 With the audio sensor module connected to the Arduino’s digital input and the IR LED wired to digital out, all you need to do is flash firmware to the board and start playing some beats. The source code [David] has provided is a a remixed version of what’s previously been published by [Carlos Ganoza], which, in this case, has been tweaked to make the lighting patterns less random.