Join Hackaday And Tindie At The Southern California Linux Expo

Do you like Open Source? Join Hackaday and Tindie at the largest community-run Open Source conference in North America. We’ll be at the Southern California Linux Expo next week, and we want to see you there.

What’s happening at SCALE this year? Amateur radio license exams, a PGP signing party, Bad Voltage Live and The Spazmatics, and a ton of great talks.

Hackaday and Tindie will be at SCALE Friday through Sunday, showing off the coolest parts of Hackaday, Hackaday.io, and our lovable robotic dog, Tindie. We’ll be handing out t-shirts and stickers, and we’ll be giving tours of the SupplyFrame Design Lab located just two blocks away from the convention center. The Design Lab is a crown jewel of our corporate overlord’s emphasis on Open Hardware, and if you want to see where the magic happens, this is your chance. We’ll be running tours of the Lab on Friday, so find the Hackaday and Tindie crew in the expo area around 3:40 PM.

Here’s something cool: We’re offering discounted SCALE passes, too. They’re 50% off using the code ‘HACK’ at this link. That’s $45 for four days of fun. Continue reading “Join Hackaday And Tindie At The Southern California Linux Expo”

First Look: Macchina M2

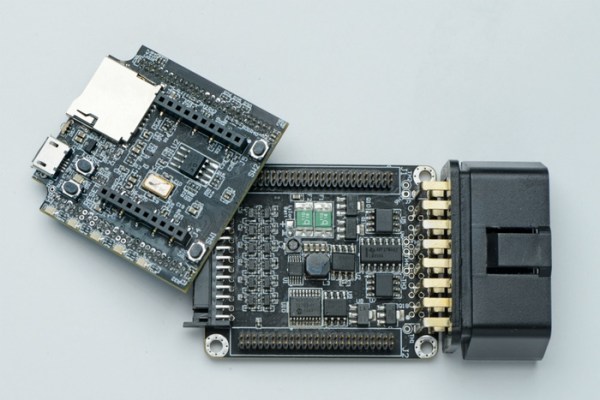
In the past few years, we’ve seen a growth in car hacking. Newer tools are being released, which makes it faster and cheaper to get into automotive tinkering. Today we’re taking a first look at the M2, a new device from the folks at Macchina.

The Macchina M1 was the first release of a hacker friendly automotive device from the company. This was an Arduino compatible board, which kept the Arduino form factor but added interface hardware for the protocols most commonly found in cars. This allowed for anyone familiar with Arduino to start tinkering with cars in a familiar fashion. The form factor was convenient for adding standard shields, but was a bit large for using as a device connected to the industry standard OBD-II connector under the dash.

The Macchina M2 is a redesign that crams the M1’s feature set into a smaller form factor, modularizes the design, and adds some new features. With their Kickstarter launching today, they sent us a developer kit to review. Here’s our first look at the device.

Continue reading “First Look: Macchina M2”

Review: The Asus Tinker Board (Updated)

In the years since the launch of the original Raspberry Pi we have seen the little British ARM-based board become one of the more popular single board computers in the hobbyist, maker, and hacker communities. It has retained that position despite the best efforts of other manufacturers, and we have seen a succession of competitor boards directly copying it by imitating its form factor. None of them have made a significant dent in the sales figures enjoyed by the Pi, yet they continue to appear on a regular basis.

We recently brought you news of the latest challenger in this arena, in the form of the Asus Tinker Board. This is a board that has made us sit up and take notice because unlike previous players this time we have a product from a giant of the industry. Most of us are likely to own at least one Asus product, indeed there is a good chance that you might be reading this on an Asus computer or monitor. Asus have made some very high quality hardware in their time, so perhaps this product will inherit some of that heritage. Thus it was with a sense of expectation that we ordered one of the first batch of Tinker Boards, and waited eagerly for the postman.

Update:

A member of the Asus Marketing team read this review and contacted Hackaday with some updated information. According to our discussion, the Tinker Board has not officially launched. This explains a lot about the current state of the Tinker Board. As Jenny mentions in her review below, the software support for the board is not yet in place, and as comments on this review have mentioned, you can’t source it in the US and most other markets. An internal slide deck was leaked on SlideShare shortly after CES (which explains our earlier coverage), followed by one retailer in the UK market selling the boards ahead of Asus’ launch date (which is how we got our hands on this unit).

Asus tells us that they are aiming for an end of February launch date, perhaps as soon as the 26th for the United States, UK, and Taiwan. Other markets might have some variation, all of this contingent on agreements with and getting stock to regional distributors. With the launch will come the final OS Distribution (TinkerOS based on Debian), schematics, mechanical block diagrams, etc. Asus tells Hackaday it is a top priority to deliver hardware video acceleration for the Rockchip on the Tinker Board. The Board Support Package which hooks the feature into Linux is not yet finished but will come either on launch day or soon after. This is the end of the update, please enjoy Jenny List’s full review below.

Continue reading “Review: The Asus Tinker Board (Updated)”

DIY Thermal Camera That’s Better And Cheaper Than A FLIR

A few years ago, FLIR unleashed a new line of handheld thermal imagers upon the world. In a manufacturing triumph, the cheapest of these thermal imaging cameras contained the same circuitry as the one that cost six times as much. Much hacking ensued. Once FLIR figured out the people who would be most likely to own a thermal imaging camera can figure out how to upload firmware, the party was over. That doesn’t mean we’re stuck with crippled thermal imaging cameras, though: we can build our own, with better specs than what the big boys are selling.

[Max] has been working on his DIY thermal imager for a while now. We first saw it about a year ago, and the results were impressive. This thermal camera is built around the FLIR Lepton sensor, providing thermal images with a resolution of 60 by 80 pixels. These thermal images were combined with a VGA resolution camera to produce the very cool enhanced imagery the commercial unit will get you. There’s also a 1/4-20 threaded insert on the bottom of [Max]’s version, making it far more useful in any experimental setup.

Now [Max] has unleashed his DIY Thermocam on the world of Open Hardware, and anyone can build their own for about €400 (about $425). The components required for this build include a FLIR Lepton sensor easily sourced from the Digikey or GroupGets, an Arducam Mini, a Teensy 3.6, and a mishmash of components that are probably kicking around your parts drawers.

If you want an overview of this project before digging in, [Max] has a project overview (PDF warning) going over the build. This is one of the better DIY projects we’ve seen recently, and the documentation is fantastic. If you’re thinking about buying one of those fancy thermal imaging cameras, here you go — this one is just as good and half off.

Printer Vulnerabilites Almost As Bad As IoT

Recently ZDNet and Gizmodo published articles outlining a critical flaw in a large array of personal printers. While the number of printers with this flaw is staggering, the ramifications are even more impressive. Ultimately, any of these printers could have documents sent to them stolen even if the document was only intended to be printed as a hard copy.

Luckily the people responsible for this discovery are white-hat in nature, and the release of this information has been made public so the responsible parties can fix the security flaws. Whether or not the “responsible party” is the manufacturer of the printer, though, is still somewhat unclear because part of the exploit takes advantage of a standard that is part of almost all consumer-grade printers. The standard itself may need to be patched.

Right now, however, it doesn’t seem clear exactly how deep the rabbit hole goes. We all remember the DDoS attack that was caused by Internet of Things devices that were poorly secured, and it seems feasible that networked printers could take some part in a similar botnet if a dedicated user really needed them. At the very least, however, your printed documents might not be secure at all, and you may be seeing a patch for your printer’s firmware in the near future.


Awesome Prank Or Circuit-Breaker Tester?

Many tools can be used either for good or for evil — it just depends on the person flipping the switch. (And their current level of mischievousness.) We’re giving [Callan] the benefit of the doubt here and assuming that he built his remote-controlled Residual Current Device (RDC) tripper for the purpose of testing the safety of the wiring in his own home. On the other hand, he does mention using it to shut off all the power in his house during an “unrelated countdown at a party”. See? Good and evil.

An RCD (or GFCI in the States) is a kind of circuit breaker that trips when the amount of current in the hot and neutral mains power lines aren’t equal and opposite, which would suggest that the juice was leaking out somewhere, hopefully not through someone. They only take a few milliamps of imbalance to blow so that nobody gets hurt. Making a device to test an RCD is easy; a resistor between hot and the protective ground circuit would do.

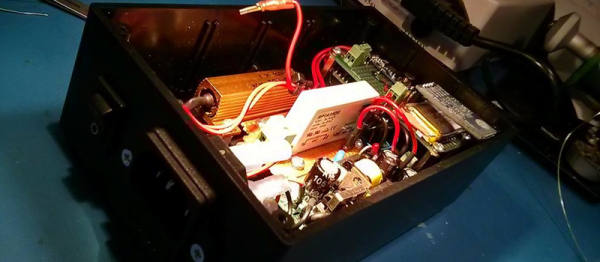
[Callan] over-engineers. He used a 50 W resistor where 30 W would do under the worst circumstances. A stealthy solid-state relay switches the resistor in, driven by an Uno and a Bluetooth module, so he can trip his circuit breakers from his smartphone, naturally.
Continue reading “Awesome Prank Or Circuit-Breaker Tester?”

The DIY Luggable PC

If you haven’t gone laptop shopping recently, you’re in for a big shock when you do. Recent consumer laptops are thin, powerful, surprisingly inexpensive, and Apple’s latest MacBook Pros even have a fantastic ‘Touch Bar’ – a touch-sensitive OLED display where the function keys should be. The greatest laptops ever made are available right now, and they don’t cost much, either.

Unfortunately, the laptop as a platform is inherently a compromise. If you want a discrete CPU, or if you simply want to choose your own parts, you’re relegated to a desktop build. The middle ground between extensibility and portability isn’t really covered by case manufacturers, and even the rare ‘LAN party’ cases rarely have a handle.

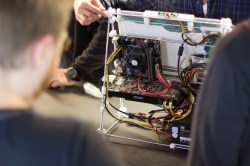
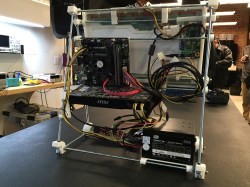
[Roger] is taking steps to solve this problem. He’s designed a 3D printable luggable PC. Yes, now you can have a GTX 1080 and a 22-core Xeon in a form factor you can carry around. It’ll fit in the overhead bin on your next flight, and yes, the monitor is included.

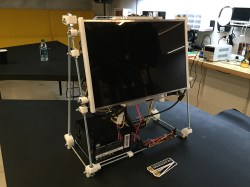
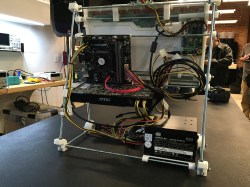
The construction of this DIY luggable PC should be familiar to anyone who built a 3D printer in 2011. It’s made out of threaded rods, with brackets for an LCD panel, ATX power supply, motherboard, and SSDs. Since this is effectively a modular system, you can load this case up with hardware. The included monitor in [Roger]’s build is taken from an old laptop and driven through an eBay “LCD Controller Board”.

While a luggable PC might be a very niche use case, it is still one that’s vastly underserved. I recently built a new battlestation, and after searching for a case like this for a few months, I eventually gave up, caved in, and bought whatever Linus told me to buy. You simply cannot buy an ATX case that has a monitor bolted to the side, and [Roger]’s build is the first DIY solution we’ve seen.

All the files to replicate this project are linked to on the [Roger]’s Hackaday.io project, and this would be an excellent basis for a community-based project to build an Open Hardware luggable PC enclosure. A few days ago, [Roger] brought this PC out to the Hackaday LA January meetup. He brought to the meetup on the train, providing more than enough evidence this is a truly portable PC. Check out the pics from the meetup below.