As is always the case with a significant hacker camp, we’ve been awaiting the official badge announcement for the upcoming Electromagnetic Field 2018 hacker camp with huge interest. These badges, for readers who may have been on Mars for the past few years, are part of a lively scene of wearable electronics at hacker conferences and camps, and can usually be expected to sport a fully-fledged computer in their own right along with other special functionality.
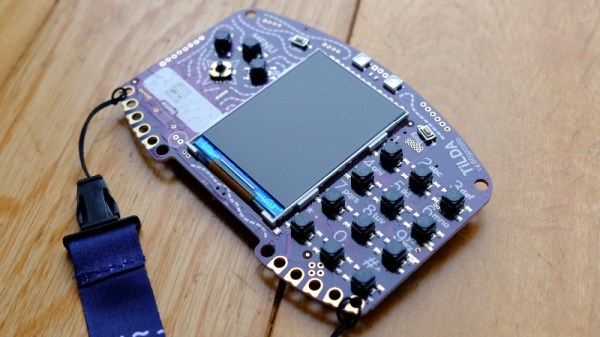
The announcement of the 2018 badge, dubbed the TiLDA Mk4, does not disappoint. We’d been told that there would be an on-site GSM network for which the welcome packs would contain a SIM, and the well-prepared among us had accordingly dusted off our old Nokia handsets alongside our DECT phones. What we hadn’t expected was that the SIM would be for the badge, because the Mk4 is a fully-fledged hackable mobile phone in its own right. The network will be fully functional for calls and texts within the camp, though since it does not explicitly say so we expect that external calls may be an impossibility. Afterwards though it will remain a usable device on any GSM network, giving it a lease of post-camp life that may see more of them staying in use rather than joining the hacker’s dusty collection in a drawer.
Beyond the party-piece phone it appears to follow the lead of its 2016 predecessor, with the same Python environment atop a TI chipset including an MSP432E4 ARM Cortex M4F microcontroller running at 120MHz with 256kB of internal and 8MB of external RAM, a CC3210 WiFi processor, and the usual battery of sensors, LEDs and GPIOs. Importantly, it also has a Shitty Add-on connector. The 2016 badge was remarkably easy to develop for, and we expect that there will soon be an impressive array of apps for this badge too. If any reader would like to put together a Hackaday feed reader app, we can’t offer you fortune but fame such as we can bestow awaits.
We’ll bring you more information as we have it about the TiLDA Mk4, as well as a hands-on report when one lands in front of us. Meanwhile you’d like to see a retrospective of past EMF badges as a demonstration of where this one has come from, have a read of our coverage of the 2016 and 2014 badges.