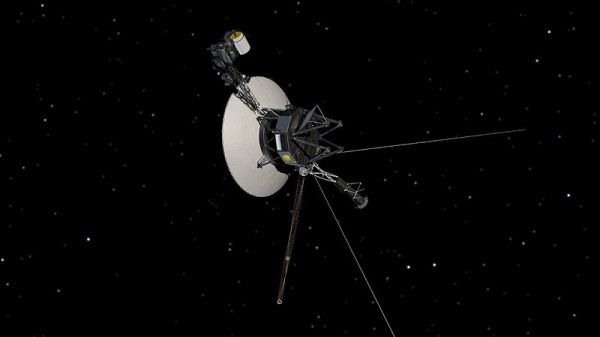
Odd Inputs And Peculiar Peripherals: The Simplest Of Pi 400 Cyberdecks

The trend for making cyberdecks has seen the Raspberry Pi emerge as a favourite for these home-made computer workstations, with the all-in-one Raspberry Pi 400 providing a particularly handy shortcut to integrating the computer and keyboard components. There’s still the question of the cyberdeck chassis and screen though, and it’s one that [bobricius] has answered in what may be the simplest manner possible, by means of a riser PCB from the expansion port holding a 320×240 SPI display.

If this is starting to look familiar, then you’d be right to recognise it as a slightly higher-quality version of those cheap LCD screens that have been available for the Pi for quite a few years. Alongside the screen is a pair of speakers, and the whole thing extends upwards from the back of the Pi 400. We’d question how much load can be taken by the expansion connector, but in practice it seems not to be taking too much.

The device in use can be seen in the video below the break. It’s definitely not the largest of displays, and when used as a desktop, it’s rather cramped, but it seems adequate for a terminal. It has the advantage over many cyberdecks that when the novelty has waned, it can be removed, and the Pi 400 used with a conventional display.

The Pi 400 has been with us for nearly a couple of years now, and perhaps hasn’t had the recognition it deserves. If you’ve never tried one, take a look at our review from when it came out.

Continue reading “Odd Inputs And Peculiar Peripherals: The Simplest Of Pi 400 Cyberdecks”

This Week In Security: For The Horde, Feature Not A Bug, And Confluence

If you roll way back through the history of open source webmail projects, you’ll find Horde, a groupware web application. First released in 1998 on Freshmeat, it gained some notoriety in early 2012 when it was discovered that the 3.0 release had been tampered with, and packages containing a backdoor had been shipped for three months. While this time around it isn’t an intentional backdoor, there is a very serious problem in the Horde webmail interface. Or more accurately, a pair of problems. The most serious is CVE-2022-30287, an RCE bug allowing an authenticated user to trigger code execution on the connected server.

The vulnerable element is the Turba address book module, which uses a PHP factory method to access a specific address book. The create() method has an interesting bit of code, that first checks the initialization value. If it’s a string, that value is understood as the name of the local address book to access. However, if the factory is initialized with an array, any of the address book drivers can be used, including the IMSP driver. IMSP fetches serialized data from remote servers, and deserializes it. And yes, PHP can have deserialization bugs, and this one runs code on the host.

But it’s not that bad, it’s only authenticated users, right? That would be bad enough, but that second bug is a Cross-site Request Forgery, CSRF, triggered by viewing an email. So on a vulnerable Horde server, any user viewing a malicious message would trigger RCE on the server. Oof. So let’s talk fixes. There is a new version of the Turba module that seems to fix the bugs, but it’s not clear that the actual Horde suite has pushed an update that includes it. So you may be on your own. As is pointed out on the Sonar Blog where the vulnerability was discovered, Horde itself seems to be essentially unmaintained at this point. Maybe time to consider migrating to a newer platform.
Continue reading “This Week In Security: For The Horde, Feature Not A Bug, And Confluence”

A Secure Phone Fit For A Prime Minister

The curtain of state secrecy which surrounds the type of government agency known primarily by initialisms is all-encompassing and long-lived, meaning that tech that is otherwise in the public domain remains top secret for many decades. Thus it’s fascinating when from time to time the skirts are lifted to reveal a glimpse of ankle, as has evidently been the case for a BBC piece dealing with the encrypted phones produced by GCHQ and used by Margaret Thatcher in the early 1980s. Sadly, it’s long on human interest and short on in-depth technology, but nevertheless from it can be deduced enough to work out how it most likely worked.

We’re told that it worked over a standard phone line and transmitted at 2.4 kilobytes per second, a digital data stream encoded using a paper tape key that was changed daily. If we were presented with this design spec to implement in a briefcase using 1980s components, we’d probably make an ADPCM (Adaptive Differential Pulse Code Modulation) system with an XOR encryption against the key, something we think would be well within the capabilities of early 1980s digital logic and microprocessors. We’re wondering whether the BBC have made a typo and that  should be kilobits rather than kilobytes to work on a standard phone line.

No doubt there are people in the comments who could tell us if they were willing to break the Official Secrets Act, but we’d suggest they don’t risk their liberty by doing so. It’s worth noting though, that GCHQ have been known to show off some of their past glories, as in this 2019 exhibition at London’s Science Museum.

STEM Award Goes To Accessible 3D Printing Project

When you are a 15-year old and you see a disabled student drop the contents of their lunch tray while walking to a table, what do you do? If you are [Adaline Hamlin], you design a 3D printed attachment for the trays to stop it from happening again.

The work was part of “Genius Hour” where [Hamlin’s] teacher encouraged students to find things that could be created to benefit others. An initial prototype used straws to form stops to fit plates, cups, and whatever else fit on the tray. [Zach Lance], a senior at the school’s 3D printing club, helped produce the actual 3D printed pieces.

Continue reading “STEM Award Goes To Accessible 3D Printing Project”

Porting DOOM To A Forgotten Apple OS

Apple hasn’t always had refined user experiences in their operating systems. In the distant past of the ’90s they were still kind of clunky computers that were far from the polished, high-end consumer machines of the modern era. That wasn’t all that Apple offered back then, though. They had a long-forgotten alternative operating system that was called A/UX designed for government applications, and [Keriad] is here to show us this relic operating system and port DOOM to it.

A/UX was designed in the pre-PowerPC days when Macintosh computers ran on Motorola 68000 chips. Luckily, [Keriad] has a Mac Quadra 800 with just such a chip that is still fully-functional. DOOM was developed with the NeXTSTEP operating system which can run on old Macs thanks to another tool called MacX which allows X11 applications to run on Mac. A version of gcc for A/UX was found as well and with the source code in hand they were eventually able to compile a binary. There were several hiccups along the way (including the lack of sound) but eventually DOOM was running on this forgotten operating system.

The main problem with the build in the end, besides the lack of sound, is that the game only runs at 2 – 3 frames per second. [Keriad] speculates that this is due to all of the compatibility layers needed to compile and run the game at all, but it’s still impressive. As far as we know, [Keriad] is the first person to port DOOM to this OS, although if you’re looking for something more straightforward we would recommend this purpose-built Linux distribution whose sole task is to get you slaying demons as quickly as possible.

See How To Effectively Use A Green Screen In A Limited Space

Virtual green screens are pretty neat, but for results, nothing beats the real thing. But what if you have limited space? [Fred Emmott] had about 30 inches behind his desk to work with, and shares what it took to make a green screen work reliably in a limited space.

Even (and consistently deployable) lighting is even more important than the camera.

When it comes right down to it, the fundamentals of camera work (lighting, angles, and so on) are unchanged, but hanging a green screen only 30 inches behind one’s desk does make it a bit more challenging to dial in the right environment. In addition, [Fred] wanted a solution that could be deployed and packed away without much of a hassle, and without taking up too much storage space. He ended up using a collapsible green screen that can be pulled straight up and out from its container, similar to portable stand-up banners used at trade shows.

As for the camera end of things, [Fred] found that reliable, quality lighting was critically important, even more so than the camera used. For repeatable results, he suggests disabling any automatic features (such as low light enhancement, or auto white balance, and settings of that nature) and to use LED lighting in the ‘daylight’ range for illumination and fill. The key to good green screen results is to light things evenly, and this is a bit more challenging when working in such a tight space.

To deal with this, [Fred] suggests lights that can be easily repositioned, and put them as far back from things as you can. Get the lighting as even as possible, then adjust your software to match ([Fred] uses OBS Studio) for best results. Once that’s done, it can be more easily set up and torn down with minimal fiddling.

Computers sure make all this much easier than it was back in the day, and if you’re curious, here is all about how green screens were done before the digital age.

Throw Out That Box? No, Build A Shelving Unit

Are you one of those people who hoards cardboard for someday, and then periodically breaks it all down and puts it out for recycling because you haven’t done anything with it yet? Well, load up a new blade in the utility knife and fire up that hot glue gun, because the [Cardboard Ninja]’s gonna show you how to make a shelving unit from the biggest box in your collection.

[Cardboard Ninja] goes about the build quite smartly, cutting the legs from the four long bends already in the cardboard. This is repeated in the shelves, which are made from the box’s sides — [Cardboard Ninja] takes advantage of the bends when it comes to cutting out the shelves and creates the other three with the edge of a metal ruler. The rest of the cardboard is devoted to supports for shelves and legs.

While you could use this unit to hold all the other, smaller boxen you have lying around, that would be a gross under-utilization. You see, the way this is put together, it can hold upwards of 133 lbs (60 kg) total, provided the rules of weight distribution are followed, and the heaviest things are on the bottom shelf.

That does seem like a lot of weight, but given that this was constructed by someone who has a holster for their utility knife and calls themselves [Cardboard Ninja], I think we can trust their stress tests and just go with it. Given that, it’s always a good idea to anchor shelving units to the wall.

You know, this would make a pretty good entry into the second Challenge of this year’s Hackaday Prize. Remember: this is the final weekend to enter, and the window closes at 7AM Pacific on Sunday, so get hackin’!

Continue reading “Throw Out That Box? No, Build A Shelving Unit”