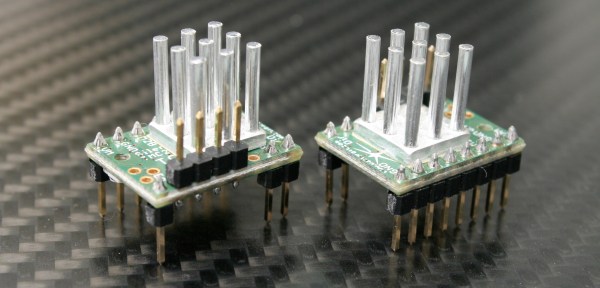
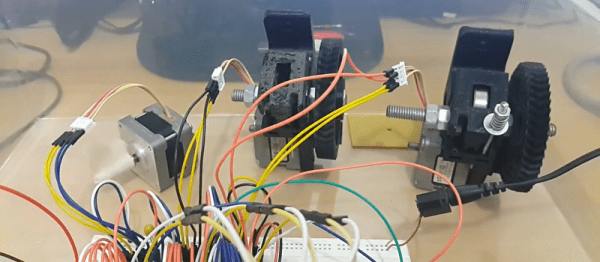
Adjust the phase current, crank up the microstepping, and forget about it — that’s what most people want out of a stepper motor driver IC. Although they power most of our CNC machines and 3D printers, as monolithic solutions to “make it spin”, we don’t often pay much attention to them.
In this article, I’ll be looking at the Trinamic TMC2130 stepper motor driver, one that comes with more bells and whistles than you might ever need. On the one hand, this driver can be configured through its SPI interface to suit virtually any application that employs a stepper motor. On the other hand, you can also write directly to the coil current registers and expand the scope of applicability far beyond motors.
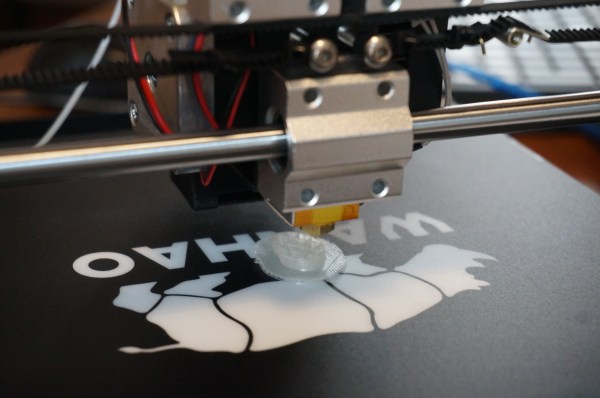
Is the Wanhao Duplicator the best printer on the market? Not at all. Is it a contender for best low-price printer?Definitely. If you consider it a low priced kit printer instead of a finished product then it’s possible that, in its price class, it is hands down the best out there.
For somewhere between 300 and 500 dollars, the Duplicator is a hell of a printer. Also selling under the name Cocoon and Maker Select, the printer is a thin folded sheet steel frame clone of the Prusa i3. I opened the box expecting the most flagrant cost cutting I could imagine. I figured the steel would be paper thin. The holes wouldn’t line up. I expected the connections to be improperly terminated. I expected a fire.
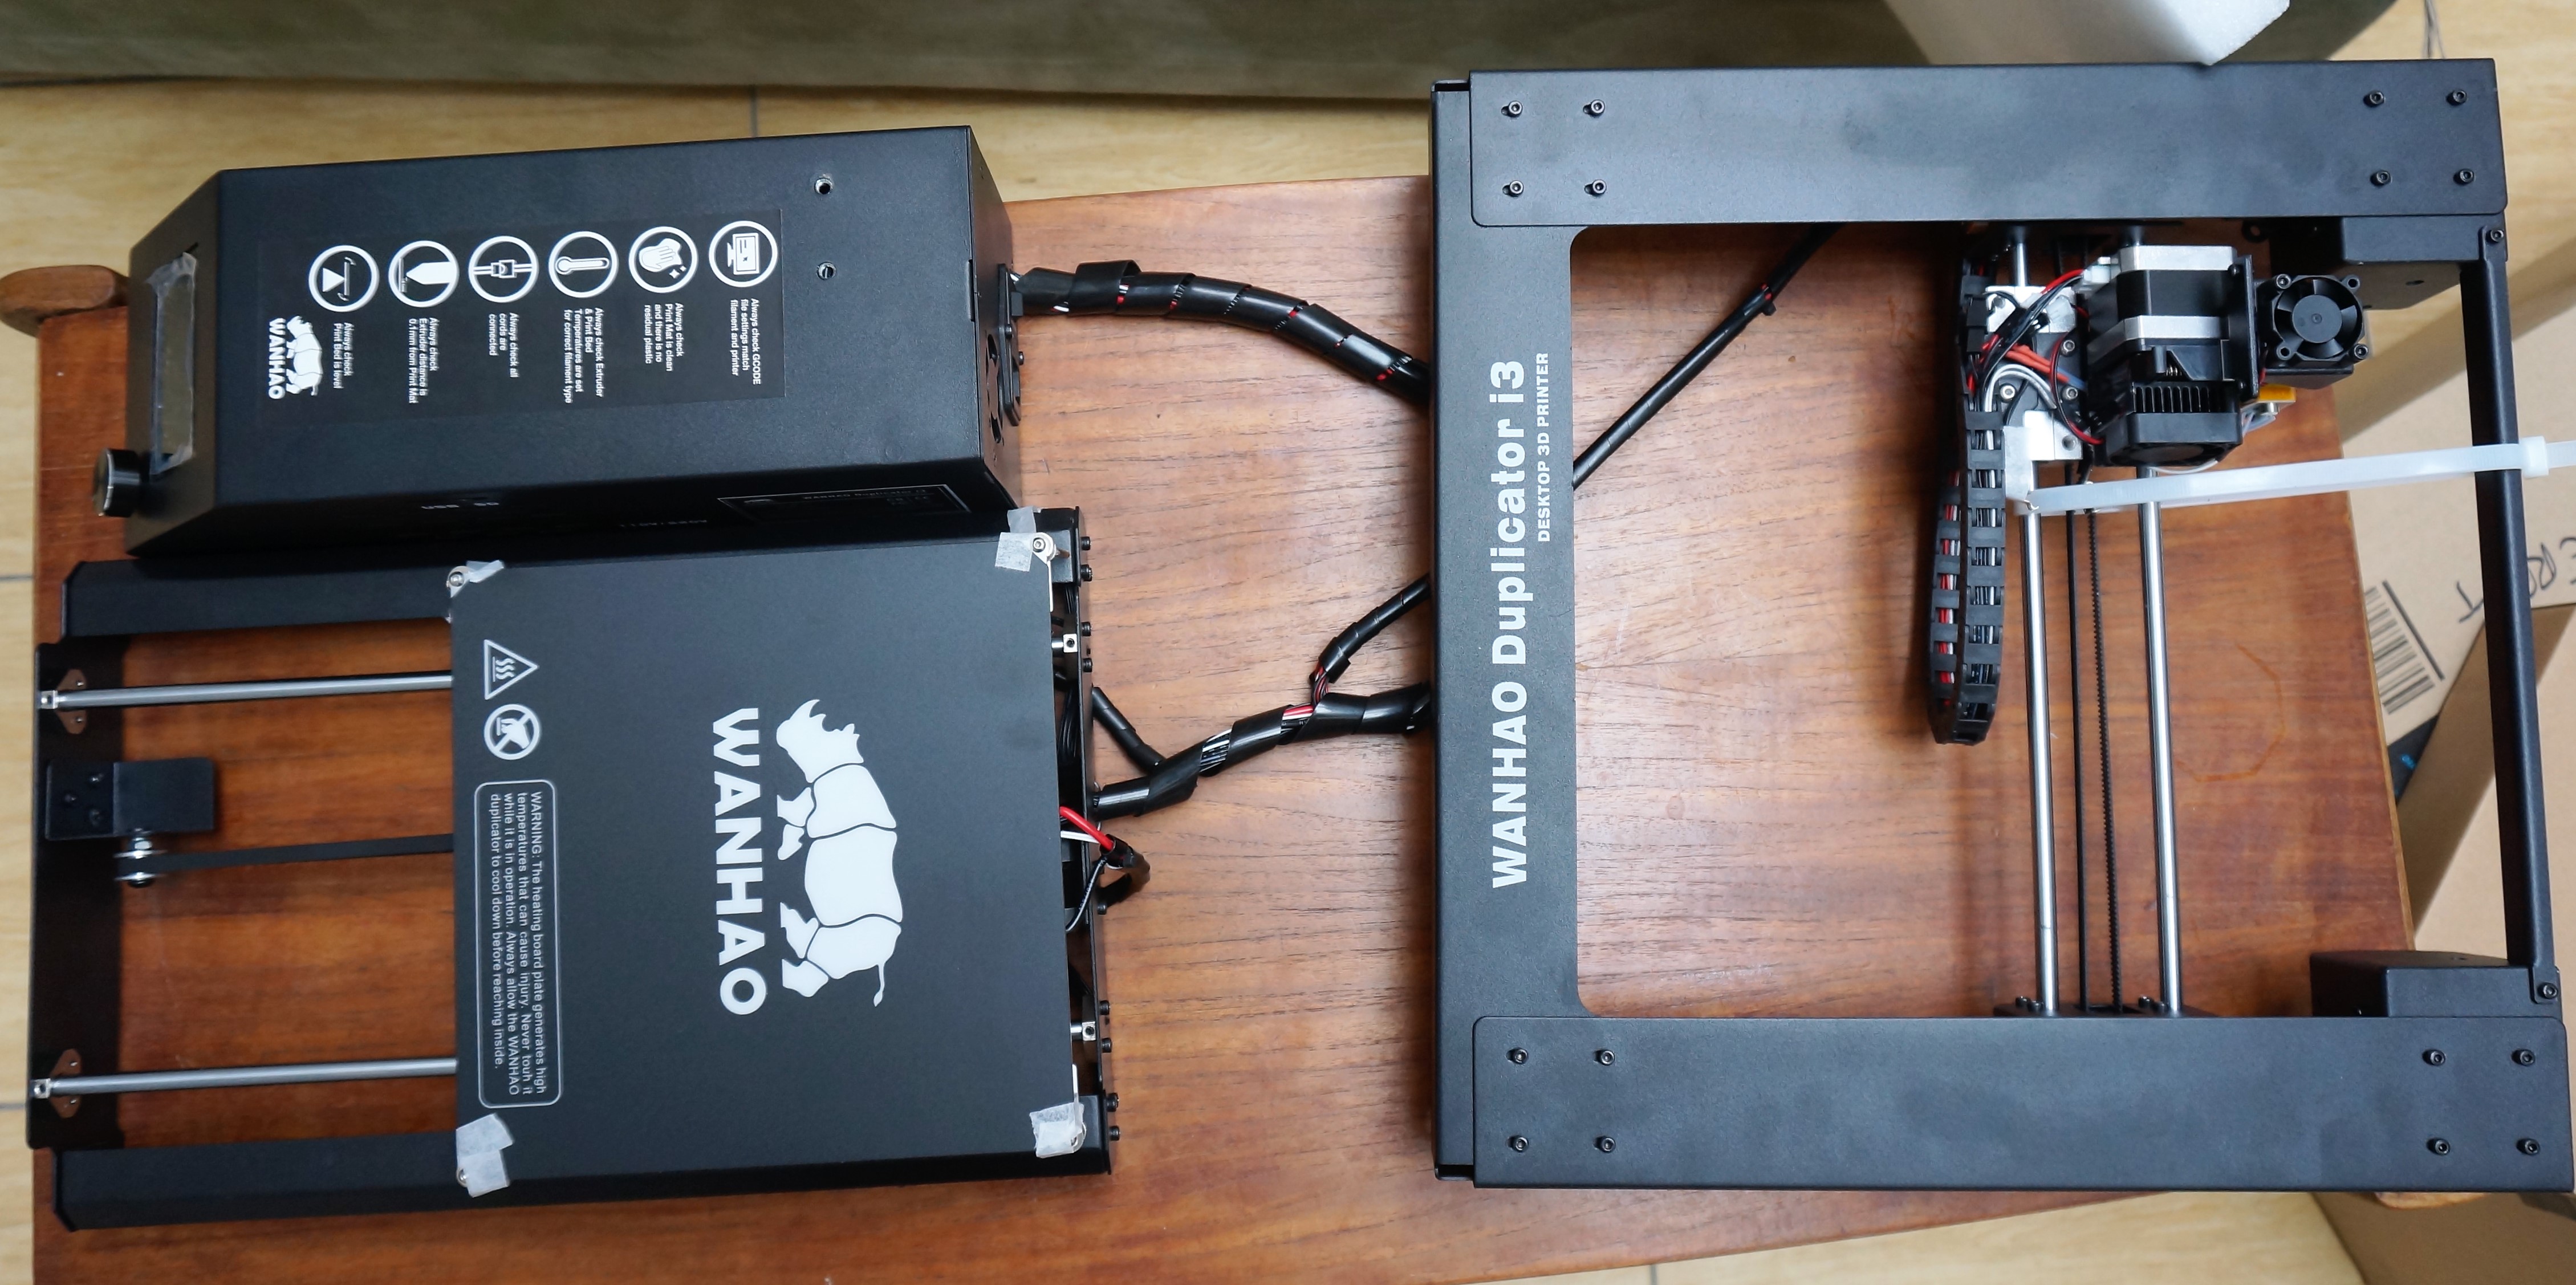
The Duplicator six screws away from being fully assembled. When the manual says find a 1m x 1m flat area to work in it’s not kidding. This table was too small.
What I got was up and printing in under an hour. What I got was something designed by someone who cares, but with an obvious cost goal. As a bonus, it even printed pretty well. As mentioned, the basic shape of the frame is that of a Prusa i3. A horizontal bit holds the bed and y movement. A vertical bit is attached to the middle of that, making a T. It holds the X, Z, and nozzle.
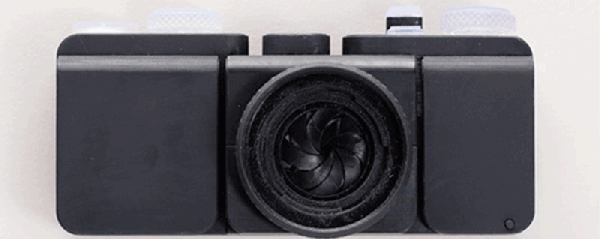
Barring the RepRap project, we usually see 3D printers make either replacement parts or small assemblies, not an entire finished product. [Amos] is the exception to this rule with his entirely 3D-printed camera. Everything in this camera is 3D printed, from the shutter to the lightproof box to the lens itself. It’s an amazing piece of engineering, and a testament to how far 3D printing has come in just a few short years.
35mm film is the most common film by far, and the only one that’s still easy to get and have developed at a reasonable price. This 3D-printed camera is based on that standard, making most of the guts extremely similar to the millions of film cameras that have been produced over the years. There’s a film cartridge, a few gears, a film takeup spool, and a lightproof box. So far, this really isn’t a challenge for any 3D printer.
The fun starts with the lens. We’ve seen 3D printers used for lens making before, starting with a 3D print used to create a silicone mold where a lens is cast in clear acrylic, 3D printed tools used to grind glass, and an experiment from FormLabs to 3D print a lens. All of these techniques require some surface finishing, and [Amos]’ lens is no different. He printed a lens on his Form 2 printer, and started polishing with 400 grit sandpaper. After working up to 12000 grit, the image was still a bit blurry, revealing microscopic grooves that wouldn’t polish out. This led him to build a tool to mechanically polish the lens. This tool was, of course, 3D printed. After polishing, the lens was ‘dip polished’ in a vat of uncured resin.
The shutter was the next challenge, and for this [Amos] couldn’t rely on the usual mechanisms found in film cameras. he did find a shutter mechanism from 1885 that didn’t take up a lot of depth, and after modeling the movement in Blender, designed a reasonable shutter system.
Building an entire camera in a 3D printer is a challenge, but how are the pictures? Not bad, actually. There’s a weird vignetting, and everything’s a little bit blurry. It’s hip, trendy, and lomo, and basically amazing that it works at all.
What’s coolest about this project is the way that [lhartmann] does it. The tiny ESP8266 has nowhere near the required number of GPIO pins, the primary SPI is connected to the onboard flash memory, and the secondary SPI is poorly documented and almost nobody uses it. So, [lhartmann] chose to use the I2S outputs.
I2S is most often an audio protocol, so this might at first seem like a strange choice. Although I2S sounds like I2C, it’s really essentially an SPI protocol with a fourth wire that alternates to designate the right or left channel. It’s actually just perfect for sending 16×2 bits of data at high data rates.
[lhartmann] takes these 32 bits and feeds them into four shift registers, producing 32 outputs from just the four I2S data lines. That’s more than enough signals to run the stepper motors. And since it updates at 192 kHz sample rate, it’s plenty fast enough to drive them.
The other side benefit of this technique is that it can work on single-board computers with just a little bit of software. Programming very complicated stepper movements then becomes just a matter of generating the right “audio” file and playing it out. [lhartmann] demonstrated this earlier with an Orange Pi. That’s pretty cool, too.
The code for turning the ESP8266 and a short handful of 74HC595s into a 3D printer controller are up on GitHub, so go check it out.
A few months ago, a very inexpensive 3D printer appeared on Monoprice. My curiosity for this printer was worth more than $200, so I picked one of these machines up. The Monoprice MP Select Mini is an awesome 3D printer. It’s the perfect printer to buy for a 13-year-old who might be going through a ‘3D printing phase’. It’s a great printer to print a better printer on. This printer is a sign the 3D printing industry is not collapsing, despite Makerbot, and foreshadows the coming age of consumer 3D printers.
The MP Select Mini isn’t Monoprice’s only 3D printer; the printer I bought was merely the ‘good’ printer in the good-better-best lineup. Since my review of the MP Select Mini, Monoprice has introduced their top of the line, the Maker Ultimate 3D printer. Monoprice asked if I would like to take a look at this offering, and I’m more than happy to oblige.
After a week of burn-in, I can safely say you’re not wasting your money on this $700 3D printer. It’s not a starter printer — it’s one that will last you a long time. 2016 is the beginning of the age of consumer 3D printers, and the Monoprice Maker Ultimate is more than proof of this.
As many of the members of the Brian Benchoff hate/fan club know, the life of a Hackaday writer is nomadic and filled with exciting adventures. Jenny List is actually crime fighting cyborg (think Bond); it’s why she knows so much about electronics. James Hobson is Iron Man. The list goes on. There are lots of unnecessary details, but to summarize: Last month I was living in Washington State, this month I am in Paris, France. It’s really nice here, the buildings are beautiful, the cathedrals stunning, and the food significantly tastier.
However, as a contracting engineer with a project involving a deadline; I found myself in dire need of a significant amount of quick turn-around 3D printing during my working vacation to France. Through a lot of trial and tribulation, I eventually discovered that the most cost-effective way to get the prints done… was to just buy a cheap 3D printer and run it into the ground.
I was spoiled by my hackerspace in Louisville, KY. They had enough 3D printers to go around and the pricing was fixed at 10 cents a gram. For the amount of printing I needed, this would be a perfectly economical arrangement. So, I set out to find a hackerspace in Paris. Whereupon I reached my first and obvious problem; I speak very little French.
Most of the hackerspaces listed in Paris are, as far as I can tell, illegally squatting in a scary part of town, exclusive to a university, exclusive to a business, or closed down.
So, I googled a bit harder. Wow! Apparently a Techshop opened up in Paris. It’s about an hour away from where I live, but having toured a Techshop before, I knew they would have the nice version of the tool I need. So, one morning bright and early I got on the metro and headed over to get a tour of the place.
What I’ve discovered is this: If you need things like a water jet cutter, welding station, or a 50 grand CNC machine, Techshop is a really economical way to get access to and play with tools like that. However, if all you want is access to a laser cutter and a 3D printer, it will set you back five-hundred dollars and you’ll have to jump through some incredibly annoying hoops just to get access to them.
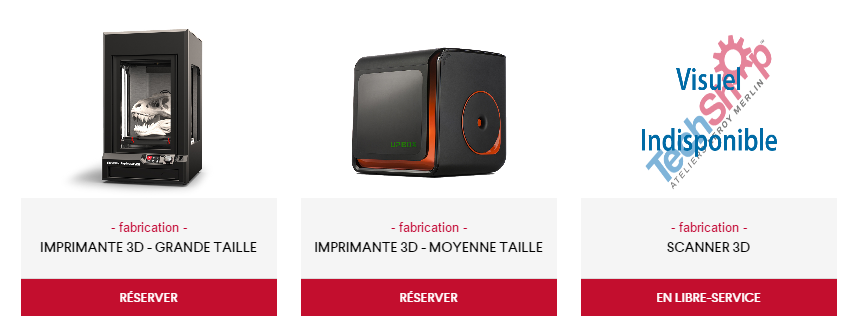
Only a small fee of 400 euros to used these bad boys.
See, most pieces of equipment at a Techshop need to be reserved. Only the 150 euro and 300 euro a month membership tiers can reserve equipment. The 150 tier can reserve something for two hours, the 300, four. If you’ve ever 3D printed you can immediately spot the problem with that. For small prints this could be workable, but if you have a lot of large prints four hours is just not enough. However, there is a work around. If you’re willing to take a metro ride late at night, arriving at the Techshop at 10:00pm, you can, of course, run a print overnight.
There were two more glitches in the Techshop plan. To be able to touch the printers required a two-hour course with a 100 euros fee. The filament also ran 65 euro per 500 g. My printing needs would easily cost me tens of hours in travel and had a starting fee of 400 euros to be workable.
The entrance to Usine.io is terrifying. It’s this massive pitch black hallway. I had no idea if I was in the right place until I got to the desk.
Now, I’m not saying Techshop isn’t absolutely wonderful when it comes to more advanced tools. It’s probably the only Hackerspace in the world where you’re entitled to expect that the CNC machine is in working order, properly trammed, and there are actually cutting bits for it. However, if all you need is a 3D printer, don’t bother.
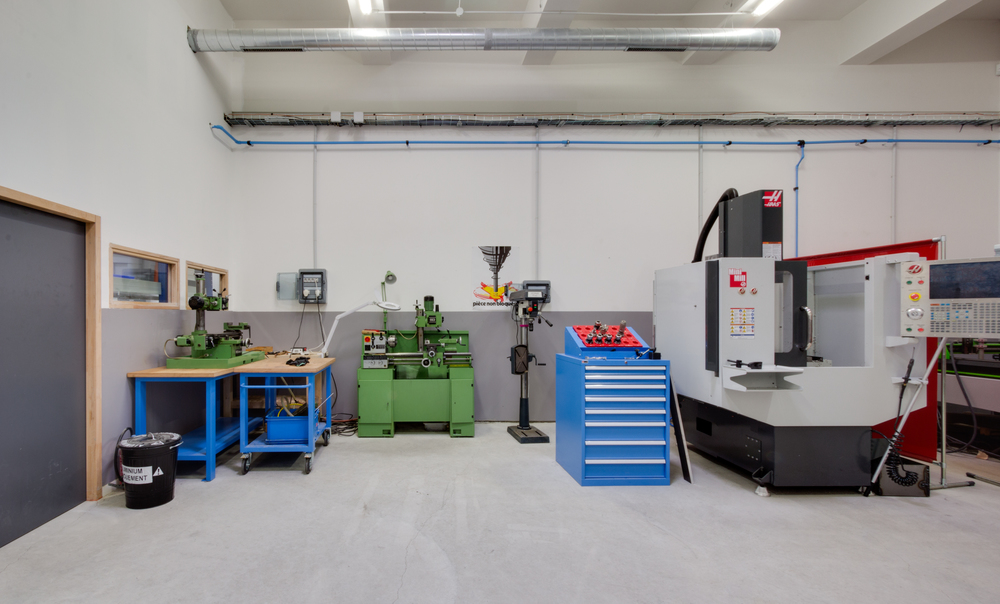
Now, I asked around some more and found that there was a competing space in Paris called Usine.io. It had a flat fee of 180 euros a month and the training was free. I actually did end up getting a membership here for access to a CNC and basic tools, but for 3D printing it was a bust. They only had three printers serving a sizable membership base. This left the printers with a 48 hour line to get your print started and a maximum of 40 hours of printing a month. A die-hard user of 3D printing can easily use 40 hours in 3 days. Because I had to test many iterations for my project, my need the next month was easily triple that number.
However, the shop itself is really nicely outfitted.
The last avenue available to me aside from 3D printer ownership was contracting someone with a 3D printer to run my prints for me. However, after asking around I found the service to be quite expensive. Rent isn’t cheap in Paris after all. If I just needed a single small print it would be worth it, but if I needed lots of printing it would quickly add up to be more money than I had.
That left me with one option. Which, honestly, sounded absolutely insane for someone visiting a country for a few months. Buy a printer. It’s an indication of the state of 3D printing that the price has come down so far that buying a printer is more economical than having someone do it for you. Even a few years ago this was not possible. However, European Amazon Prime had a workable enough import printer to my doorstep faster than any commercially available service could even process my order. We’ve come a long way since the Darwin. That’s for sure.
It doesn’t happen that often, but this is the last time that [Lucas] comes back from hours of unattended 3D printing to find a large portion of plastic spaghetti mess and a partly disassembled Kossel. The crash sensor he designed will now safely halt the printer if it detects that something went wrong during the print.