As smartphones become more ubiquitous in society, they are being used in plenty of ways not imaginable even ten or fifteen years ago. Using its sensors to gather LIDAR information, its GPS to get directions, its microphone to instantly translate languages, or even use its WiFi and cellular radios to establish a wireless hotspot are all things which would have taken specialized hardware not more than two decades ago. The latest disruption may be in microscopy, as this build demonstrates a microscope that would otherwise be hundreds of thousands of dollars.
The microscope is a specialized device known as a fluorescence microscope, which uses a light source to excite fluorescent molecules in a sample which can illuminate structures that would otherwise be invisible under a regular microscope. For this build, the light is provided by readily-available LED lighting as well as optical filters typically used in stage lighting, as well as a garden-variety smartphone. With these techniques a microscope can be produced for around $50 USD that has 10 µm resolution.
While these fluorescence microscopes do have some limitations compared to units in the hundred-thousand-dollar range, perhaps unsurprisingly, they are fairly impressive for such a low-cost alternative. More details about these builds can also be found in their research paper published in Nature. Even without the need for fluorescence microscopy, a smartphone has been shown to be a fairly decent optical microscope, provided you have the right hardware to supplement the phone’s camera.
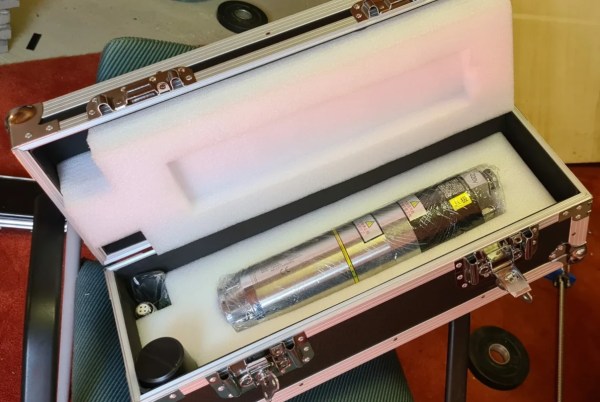
The old saying “you get what you pay for” is a cautionary cliché, but is directly contrary to several other common sayings. In the case of [Spikee]’s planned CNC machine build, he took the more adventurous idiom of “no risk, no reward” to heart when he purchased these spindles for the machine from AliExpress. While the delivered product seemed fine, there were some problems that needed investigations.
Upon delivery of the spindle, everything seemed to work correctly out-of-the-box. Even the variable frequency drive, which was programmed at the factory, was working properly. But at around 8000 rpm the machine would begin shaking. The suspected part causing the vibration was the tool holder, so after checking the machine’s runout and also using a specialized vibration sensor this was confirmed to be the case.
Luckily [Spikee] was able to get a refund on the tool holders since they were out of spec, but still has a quite capable spindle on his hands for an excellent price. Without some skills in troubleshooting he might have returned the entire machine unnecessarily. If you are looking for some other ideas in setting up an inexpensive CNC machine, you might also like to look at BLDC motors from a remote control vehicle.
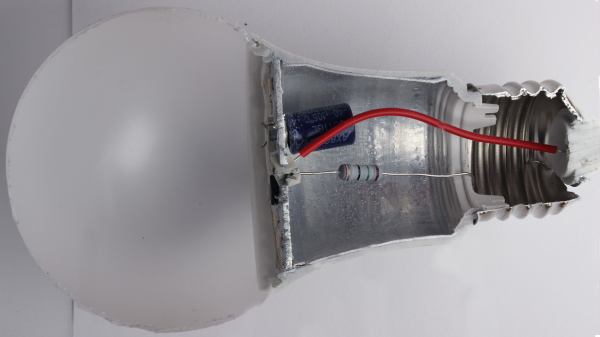
[electronupdate] has done a lot of LED light bulb teardowns over the years, witnessing a drive towards ever-cheaper and ever-simpler implementations, and suspects that LED light bulb design has finally reached its ultimate goal. This teardown of a recent dollar store example shows that cost-cutting has managed to shave even more off what was already looking like a market saturated with bottom-dollar design.
The electrical components inside this glowing model of cost-cutting consists of one PCB (previously-seen dollar store LED bulb examples had two), eleven LEDs, one bridge rectifier, two resistors, and a controller IC. A wirewound resistor apparently also serves as a fuse, just in case.
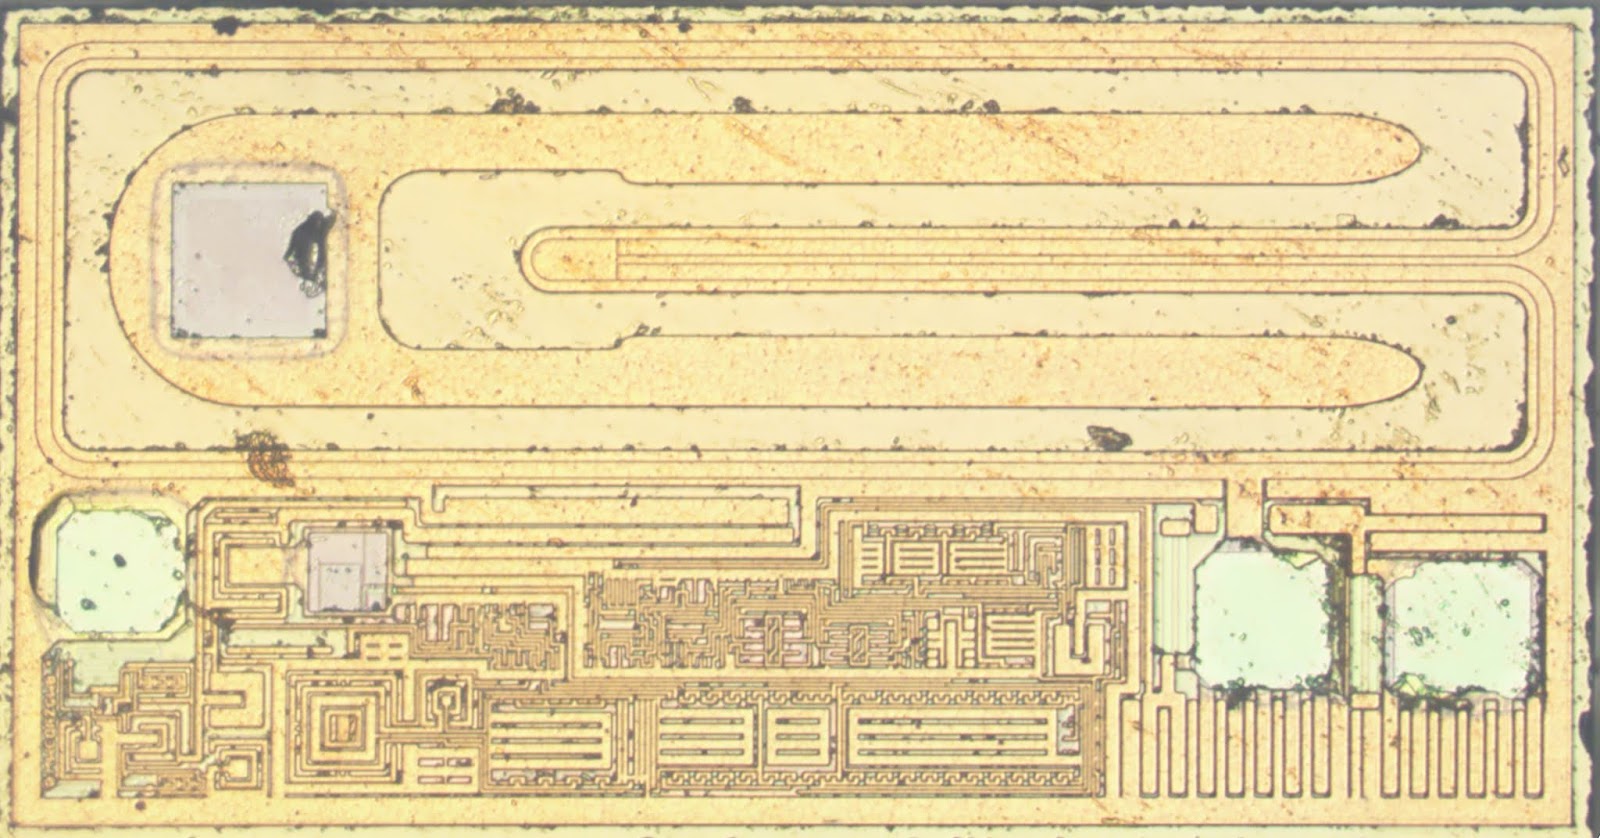
Inside the unmarked controller IC. The design is as cheap as it is clever in its cost-cutting.
That’s not all. [electronupdate] goes beyond a simple teardown and has decapped the controller IC to see what lurks inside, and the result is shown here. This controller is responsible for driving the LEDs from the ~100 Volts DC that the bridge rectifier and large electrolytic cap present to it, and it’s both cheap and clever in its own way.
The top half is a big transistor for chopping the voltage and the bottom half is the simple control logic; operation is fast enough that no flicker is perceived in the LEDs, and no output smoothing cap is needed. The result, of course, is fewer components and lower cost.
Some of you may recall that back in the early days of LED lighting, bulbs that could last 100,000 hours were a hot promise. That didn’t happen for a variety of reasons and the march towards being an everyday consumable where cost was paramount continued. [electronupdate] feels they have probably reached that ultimate goal, at least until something else changes. They work, they’re cheap, and just about everything else has been successfully pried up and tossed out the door.
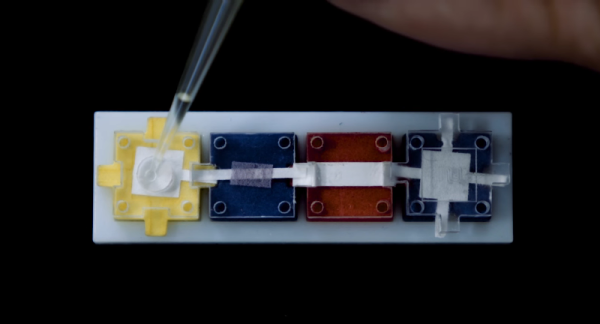
When engineering a solution to a problem, an often-successful approach is to keep the design as simple as possible. Simple things are easier to produce, maintain, and use. Whether you’re building a robot, operating system, or automobile, this type of design can help in many different ways. Now, researchers at MIT’s Little Devices Lab have taken this philosophy to testing for various medical conditions, using a set of modular blocks.
Each block is designed for a specific purpose, and can be linked together with other blocks. For example, one block may be able to identify Zika virus, and another block could help determine blood sugar levels. By linking the blocks together, a healthcare worker can build a diagnosis system catered specifically for their needs. The price tag for these small, simple blocks is modest as well: about $0.015, or one and a half cents per block. They also don’t need to be refrigerated or handled specially, and some can be reused.
This is an impressive breakthrough that is poised to help not only low-income people around the world, but anyone with a need for quick, accurate medical diagnoses at a marginal cost. Keeping things simple and modular allows for all kinds of possibilities, as we recently covered in the world of robotics.
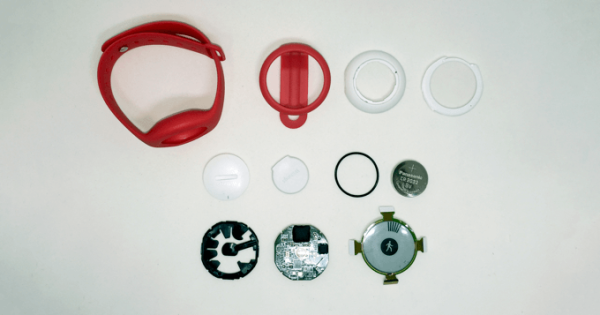
If the trends are anything to go on, after the success of Fitbit we are nearing a sort of fitness tracker singularity. Soon there will be more fitness trackers on wrists and ankles then there will be stars in the sky. We will have entire generations who will grow up not knowing what life is like without the ever-present hug of a heart monitor strapped across their chest. Until then though, we can learn a bit of design for manufacture from this excellent teardown of a watch shaped fitness tracker.
This tracker has a nice round e-paper screen, which could be a welcome part in a project if they start washing up on the shores of eBay. The rest of the watch is a basic Bluetooth low energy module and the accessory electronics wrapped in a squishy plastic casing.
There’s a lot of nice engineering inside the watch. As far as the electronics go, it’s very low power. On top of that is plenty of clever cost optimization; from a swath of test points to reduce quality issues in the hands of consumers to the clever stamped and formed battery tabs which touch the CR2032 that powers it.
The teardown covers more details: the switch, what may be hiding behind the epoxy globs, the plastics, and more. One thing that may be of interest to those that have been following Jenny’s excellent series is the BOM cost of the device. All in all a very educational read.
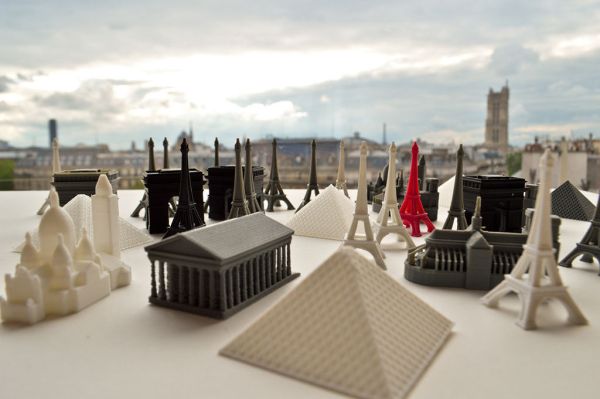
As many of the members of the Brian Benchoff hate/fan club know, the life of a Hackaday writer is nomadic and filled with exciting adventures. Jenny List is actually crime fighting cyborg (think Bond); it’s why she knows so much about electronics. James Hobson is Iron Man. The list goes on. There are lots of unnecessary details, but to summarize: Last month I was living in Washington State, this month I am in Paris, France. It’s really nice here, the buildings are beautiful, the cathedrals stunning, and the food significantly tastier.
However, as a contracting engineer with a project involving a deadline; I found myself in dire need of a significant amount of quick turn-around 3D printing during my working vacation to France. Through a lot of trial and tribulation, I eventually discovered that the most cost-effective way to get the prints done… was to just buy a cheap 3D printer and run it into the ground.
I was spoiled by my hackerspace in Louisville, KY. They had enough 3D printers to go around and the pricing was fixed at 10 cents a gram. For the amount of printing I needed, this would be a perfectly economical arrangement. So, I set out to find a hackerspace in Paris. Whereupon I reached my first and obvious problem; I speak very little French.
Most of the hackerspaces listed in Paris are, as far as I can tell, illegally squatting in a scary part of town, exclusive to a university, exclusive to a business, or closed down.
So, I googled a bit harder. Wow! Apparently a Techshop opened up in Paris. It’s about an hour away from where I live, but having toured a Techshop before, I knew they would have the nice version of the tool I need. So, one morning bright and early I got on the metro and headed over to get a tour of the place.
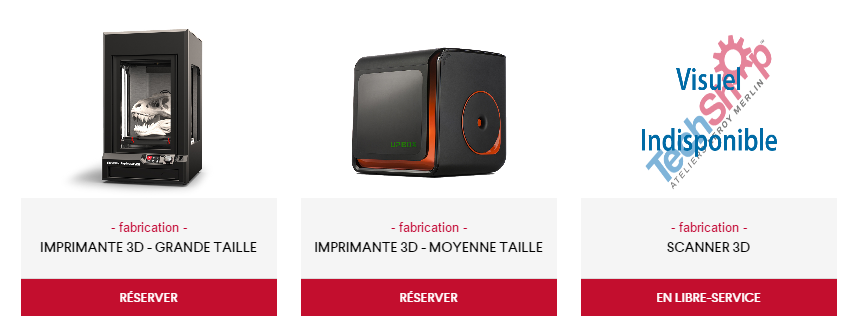
What I’ve discovered is this: If you need things like a water jet cutter, welding station, or a 50 grand CNC machine, Techshop is a really economical way to get access to and play with tools like that. However, if all you want is access to a laser cutter and a 3D printer, it will set you back five-hundred dollars and you’ll have to jump through some incredibly annoying hoops just to get access to them.
Only a small fee of 400 euros to used these bad boys.
See, most pieces of equipment at a Techshop need to be reserved. Only the 150 euro and 300 euro a month membership tiers can reserve equipment. The 150 tier can reserve something for two hours, the 300, four. If you’ve ever 3D printed you can immediately spot the problem with that. For small prints this could be workable, but if you have a lot of large prints four hours is just not enough. However, there is a work around. If you’re willing to take a metro ride late at night, arriving at the Techshop at 10:00pm, you can, of course, run a print overnight.
There were two more glitches in the Techshop plan. To be able to touch the printers required a two-hour course with a 100 euros fee. The filament also ran 65 euro per 500 g. My printing needs would easily cost me tens of hours in travel and had a starting fee of 400 euros to be workable.
The entrance to Usine.io is terrifying. It’s this massive pitch black hallway. I had no idea if I was in the right place until I got to the desk.
Now, I’m not saying Techshop isn’t absolutely wonderful when it comes to more advanced tools. It’s probably the only Hackerspace in the world where you’re entitled to expect that the CNC machine is in working order, properly trammed, and there are actually cutting bits for it. However, if all you need is a 3D printer, don’t bother.
Now, I asked around some more and found that there was a competing space in Paris called Usine.io. It had a flat fee of 180 euros a month and the training was free. I actually did end up getting a membership here for access to a CNC and basic tools, but for 3D printing it was a bust. They only had three printers serving a sizable membership base. This left the printers with a 48 hour line to get your print started and a maximum of 40 hours of printing a month. A die-hard user of 3D printing can easily use 40 hours in 3 days. Because I had to test many iterations for my project, my need the next month was easily triple that number.
However, the shop itself is really nicely outfitted.
The last avenue available to me aside from 3D printer ownership was contracting someone with a 3D printer to run my prints for me. However, after asking around I found the service to be quite expensive. Rent isn’t cheap in Paris after all. If I just needed a single small print it would be worth it, but if I needed lots of printing it would quickly add up to be more money than I had.
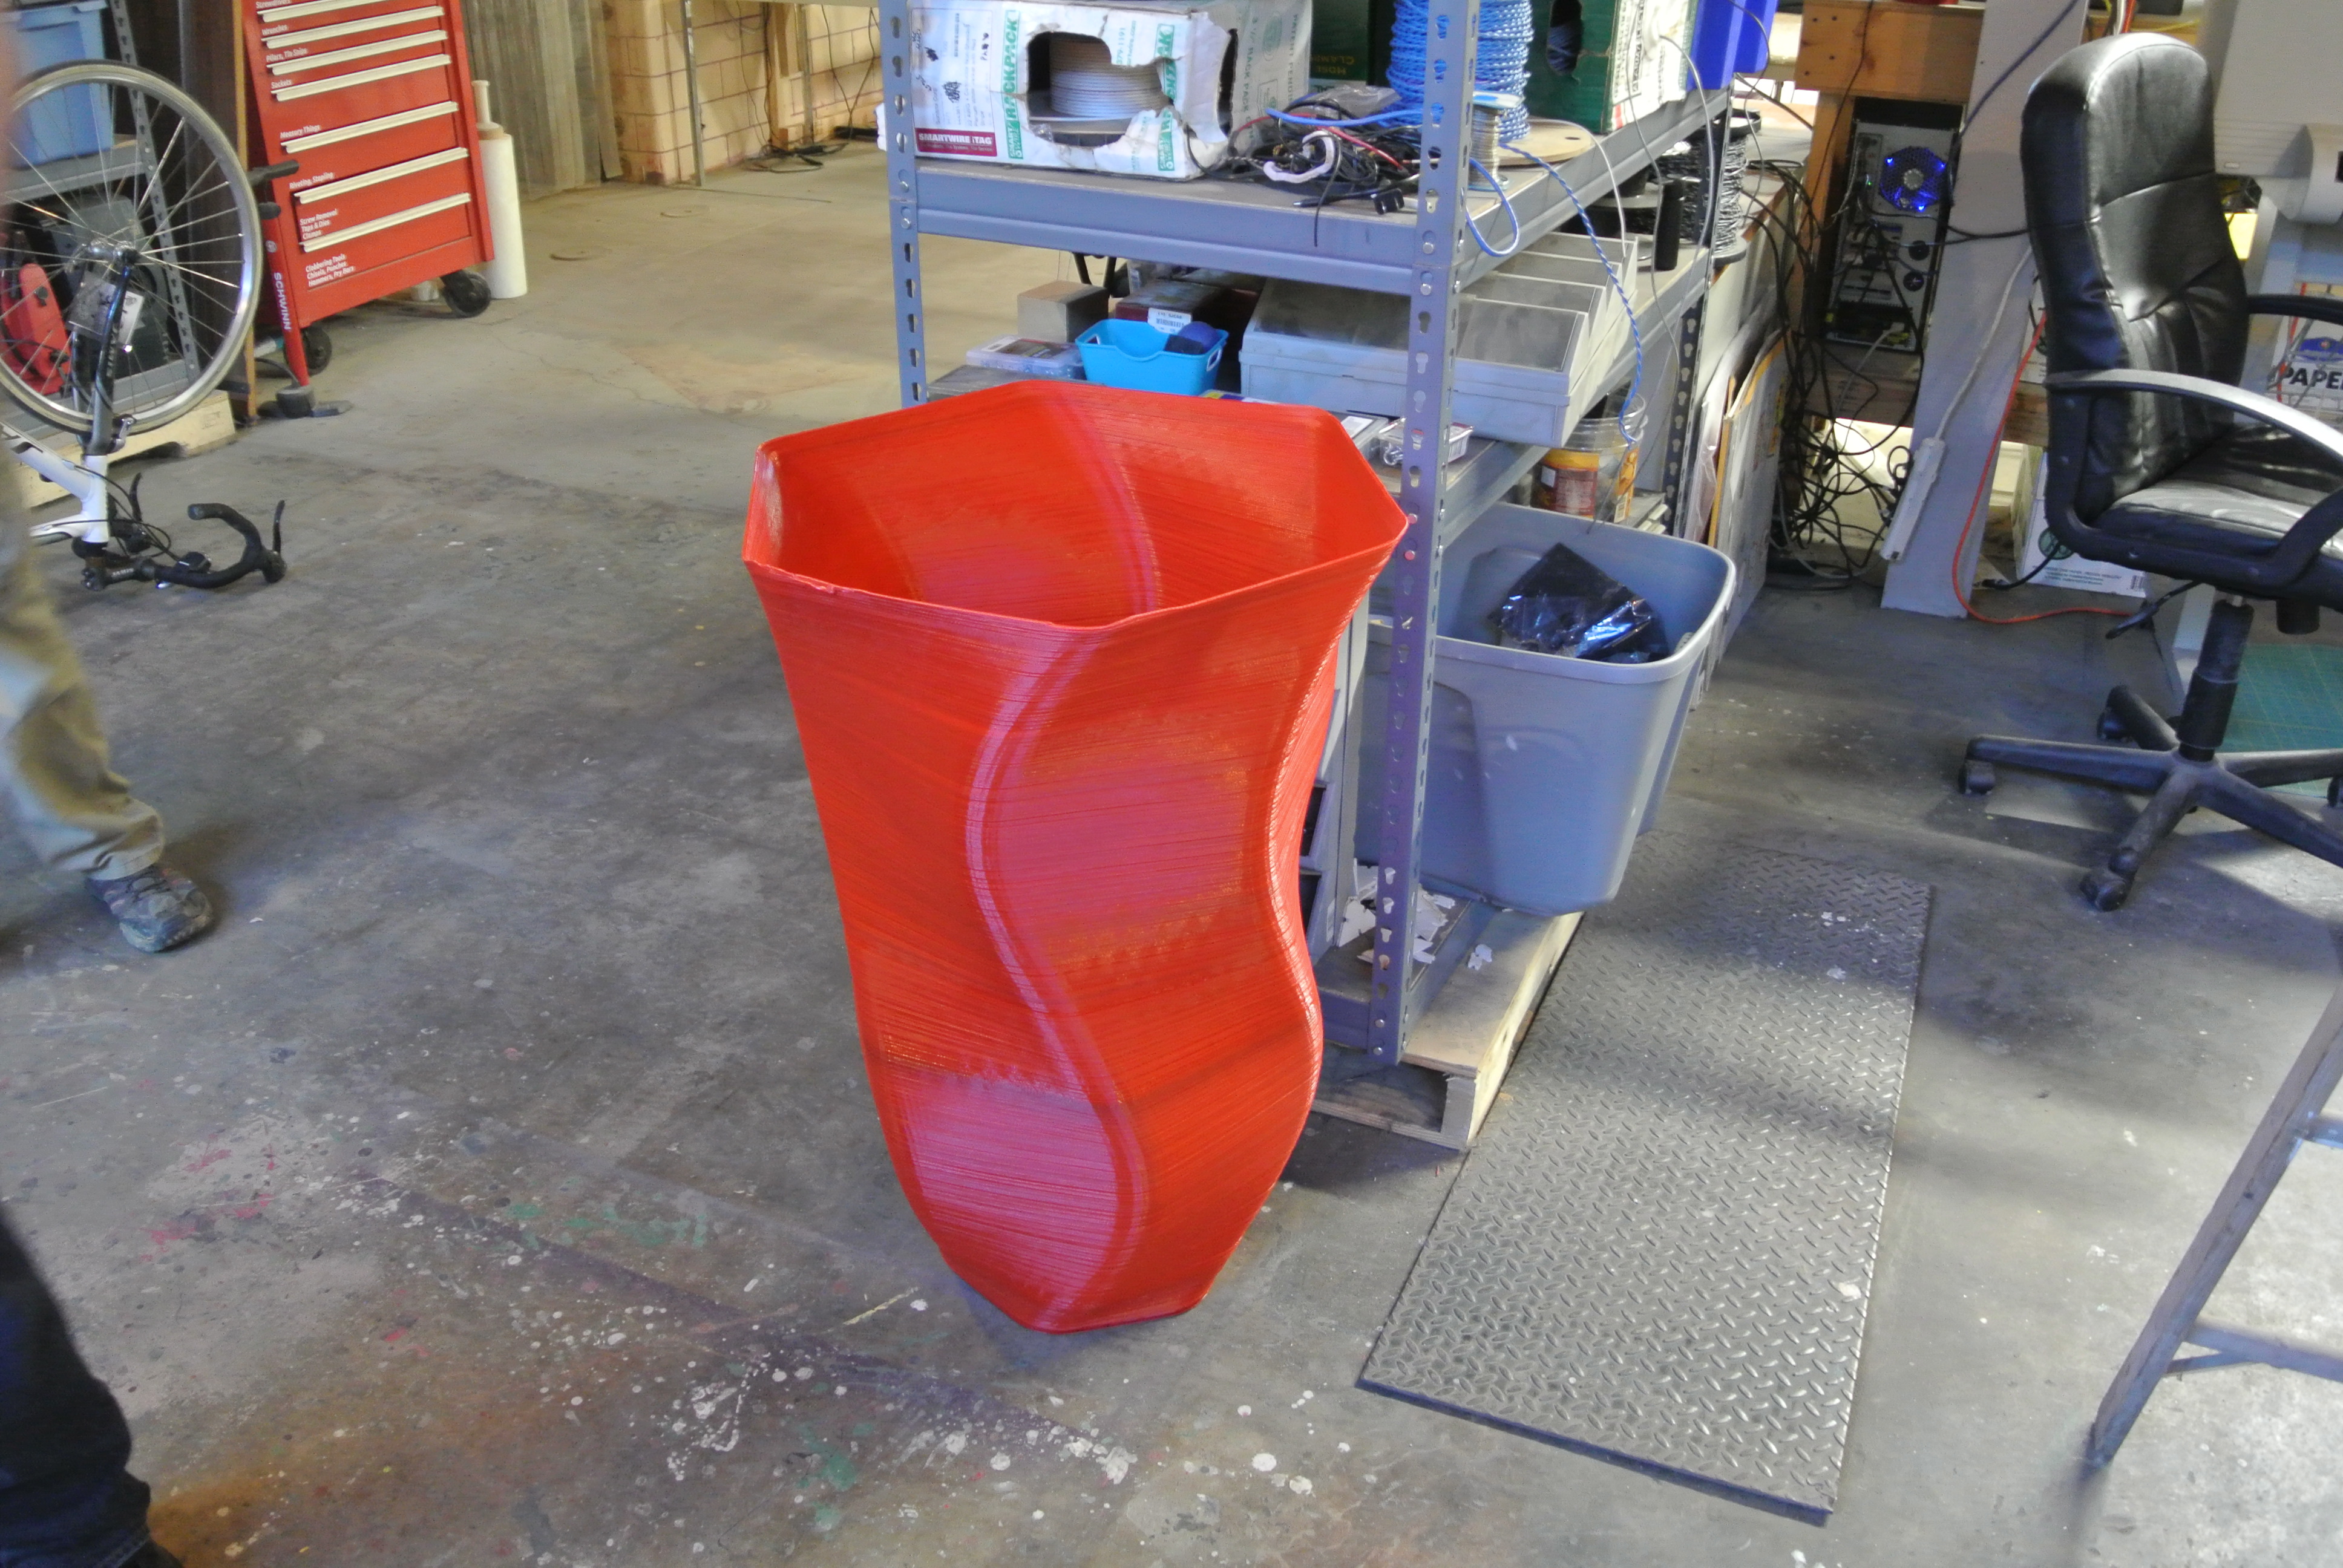
That left me with one option. Which, honestly, sounded absolutely insane for someone visiting a country for a few months. Buy a printer. It’s an indication of the state of 3D printing that the price has come down so far that buying a printer is more economical than having someone do it for you. Even a few years ago this was not possible. However, European Amazon Prime had a workable enough import printer to my doorstep faster than any commercially available service could even process my order. We’ve come a long way since the Darwin. That’s for sure.
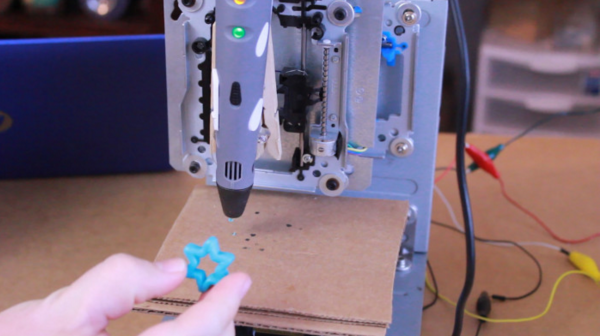
3D printers are ubiquitous now, but they’re still prohibitively expensive for some people. Some printers cost thousands, but even more inexpensive options aren’t exactly cheap. [Daniel] decided that this was unacceptable, and set out to make a basic 3D printer for under $100 by including only the bare essentials needed for creating anything out of melted plastic.
3D printers are essentially four parts: a bed, filament, and a hot end and extruder. In a previous project, [Daniel] used parts from old CD drives to create a three-axis CNC machine which he uses for the bed. To take care of the hot end and extruder, he is using a 3D printing pen which he mounts to the CNC machine and voila: a 3D printer!
It’s not quite as simple as just strapping a 3D printing pen to a CNC machine, though. The pen and the CNC machine have to communicate with each other so that the pen knows when to place filament and the CNC machine knows when to move. For that, [Daniel] went with a trusty Arduino in order to switch the pen on and off. Once it’s working, it’s time to start printing!
[Daniel] does note that this is a design that’s relatively limited in terms of print size and resolution, but for the price it can’t be beat. If you’re interested in getting started with 3D printing, a setup like this would be perfect. 3D pens are a pretty new idea too, and it’s interesting to see them used in different ways like this.