Teensy Script Plays Nintendo Switch, Strikes Out

The most recent of the Zelda franchise, Breath of the Wild, is known for its many, many puzzles.  One of the more frustrating ones involved bowling with a giant snowball at the top of a hillside.  [Bertrand] did not like this, so he cheated the system hacked the Nintendo Switch so that he “genuinely earned” a strike every time he played.  He achieved this by writing a script for a Teensy module that got him those sweet rupees.

The Teensy houses an Atmel 90USB1286 microcontroller.  When paired with LUFA software, it can emulate numerous controllers including keyboards, joysticks, etc.  It also handily has a Mini-B USB connector located on its rear, allowing it to communicate to the Switch with ease.  After confirming the hardware was compatible, [Bertrand] looked towards the software side noticing the similarity between what already existed and what he was attempting to accomplish.  He happened upon this in a Splatoon 2 fork that allows players to draw posts. 

In essence, it takes image files as input and emulates the controls and buttons to draw a 1-bit version of the image automatically.  This takes care of syncing the hardware as well as how to simulate the button presses.  But instead of reading an image file, it needed to take a custom script as the input.  This required starting from scratch.  The first logical step — of course — was to create a language similar to Logo, a name that surely brings back memories of the time of big hair and shoulder pads.  He only needed a handful of simple commands to control Link:

typedef enum {
	UP,
	DOWN,
	LEFT,
	RIGHT,
	X,
	Y,
	A,
	B,
	L,
	R,
	THROW,
	NOTHING,
	TRIGGERS
} Buttons_t;

Continue reading “Teensy Script Plays Nintendo Switch, Strikes Out”

Paperback: ePaper desktop monitor playing Doom

Hackaday Prize Entry: PaperBack Desktop EPaper Monitor

When we announced the Hackaday Prize with its Best Product category, [PK] polled his wife and co-workers about the idea of making a desktop monitor using 6″ 800×600 ePaper, which he has since built and calls the PaperBack. One such requirement for a monitor is to be able to connect to it using one of the usual desktop methods: VGA, DVI or HDMI. Given his previous experience making his own VGA card for the 2015 prize, he went with that. HDMI is in the works.

But it ended up being more than a desktop monitor. He first made a power and breakout board that a VGA input board would eventually connect to. To test it, he included a socket for plugging in an ESP32. With only one bodge he had the Hackaday logo displayed on the ePaper. He also now had the option of using it as a wireless internet connected display.

Moving on to VGA support, [PK] made a VGA input board using the MST9883 chip, which does the A/D conversion of the VGA RGB graphics signal and also recovers a pixel sampling clock from the HSYNC. His new VGA ePaper monitor has to identify itself to the VGA source, telling it dimensions, resolution and so on. This is called the EDID and was handled by the addition of an Atmel ATmega328 to the board. To finish it off, an LCMXO1200C FPGA does the high-speed conversions with the help of a 4 MBit SRAM framebuffer.

His very first test involved simply displaying the Hackaday logo using the ESP32, but now with the VGA input board he has it displaying Doom. Since it’s using ePaper it has only a 1-second refresh rate but it’s hard to come up with a more awesome way to proved that it works. He can also unplug it at any time and walk away with the latest screenshot intact. See it for yourself in the video below.

Continue reading “Hackaday Prize Entry: PaperBack Desktop EPaper Monitor”

Get Hands-On At Supercon: Workshop Tickets Now Available

Build something cool and pick up new skills from the workshops at the Hackaday Superconference. Last week we announced all of the talks you’ll find at Supercon, and starting today you can reserve your spot at one of the workshops.

You must have a Superconference ticket in order to purchase a workshop ticket; buy one right now if you haven’t already. You can get mechanical with Haptics and Animatronics, take your product design from schematic to PCB and enclosure, brush up your embedded development on several choices of platform, make cell towers do your bidding, or dump way too many volts into a block of wood.

Space in these workshops is limited so make sure to sign up before all the seats are taken. The base price for workshops is $10 (basically a “skin in the game” price to encourage those who register to show up). Any tickets priced above that base is meant to cover the material expense of the workshop. Here’s what we have planned:

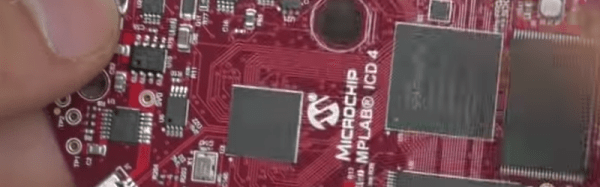
Embedded Programming with Black Magic and the Lights On

Piotr Esden-Tempski

Sunday Afternoon

Embedded systems programming has earned a bad reputation of being difficult to master. Especially in the open-source world, most people associate it with cut and pasted code that is difficult to debug. The usual tools we have to debug embedded systems are a blinking LED and, if we are lucky, printf statements through a serial port. In this self guided workshop we will show you how easy it can be to have full insight into your microcontroller using fully open source tools that are on par with expensive proprietary closed-source solutions.

Fun with High Voltage

Will Caruana

Sunday Morning

This workshop is about making Lichtenberg figures. A Lichtenberg figure is a piece of art though the multiplication of a few thousands of volts to burn wood. We will cover the science behind this art form as well as the safety and lastly we will be getting hands on experience in being able to using high voltage transformers to make these burnings into wood and make coasters you can take home.

Designing Electronic Textures

Noah Feehan

Sunday Afternoon

Participants will learn the physics behind electrovibration, and then get to play/design for it using a new open-source board called WEFT. After the workshop, you’ll know how to deploy electrovibration in your projects, and understand the feeling of different waveforms.

End to End Product Design with Eagle and Fusion 360

Matt Berggren

Saturday Morning

In this session, we’ll take you end to end, from building a new schematic, simulating a circuit using EAGLE’s built-in SPICE simulator, laying out a PCB, generating mfg files and include some tips & tricks for milling boards and making stencils. We’ll also take you thru the link between electronics and mechanics using Fusion360. Alongside EAGLE we’ll build an enclosure and generate the mfg outputs for your mechanical design (CAM, 3D prints, etc). We’ll look at library management across electronics and mechanics and bidirectional synchronization between both of these domains. This is more than an intro, as Matt’s always good for some essential, oft-missed background and tips with EAGLE you might never have known otherwise.

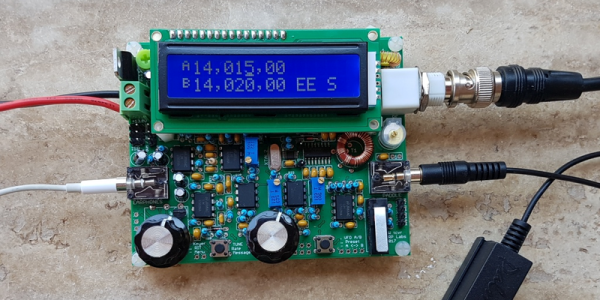
AVR® MCU Effortless Design Workshop: Prototyping with Sensors and BLE

Bob Martin, Senior Staff Engineer

Sunday Morning

This hands-on training session will walk you through how to develop an embedded sensor node prototype with Bluetooth® Low Energy (BLE) connectivity. You will speed through configuration of the AVR microcontroller, sensor interface and communications interface setup by using Atmel Start, a graphical programming interface. This tool will generate libraries with simple APIs so you can spend time working on your solution instead of messing with registers or communication protocols.

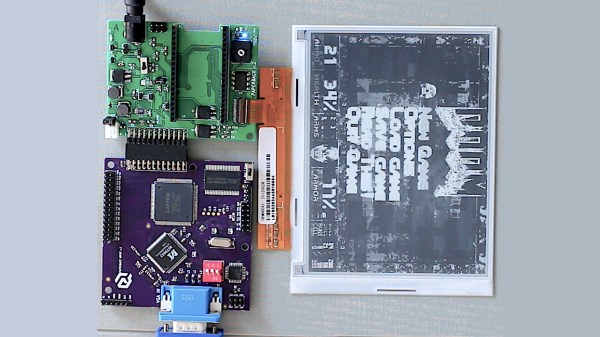
Rapid Prototyping and Linux Kernel Development with the PocketBeagle® Platform

Robert Nelson

Saturday Afternoon

The newly introduced PocketBeagle® is an ultra-tiny-yet-complete Linux-enabled, community-supported, open-source USB-key-fob computer. By leveraging the Octavo SIP, the PocketBeagle offers complete BeagleBoard functionality and includes 512MB DDR3 RAM, 1-GHz ARM Cortex-A8 CPU, 2x 200-MHz PRUs, ARM Cortex-M3, 3D accelerator, power/battery management and EEPROM. The board offers lots of GPIOs, on board peripherals and various expansion capabilities via multiple headers and the Mikroelektronika click board interface. During this course you will learn about pin configuration, how to create a Linux distribution, reconfiguring io on the fly and how to leverage expansion modules. Attendees will leave with their very own PocketBeagle and a couple other surprises as well.

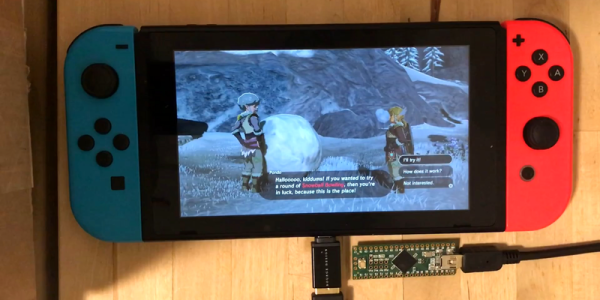
Cellular Connectivity for Your Next Hardware Project

Ben Strahan and Chris Gammell

Saturday Afternoon

Your project shouldn’t be constrained by the range of a WiFi signal. This workshop will show you how to connect to cellular towers via a serial link, get connected into the cloud and reliably start transmitting data. This workshop is suitable for people just getting started in the firmware ecosystem up through advanced firmware engineers. Advanced members of the workshop will have the opportunity to hack their conference badge to connect to cell towers. Sign up for this workshop to add another connection method to your hardware development toolbox.

An Introduction to Animatronics with Laser Cut Tentacle Mechanisms

Joshua Vasquez

Saturday Morning

Animatronics are way cool, but the hacker community rarely ventures farther than a few hobby servos and “dem-blinkin’ LEDs.” In this workshop, I’ll get you cozy with tentacle mechanisms that you can build with just a laser cutter and a few hand tools. There are three big takeaways from this workshop. We’ll build up a two-stage controller reusable in other projects, muscle up our vocabulary of off-the-shelf parts for cable mechanisms, and discover a few laser-cut design techniques.

Superconference workshops tend to sell out extremely quickly. Don’t wait to get your ticket.

A Fully Featured, Fifty Dollar QRP Radio

QRP radio operators try to get maximum range out of minimal power. This term comes from the QRP Q-code, which means “reduce power.” For years, people have built some very low-cost radios for this purpose. Perhaps the best known QRP kit is the Pixie, which can be found for less than $3 on eBay.

The QCX is a new DIY QRP radio kit from QRP Labs. Unlike the Pixie, it has a long list of features. The QCX operates on the 80, 60, 40, 30, 20, or 17 meter bands at up to 5W output power. The display provides tuning information, an S-meter, and a CW decoder. An on-board microswitch functions as a basic Morse key, and external Iambic or straight keys are also supported. An optional GPS can be used as a frequency reference.

The radio is based around the Silicon Labs Si5351A Clock Generator, a PLL chip with three clock outputs ranging from 2.5 kHz to 200 MHz. The system is controlled by an Atmel ATmega328P.

Demand for the kit has been quite high, and unfortunately you’ll have to wait for one. However, you can put down your $49 and learn Morse code while waiting for it to ship. While the project does not appear to be open source, the assembly instructions [PDF warning] provide a full schematic.

Microchip ICD4 REview

[Mike] is an avid PIC developer and replaced his ICD3 debugger for an ICD4. He made a video with his impressions and you can see it below. [Mike] found the heavy aluminum case with a sexy LED attractive, but wondered why he was paying for that in a development tool. He was also unhappy that they replaced the ICD3 cable connections with new connectors. Finally, he wished for the pin out to be printed on the case.

On the other hand, the ICD4 will also do JTAG and handle the Atmel parts (which Microchip acquired). [Mike] opens the box and shows the inside of the device before actually using it for the intended task.

Continue reading “Microchip ICD4 REview”

Touchscreen Oscilloscope

[Marco Reps] didn’t want to lug a full-sized oscilloscope around to measure his ECG while running. He decided to check out the DSO112A which is a tiny touchscreen scope from the usual China sources. The tiny one channel scope can go to 2mV/division at 2MHz and can save and recall up to 24 configurations. It also has access to the data via a serial port so you can use it as a fancy data logger. [Marco’s] video appears below.

Apparently, there is was an older model without the A on the end that was not as sensitive and had some other missing features. The price is about $70–fairly inexpensive, although not throw-away cheap.

[Marco] noted that one of the two small connectors can act as an external trigger input or a function generator. There’s the typical LiPo battery inside and a shielded input section. [Marco] tears the board down and looks at the chips on the board. Inside are two Atmel CPUs and a 20 megasample per second analog to digital converter.

The color screen looks surprisingly good in the video although, as [Marco] points out, with one channel, the colors aren’t super useful. The device also has cursors and a nice selection of measurements that work both live and on stored data.

At the end of the video, [Marco] shows a simple ECG amplifier he built from an open source schematic. We’ve covered simple ECG circuits before if you want to read more.

Last year we looked at two small inexpensive scopes. Like everything else, each year the bar gets higher. Although, in fairness, those scopes had a (reported) 25 MHz bandwidth. We’d love to see that kind of front end with the user interface of the DSO112A.

Continue reading “Touchscreen Oscilloscope”

Best Product Entry: Emulating Memory

For this year’s Hackaday Prize, we’re giving everyone the opportunity to be a hardware startup. This is the Best Product portion of the Hackaday Prize, a contest that will award $30,000 and a residency in our Design Lab to the best hardware project that is also a product.

Imagine all the memory chips in all the landfills in the world. What if we could easily recover those hosed motherboards and swap out ROM files on malware-damaged chips. That’s the promise of [Blecky]’s EEPROM/Flash Emulator project on Hackaday.io. This project seeks to be the ultimate memory interface, emulating SPI-interface EEPROM or Flash memory chipsets with ease. It can also be used as a security device, checking the BIOS for untoward changes.

The EEEmu packs an Atmel SAM4S Cortex-M4 processor-based microcontroller, an SD card reader, a micro USB for reprogramming, boost converter, voltage regulator, and includes additional 3.3V GPIO/I2C ports, all on a wee 51.5x20mm circuit board. Version 2 is slated to include more features to facilitate use as a normal micro controller: more GPIO pins, USB voltage monitoring, and high-Z control for SPI output.

EEEmu is completely open source, with [Blecky] sharing his code on GitHub and even has created an EEEmu Fritzing part, also found in his repository.