Netbooks: The Next Generation — Chromebooks

Netbooks are dead, long live the Chromebook. Lewin Day wrote up a proper trip down Netbook Nostalgia Lane earlier this month. That’s required reading, go check it out and come back. You’re back? Good. Today I’m making the case that the Chromebook is the rightful heir to the netbook crown, and to realize its potential I’ll show you how to wring every bit of Linuxy goodness out of your Chromebook.

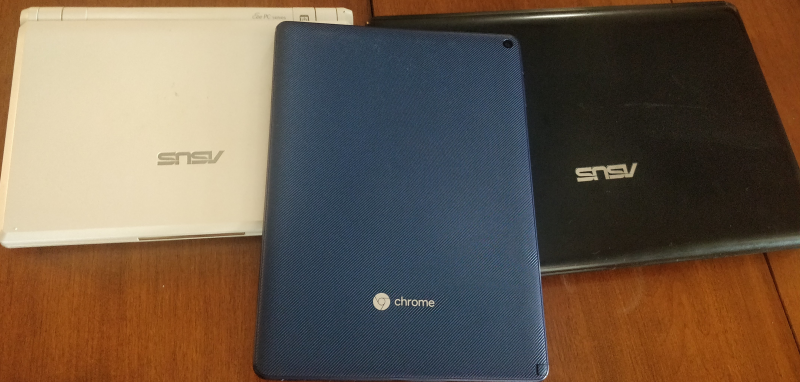
I too was a netbook connoisseur, starting with an Asus Eee 901 way back in 2009. Since then, I’ve also been the proud owner of an Eee PC 1215B, which still sees occasional use. Only recently did I finally bite the bullet and replace it with an AMD based Dell laptop for work.

For the longest time, I’ve been intrigued by a good friend who went the Chromebook route. He uses a Samsung Chromebook Plus, and is constantly using it to SSH into his development machines. After reading Lewin’s article, I got the netbook bug again, and decided to see if a Chromebook would fill the niche. I ended up with the Acer Chromebook Tab 10, codename Scarlet. The price was right, and the tablet form factor is perfect for referencing PDFs.

Two Asus Netbooks and a ChromeOS tablet.
Behold, my netbook credentials.

The default ChromeOS experience isn’t terrible. You have the functionality of desktop Chrome, as well as the ability to run virtually any Android app. It’s a good start, but hardly the hacker’s playground that a Linux netbook once was. But we can still get our Linux on with this hardware. There are three separate approaches to making a Chromebook your own virtual hackspace: Crostini, Crouton, and full OS replacement.

Continue reading “Netbooks: The Next Generation — Chromebooks”

How To Retrofit A Pick And Place Machine For OpenPnP, In Detail

[Erich Styger] owns a Charmhigh CHM-T36VA pick and place machine, which he describes as well-built and a great value of hardware for the money. However, the software end is less impressive, with a proprietary controller that is functional but not great. The good news is that it is possible to retrofit the machine to use the OpenPnP framework, which is open-source and offers more features. Even better, [Erich] has already done and documented all the hard parts!

The CHM-T36VA has two heads, vision system, and uses drag feeders.

The conversion requires upgrading a few hardware parts such as the cameras, replacing the controller’s firmware, then installing and configuring OpenPnP (which runs on an attached PC.)

[Erich] does not recommend this conversion for anyone who is not very familiar with electronics, or has any worries about voiding warranties. Barring that, he suspects the conversion could be done in about a day or two’s worth of focused work. It took him two weeks, including time spent fine-tuning the first production job. He says the bulk of the time was spent on configuration, but he has shared his configuration on GitHub in the hopes that it will save a lot of time for anyone using the same hardware.

After populating some 300 boards and placing over 7000 parts, he’s very happy with the results. The machine places between 600 and 700 parts per hour, so speed might not be amazing but it’s perfectly serviceable. [Erich] finds that while the machine runs a little slower than it did with the original controller, it also runs much smoother and quieter overall. In return he gets what he truly wanted: a pick and place machine whose operation and configuration is entirely open and accessible. You can see it in action in the video, embedded below.

Continue reading “How To Retrofit A Pick And Place Machine For OpenPnP, In Detail”

Raspberry Pi Takes Control Of Ham Radio

Today’s ham radio gear often has a facility for remote control, but they most often talk to a computer, not the operator. Hambone, on the other hand, acts like a ham radio robot, decoding TouchTone digits and taking action — for example, keying the radio and reading off the weather — in response to the commands received.

The code is in Python and uses numpy’s fast Fourier transform to identify digits. We’d be interested to test the performance of that compared to doing a Goertzel to specifically probe for the 8 digit tones: there are four row tones and four column tones. On the other hand, the FFT is handy and clearly works fast enough for this application.

Continue reading “Raspberry Pi Takes Control Of Ham Radio”

Boot-To-BASIC Box Packs A Killer Graphics Engine

In the early days of the home computer era, many machines would natively boot into a BASIC interpreter. This was a great way to teach programming to the masses. However on most platforms the graphics routines were incredibly slow, and this greatly limited what could be achieved. In 2020 such limitations are a thing of the past, with the Color Maximite 2. (Video, embedded below.)

The Color Maximite 2 is a computer based around the STM32H743IIT6 microcontroller, packing a Cortex-M7 32-bit RISC core with the Chrom-ART graphics accelerator. Running at 480MHz it’s got plenty of grunt, allowing it to deliver vibrant graphics to the screen reminiscent of the very best of the 16-bit console era. The Maximite 2 combines this chip alongside a BASIC interpreter complete with efficient graphics routines. This allows for the development of games with fast and smooth movement, with plenty of huge sprites and detailed backgrounds.

[cTrix] does a great job of demonstrating the machine, designed by [Geoff Graham] and [Peter Mather]. Putting the computer through its paces with a series of demos, it shows off the impressive visual and audio capabilities of the hardware. It serves as an excellent spiritual successor to BlitzBASIC from back in the Amiga days. Particularly enjoyable is seeing a BASIC interpreter that adds syntax highlighting – making parsing the code far easier on the eyes!

We’d love to see this become an off-the-shelf kit, as it’s clear the platform has a lot to offer the retro hobbyist. It’s certainly come a long way from the original Maximite of nearly a decade ago. Video after the break.

Continue reading “Boot-To-BASIC Box Packs A Killer Graphics Engine”

An Open Source Tool To Document Your Wiring

Most of us are familiar with the tools available to create circuit diagrams, as generally that’s the first step towards producing a custom PCB. But that about the cables and wiring harnesses that don’t live on your board? How do you easily document the rat’s nest perfectly logical wiring of your latest and greatest creation?

That’s precisely the question that led [Daniel Rojas] to create WireViz. This open source Python tool takes human readable input files and turns them into attractive and functional visualizations of where all the wires in your project are going. It can even be used to generate a Bill of Materials that documents the lengths of wire required and types of connectors needed to hook everything up.

If you’re still using pre-made cables to connect all of your components together, than you might not immediately see the benefit of a tool like this. But as we’ve talked about in the past, the creation of custom wiring harnesses is something that serious hardware hackers should become familiar with. Yes it takes more effort, but the end result is worth it. With a tool like WireViz, the creation of a bespoke harness for your next project just got a little bit easier.

[Daniel] has done a fantastic job documenting this project, providing not only a tutorial on how to feed and care for your WireViz, but a gallery of examples that shows off the kind of complex wiring the tool can help make sense of. But there’s plenty more to be done, and he’s happy to get feedback or code contributions from anyone who wants to get involved.

Macros For A Mazda

[Arik Yavilevich] recently upgraded his second-gen Mazda’s control console, going from the stock busy box to an Android head unit that does it all on a nice big touchscreen. It can also take input from the handy steering wheel buttons — these are a great option for keeping your eyes on the road and occasionally startling your unsuspecting passengers when the radio station suddenly changes.

The only problem is that [Arik]’s stock steering wheel doesn’t have any media-specific buttons on it. After a short trip to the junkyard, [Arik] had a fancier wheel to go along with the new head unit.

[Arik] doesn’t use cruise control, and those particular buttons can’t be hooked up with reprogramming the car’s computer, so he made them into macro buttons that control the head unit over Bluetooth, using an STM32 black pill board stashed in the glove box.

[Arik] found out that the cruise control buttons don’t ride the CAN bus — they use a resistor ladder/voltage divider and go directly into the ECU. After that it was mostly a matter of finding the right wires and then cutting and re-routing them to make the buttons work on the ACC setting as well as ON. A brief demo video is idling after the break.

Have an old smart phone lying around? Of course you do. Why not make your own head unit?

Continue reading “Macros For A Mazda”

Building A Scooter Exhaust From Scrap Metal

When a part on a vehicle fails, oftentimes the response is to fit a new one fresh out the box. However, sometimes, whether by necessity or simply for the love of it, it’s possible to handcraft a solution instead. [Samodel] does just that when whipping up a new exhaust for his scooter out of scrap metal.

It’s a great example of classic backyard metalworking techniques. The flange is recreated using a cardboard template rubbed on the exhaust port, with the residual oil leaving a clear impression. Hard work with a grinder and drill get things started, with an insane amount of filing to finish the piece off nicely. A properly tuned pipe is then sketched out on the computer, and a paper template created. These templates are cut out of an old fridge to create the main muffler section.

There’s plenty of other hacks, too – from quick and dirty pipe bends to handy sheet forming techniques. It’s not the first time we’ve seen great metalworking with scrap material, either. Video after the break.

[Thanks to BrendaEM for the tip]

Continue reading “Building A Scooter Exhaust From Scrap Metal”