Cluster Deck Packs Four Pis Into One Portable Package

Parallel computing is a fair complex subject, and something many of us only have limited hands-on experience with. But breaking up tasks into smaller chunks and shuffling them around between different processors, or even entirely different computers, is arguably the future of software development. Looking to get ahead of the game, many people put together their own affordable home clusters to help them learn the ropes.

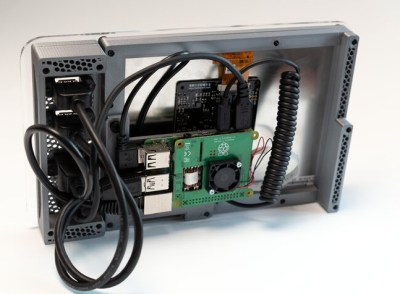
As part of his work with decentralized cryptocurrency, [Jay Doscher] recently found himself in need of a small research cluster. He determined that the Raspberry Pi 4 would give him the best bang for his buck, so he started work on a small self-contained cluster that could handle four of the single board computers. As we’ve come to expect given his existing body of work, the final result is compact, elegant, and well documented for anyone wishing to follow in his footsteps.

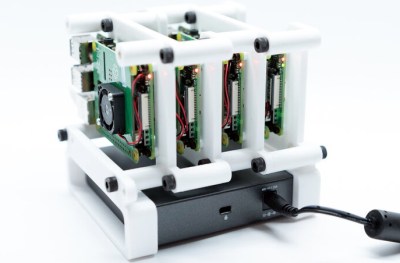
The core unit would make a great desktop cluster.

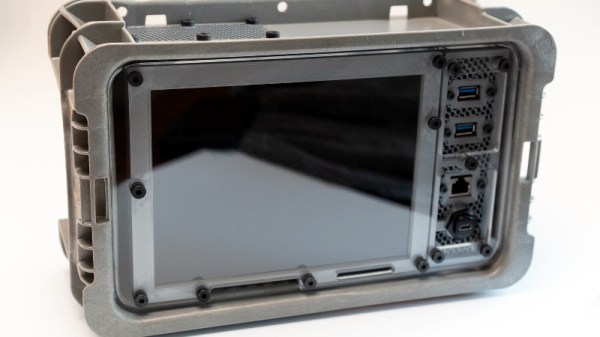
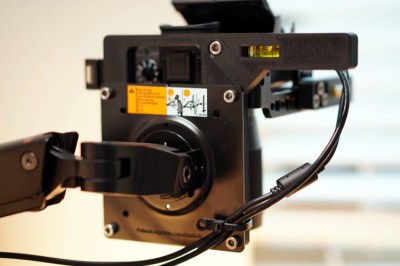
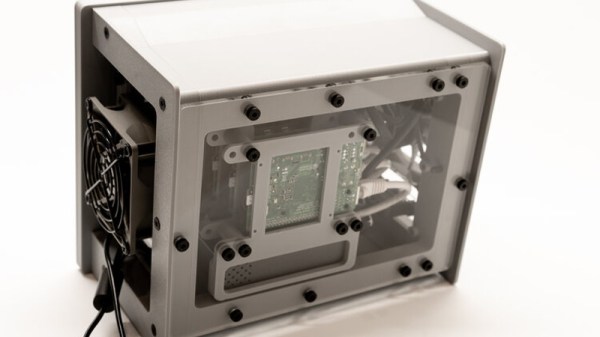
Outwardly the cluster looks quite a bit like the Mil-Plastic that he developed a few months back, complete with the same ten inch Pimoroni IPS LCD. But the internal design of the 3D printed case has been adjusted to fit four Pis with a unique staggered mounting arrangement that makes a unit considerably more compact than others we’ve seen in the past. In fact, even if you didn’t want to build the whole Cluster Deck as [Jay] calls it, just printing out the “core” itself would be a great way to put together a tidy Pi cluster for your own experimentation.

Thanks to the Power over Ethernet HAT, [Jay] only needed to run a short Ethernet cable between each Pi and the TP-Link five port switch. This largely eliminates the tangle of wires we usually associate with these little Pi clusters, which not only looks a lot cleaner, but makes it easier for the dual Noctua 80 mm to get cool air circulated inside the enclosure. Ultimately, the final product doesn’t really look like a cluster of Raspberry Pis at all. But then, we imagine that was sort of the point.

Of course, a couple of Pis and a network switch is all you really need to play around with parallel computing on everyone’s favorite Linux board. How far you take the concept after that is entirely up to you.

Simplifying The Ruggedized Raspberry Pi Portable

Over the last year we’ve seen a wave of portable computer builds that center around the Raspberry Pi taking up residence inside a commercial heavy-duty storage case. It’s not hard to see why; whether you spring for the Pelican case or get a cheaper alternative, these water-tight cases are far stronger than anything you’re going to 3D print or otherwise cobble together in the home shop. Especially if you can avoid popping any holes in the side.

Inspired by these builds but looking to make it even easier and cheaper to roll your own version, [Dmitry] recently took the wraps off of what he calls the Militarish Pi. You don’t need a CNC to cut out any face plates or a 3D printer to create an internal framework for all your components. You could even do it without soldering anything, if you really wanted to. Short of just buying one of these rigs pre-built from somebody, it’s hard to imagine it could get much easier than this.

Most of the effort involves cutting the PVC foam sheet that holds the Raspberry Pi, battery pack, and the driver board for the LCD in the bottom of the $15 USD case [Dmitry] managed to track down on AliExpress. The “carbon fiber” sticker he put on the PVC sheet won’t do much for the structural integrity of the build, but it sure looks nice. Of course if you have access to the appropriate tools, you could certainly cut the plate out of something stouter. As for the display, the nine inch LCD is perfectly sized to press fit into the lid.

Rounding out the build, [Dmitry] found a cheap Android phone case that included a tiny USB keyboard which plugs right into the Pi and he’s looking to add a BlackBerry trackball to the setup down the line. We especially like the large open area that he’s kept around the Raspberry Pi’s ports that allow you to easily hook up to the network or plug in a flash drive. It could also be a nice compartment to keep your RTL-SDR for some mobile radio work.

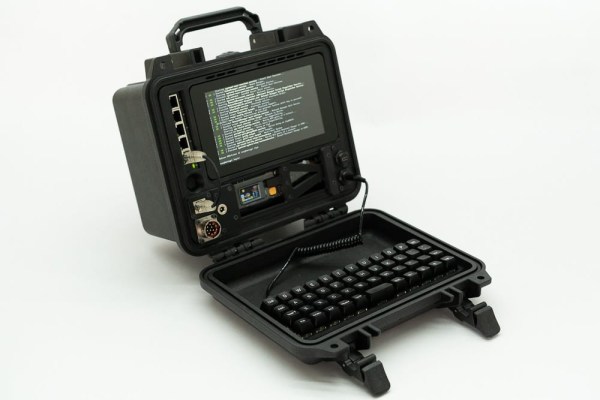
For those that don’t mind spending name-brand money and have access to a 3D printer, the Raspberry Pi Quick Kit by [Jay Doscher] is another great way to get yourself a rough and tumble Pi without reinventing the wheel.

This Ruggedized Raspberry Pi Was Built To Be Copied

Over the last couple of years, we’ve seen a wave of impressive rugged mobile computing devices based on the ubiquitous Raspberry Pi. Sometimes they involve repurposing an existing heavy duty enclosure, and in others the Pi takes up residence in a 3D printed case which may or may not be as strong as it appears. In either event, they usually don’t lend themselves to duplication because of the time and expense involved in tracking down or printing all the parts required.

But the Raspberry Pi Quick Kit by [Jay Doscher] may change that. It represents what must surely be the simplest and fastest route to a building a rugged mobile ARM computer for your hacking adventures. Beyond the Pelican 1150 case that serves as the outer enclosure, you only need three printed parts and a handful of fasteners to complete the build. Of course you’ll need a Raspberry Pi and the official touch screen as well, but that’s sort of a given.

Electronics mounted to the 3D printed frame.

All of the electronics mount onto the three piece 3D printed frame, which is then press-fit into the opening of the Pelican case. Since you don’t need to pop any holes through the case itself, the assembled unit remains water and air tight. While [Jay] has recently shown off a very impressive 3D printed Pi enclosure, there’s really no beating a legitimate heavy duty storage case if you’re trying to protect the hardware.

When you want to use the Pi, just open the case and plug your power and accessories into the panel mount connectors under the display. There’s no integrated battery or keyboard on this build, but considering how small it is, that shouldn’t really come as a surprise.

[Jay] is targeting the Pi 4 for the Quick Kit, so that means WiFi and Bluetooth will come standard without the need for any external hardware. It looks like there might just be enough room to include an RTL-SDR receiver inside the case as well, but you’ll need to do a little redesigning of the 3D printed parts. If you do modify this design to pack in a few new tricks, we’d love to hear about it.

The Quick Kit is a greatly simplified version of the Raspberry Pi Recovery Kit that [Jay] unleashed on an unsuspecting world late last year. We’ve seen numerous variations on that original design sprout up since then, so we’re very interested to see what the response will be like to this much cheaper and easier to build version.

YARH.IO Is The Hackable Pi Portable Of Our Dreams

Less than a decade ago, building a completely custom portable computer was more or less out of the question. Sure you could have cobbled something together with a Gumstix board and the dinky NTSC/PAL screen pulled from a portable DVD player, but it wouldn’t exactly have been a daily driver. But now we have cheap high definition LCD panels, desktop 3D printers, and of course, the Raspberry Pi.

We’ve seen these elements combined into bespoke personal computing devices too many times to count now, but very few of them can compare to the incredible YARH.IO. It’s been designed from the ground up for easy assembly and customization; you don’t have to worry about getting custom PCBs made or tracking down some piece of unobtanium hardware. Everything inside of the 3D printed enclosure is an off-the-shelf module, needing little more than the occasional scrap of protoboard to tie them all together.

YARH.IO in tablet mode.

One glance at the rugged design of the YARH.IO, and it’s clear this device wasn’t meant to live on a shelf. Whether it’s getting tossed around the workbench or thrown into a bag on the way to a hacker con, the militarized design of this portable is ready for action. Using appropriately strong materials such as PETG and ABS, we have no doubt the enclosure will survive whatever the on-the-go hacker can throw at it.

But what’s arguably the best feature of the YARH.IO also happens to be the least obvious: the modular design of the enclosure allows you to remove the lower keyboard section and use it as a battery powered Linux tablet (albeit a rather chunky one). Whether the keyboard is attached or not, you still have access to the Pi’s expansion header thanks to a clever pass-through.

Like with the Mil-Plastic that [Jay Doscher] released recently, we know these 3D printed kits will never be as strong as the real military gear they’re emulating. But let’s be realistic, none of us keyboard warriors will be taking them into an actual battlefield anytime soon. What’s more important is that their modular construction allows them to be easily modified for whatever the user’s needs might be. With as far as the state-of-the-art in DIY bespoke computing as come in the last decade, we can’t wait to see what the future holds.

Mil-Spec Looks Without Defense Department Budget

While hackers and makers have a tendency to focus on functionality above all else, that doesn’t mean there isn’t room for some visual flair. A device that works well and looks good will always be more impressive than the bare bones approach, but the extra time and money it usually takes to polish up the visual component of a build means it’s often overlooked. Which is exactly what [Jay Doscher] wanted to address with his Mil-Plastic project.

On the surface, the Mil-Plastic is yet another entry in the rapidly growing and often ill-defined world of cyberdecks: custom computing devices that forgo the standard laptop and desktop dichotomy and instead explore the road not taken by mainstream consumer electronics. To that end, it’s a solid build more than worthy of praise. But more than that, it’s also a lesson on how 3D printing and some clever design can create a truly impressive visual for little more than the cost of a spool of PLA.

The modular design allows parts to be printed in parallel.

The Mil-Plastic, as the name implies, looks like it was pulled from a Humvee or an Abrams tank. While the gorgeous olive green PETG filament that [Jay] has stumbled upon certainly helps, his eye for detail and design chops aren’t to be underestimated. He’s given the case a rugged and armored look that simply screams “Your Tax Dollars At Work”, complete with faux cooling fins running along the back and a generous application of low-profile stainless steel fasteners. We’ve taken a close look at the decadence of military engineering in the past, and the Mil-Plastic could hang with the best of them.

Most importantly, [Jay] has given us all the tools and information we need to recreate the look on our own terms. You don’t have to be in the market for yet another Raspberry Pi gadget to appreciate the Mil-Plastic; the design can serve as the backbone for whatever you happen to be building. The printed case not only looks impressive, but can easily be modified and expanded as needed.

[Jay] kicked off a minor revolution late last year with his Raspberry Pi Recovery Kit, and has continued to produce well-documented designs that illustrate the incredible power of desktop 3D printing. If you can look through his portfolio and not get inspired, you may want to speak with a doctor.

The CLUE Tracker Points You To A Target, Using CircuitPython

The main components are an Adafruit CLUE, Stemma GPS, and a lithium-polymer battery. No soldering required.

[Jay Doscher] shares a quick GPS project he designed and completed over a weekend. The device is called the CLUE Tracker and has simple goals: it shows a user their current location, but also provides a compass heading and distance to a target point. The idea is a little like geocaching, in that a user is pointed to a destination but must find their own way there. There’s a 3D printed enclosure, and as a bonus, there is no soldering required.

The CLUE Tracker uses the Adafruit CLUE board (which is the same size as the BBC micro:bit) and Stemma GPS sensor, with the only other active component being a lithium polymer battery. The software side of the CLUE Tracker uses CircuitPython, and [Jay] has the code and enclosure design available on GitHub.

[Jay] did a nice job of commenting and documenting the code, so this could make a great introductory CircuitPython project. No soldering is required, which makes it a little easier to re-use the parts in other projects later. This helps to offset costs for hackers on a budget.

The fact that a device like this can be an afternoon or weekend project is a testament to the fact that times have never been better for hobbyists when it comes to hardware. CircuitPython is also a fast-growing tool, and projects like this can help make it easy and fun to get started.

Surviving The Apocalypse With A Briefcase Full Of Pi

Let’s imagine that you’ve spent most of your life indoors tinkering with electronic gadgets and that you don’t have a lot of practical survival experience. Since you’re currently reading Hackaday, it shouldn’t be much of a stretch for you. Let’s further imagine that our entire civilization gets upended by an ecological disaster, nuclear war, invaders from Zeta Reticuli, that sort of thing. What do you do?

If you’re [Evan Meaney], you might start by retrieving the Crash Recovery Device from its EMP shielded storage nook. This mobile digital library is designed to serve as a backup copy of all the information we’d lose in a post-Internet world. It holds detailed geological maps, a library of survival manuals, agriculture guides, and should you get bored, the entirety of Wikipedia.

Of course, having all that information in a digital format is no good if you can’t access it. Rather than designing a device from scratch, [Evan] based his rugged command center on the Raspberry Pi Recovery Kit by [Jay Doscher].

He deleted the more esoteric components such as the mil-spec connectors on the front panel, and improved the ability to switch between different power sources with a capacitor bank big enough to smooth out any momentary interruptions. There’s also added circuitry so the device can be run on a wider range of voltages, allowing the use of whatever batteries or power sources can be scrounged up. [Evan] even thought to use automotive style fuses that could be pilfered from abandoned vehicles if necessary.

We know what you’re probably thinking; a better way to hone your survival skills and prepare for a disaster would be to just go camping a few times a year. Fair enough. But if you’re a city dweller who might not have the option, it’s hard to argue that you wouldn’t be better off having a mobile repository of survival information to consult should you need it. Doubly so if it looks this cool.

Continue reading “Surviving The Apocalypse With A Briefcase Full Of Pi”