REMOTICON 2021 // Jay Doscher Proves Tinkercad Isn’t Just For Kids

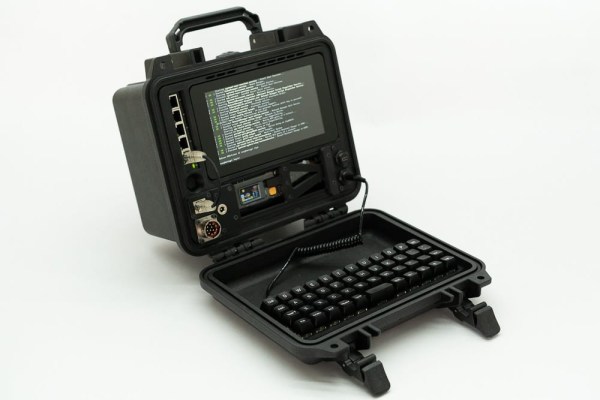
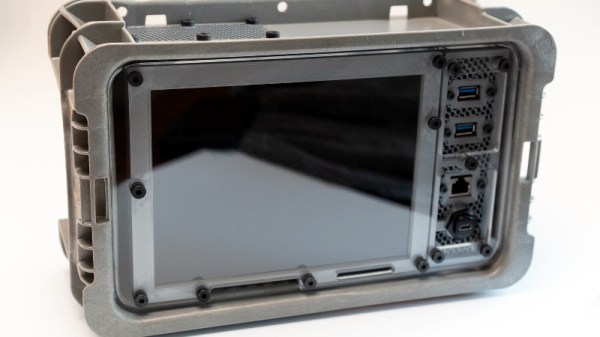
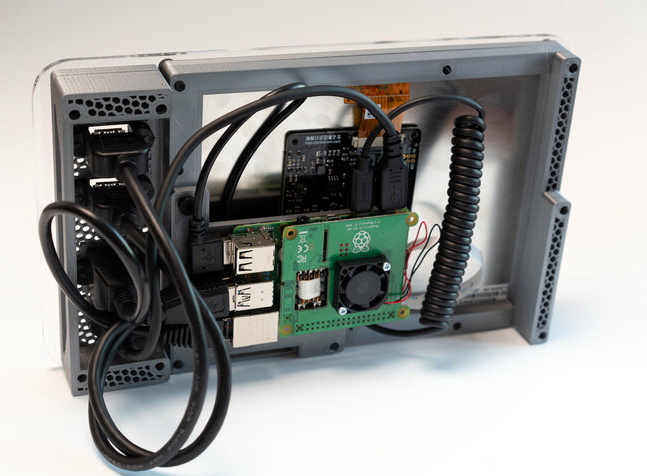
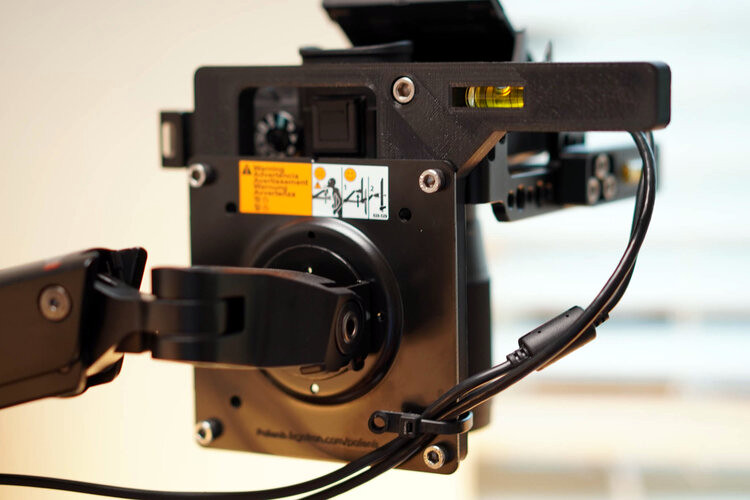
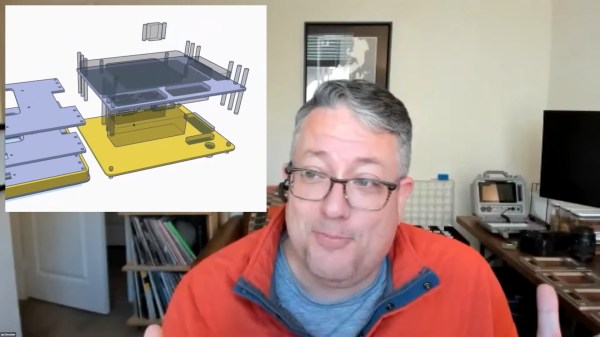
We invited [Jay Doscher] to give us a view into his process designing 3D printed parts for the impressive array of cyberdecks we’ve covered since 2019.

[Jay] got his start as a maker through woodworking in high school, getting satisfaction from bringing something from idea to reality. After a more recent class in blacksmithing and ax-making showed him what he could do when really focused, his hardware hacking really took off and his line of cyberdecks and other portable computers was born.

If you’ve heard of Tinkercad, you probably think it’s just for kids. While designed as an educational tool, [Jay] found that Autodesk’s younger sibling to the professionally powered (and priced) Fusion 360 had everything needed for making cyberdecks. If you’re willing to work around a few limitations, at the low-low price of free, Tinkercad might be right for you too.

What limitations? To start, Tinkercad is only available in a browser and online. There’s also no guarantee that it will remain free, but [Jay] notes that with its educational focus that is likely to remain the case. There is no library of common components to import while modeling. And, when your model is complete the options for exporting are limited to 2D SVGs and 3D STL, OBJ, and gaming-focused GBL formats. [Jay] has converted those to other formats for laser cutting and the STEP file a machine shop is expecting but admits that it’s something that adds complexity and is an annoyance.

back7-TinkerCad-Alignment

In the talk, [Jay] discusses moving from his initial “cringy” explorations with Tinkercad, to his first cyberdeck, a little history on that term, and the evolution of his craft. It’s mostly a hands-on demo of how to work with Tinkercad, full of tips and tricks for the software itself and implications for 3D printing yourself, assembly, and machining by others.

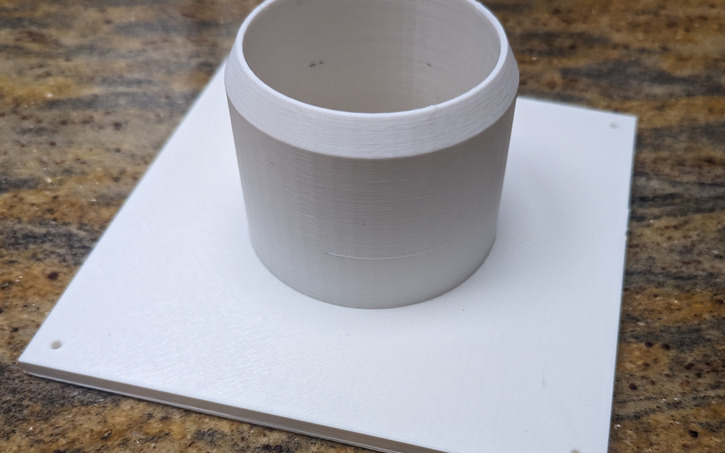
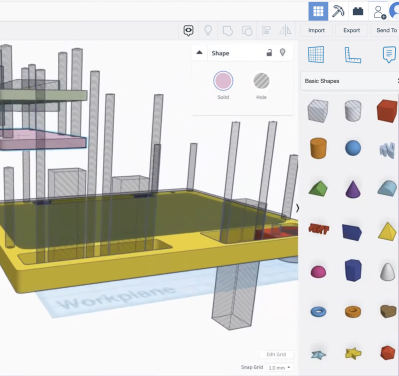
While quite limited, Tinkercad still allows for boolean operations to join two volumes or the subtraction of one from another. [Jay] does a wonderful job of unpeeling the layers of operations, showing how combinations of “solids” and “holes” generated a complex assembly with pockets, stepped holes for fasteners, and multiple aligned parts for his next cyberdeck. Even if you already have a favorite CAD tool, another approach could expand your mind just like writing software in Strange Programming Languages can.

Continue reading “REMOTICON 2021 // Jay Doscher Proves Tinkercad Isn’t Just For Kids”

Printed Rack Holds Pair Of LattePandas In Style

ARM single-board computers like the Raspberry Pi are great for some applications — if you need something that’s energy efficient or can fit into a tight space, they’re tough to beat. But sometimes you’re stuck in the middle: you need more computational muscle than the average SBC can bring to the table, but at the same time, a full-size computer isn’t going to work for you.

Luckily, we now have options such as the LattePanda Mu powered by Intel’s quad-core N100 processor. Put a pair of these modules (with their associated carrier boards) on your desktop, and you’ve got considerable number-crunching capabilities in a relatively small package. Thanks to [Jay Doscher] we’ve got a slick 3D printed rack that can keep them secure and cool, complete with the visual flair that we’ve come to expect from his creations.

Continue reading “Printed Rack Holds Pair Of LattePandas In Style”

Portable Multi-SDR Rig Keeps Your Radios Cool

With as cheap and versatile as RTL-SDR devices are, it’s a good idea to have a couple of them on hand for some rainy day hacking. In fact, depending on what signals you’re trying to sniff out of the air, you may need multiple interfaces anyway. Once you’ve amassed this arsenal of software defined radios, you may find yourself needing a way to transport and deploy them. Luckily, [Jay Doscher] has you covered.

His latest creation, the SDR SOLO, is a modular system for mounting RTL-SDRs. Each dongle is encased in its own 3D printed frame, which not only protects it, but makes it easy to attach to the base unit. To keep the notoriously toasty radios cool, each frame has been designed to maximize airflow. You can even mount a pair of 80 mm fans to the bottom of the stack to really get the air moving. The current design is based around the RTL-SDR Blog V4, but could easily be adapted to your dongle of choice.

In addition to the row of SDR dongles, the rig also includes a powered USB hub. Each radio connects to the hub via a short USB cable, which means that you’ll only need a single USB cable running back to your computer. There’s also various mounts and adapters for attaching antennas to the system. Stick it all on the end of a tripod, and you’ve got a mobile radio monitoring system that’ll be the envy of the hackerspace.

As we’ve come to expect, [Jay] put a lot of thought and effort into the CAD side of this project. Largely made of 3D printed components, his projects often feature a rugged and professional look that really stands out.

An adorable mini rack for NUCs, plus a 5-port switch.

A Mini NUC Rack For Your Desktop

We (well, some of us) are complete suckers for things that are both much smaller and much larger than life. And if that thing actually does what its supposed to? Squee! So naturally, we rushed to bring you news of this mini NUC rack designed by [Jeremy Weatherford].

Inspiration comes from a lot of places, often times from stuff that lives on your desk. [Jeremy] had a pile of NUCs and thought they resembled a mini rack already, so why not build them one to live in? It was the perfect excuse to learn CAD, so off [Jeremy] went. Although this is a mini rack, the parts were too big to print. Another opportunity presented itself, and [Jeremy] tried out an online service to get the acrylic cut.

Assembly may have been fiddly with super glue all over the nice black acrylic, but [Jeremy] learned an important tip: excess glue can be removed with vegetable oil. Once it was built, he decided to make it into a control system lab and even found a perfect little five-port switch to top it off. The logo plate, of course, is the icing on this cake.

If you prefer your tower of mini-computers to be extruded, we covered a clever design from [Jay Doscher] back in May.

Remixed Pi Recovery Kit V2 Offers Another Path

Just a few months after releasing the long-awaited second version of his Raspberry Pi Recovery Kit, [Jay Doscher] is back with an alternate take on his latest Pi-in-a-Pelican design. This slightly abridged take on the earlier design should prove to be easier and cheaper to assemble for those playing along at home while keeping the compromises to a minimum.

Probably the biggest change is that the Raspberry Pi 5 has been swapped out for its less expensive and more abundant predecessor. The Pi 4 still packs plenty of punch, but since it requires less power and doesn’t get as hot, it’s less temperamental in a build like this. Gone is the active cooling required by the more powerful single-board computer, and the wiring to distribute power to the Kit’s internal components has been simplified. The high-end military style connectors have been deleted as well. They looked cool, but they certainly weren’t cheap.

One of the most striking features of the original Recovery Kit was the front-mounted switches — both the networking type that’s intended to help facilitate connecting the Raspberry Pi to whatever hardware is left after the end of the world, and the toggles used to selectively control power to to accessory devices. Both have returned for the Recovery Kit 2B, but they’re also optional, with blank plates available to fill in their vacant spots.

Ultimately, both builds are fairly similar, but there’s enough changes between the two that it will have a notable impact on how much time (and money…) it would take you create one of your own. [Jay] has attempted to offer less intimidating versions of his designs in the past; while other creators take a “one and done” approach to their projects, he seems eager to go back and rethink problems that most others would have considered solved.

Printed Case Lets Pair Of RTL-SDRs Go Mobile

We’ll admit to not fully knowing what [Jay Doscher] has planned for the pair of RTL-SDR Blog V4 software defined radios (SDRs) that are enclosed in the slick 3D printed enclosure he’s designed. But when has that ever stopped us from appreciating a nice design when we see one?

Inside the ventilated enclosure is the aforementioned pair of RTL-SDR Blog V4 (SDRs), as well as a StarTech USB hub that they’re plugged directly into. It seems like it wouldn’t take much to adapt this design to any other pair of USB gadgets, such as flash drives or WiFi adapters.

In fact, if they’re smaller than the RTL-SDR [Jay] has used here, you could probably get away with only needing to modify the one side panel of the case.

The simple modularity of the design, with two end pieces and the top and bottom plates, makes such modifications easy as you don’t need to reprint the whole thing if you just want a different antenna aperture. It also makes it easy to print without support material, and with just a few tweaks, looks like it could be adapted to use laser-cut panels for the sides. This would not only be faster than printing, but depending on the material, could make for a very stout enclosure.

We’ve covered several designs from [Jay] over the years, including a number of heavy-duty mobile “doomsday” computers that certainly fit in with this same design aesthetic. After all, why not face the end of the world with a little style?

Fully 3D Printed Case Is Stacked High With Mini PCs

Over the years we’ve seen no shortage of 3D printed cases designed to hold several Raspberry Pi computers, often with the intent to use them as convenient desktop-sized platforms for experimenting with concepts such as server load balancing and redundancy.

The reason the Pi was always the star of the show is simple enough to explain: they were small and cheap. But while the Pi has only gotten more expensive over the years, x86 machines have gotten smaller and cheaper. Which is how a project like the N100 Obelisk was born.

Continue reading “Fully 3D Printed Case Is Stacked High With Mini PCs”