Surviving The Apocalypse With A Briefcase Full Of Pi

Let’s imagine that you’ve spent most of your life indoors tinkering with electronic gadgets and that you don’t have a lot of practical survival experience. Since you’re currently reading Hackaday, it shouldn’t be much of a stretch for you. Let’s further imagine that our entire civilization gets upended by an ecological disaster, nuclear war, invaders from Zeta Reticuli, that sort of thing. What do you do?

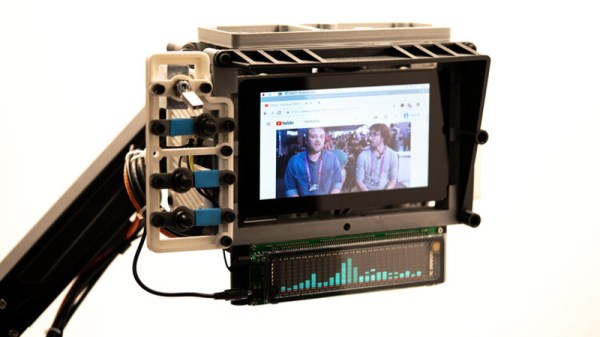
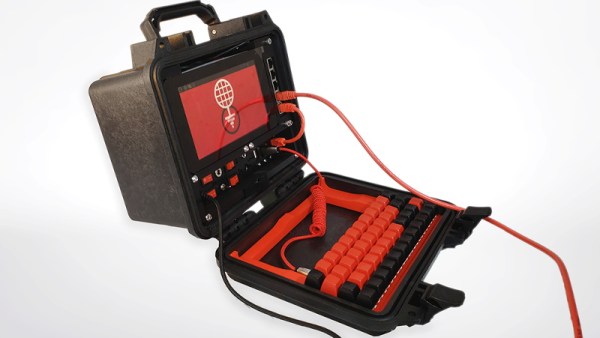
If you’re [Evan Meaney], you might start by retrieving the Crash Recovery Device from its EMP shielded storage nook. This mobile digital library is designed to serve as a backup copy of all the information we’d lose in a post-Internet world. It holds detailed geological maps, a library of survival manuals, agriculture guides, and should you get bored, the entirety of Wikipedia.

Of course, having all that information in a digital format is no good if you can’t access it. Rather than designing a device from scratch, [Evan] based his rugged command center on the Raspberry Pi Recovery Kit by [Jay Doscher].

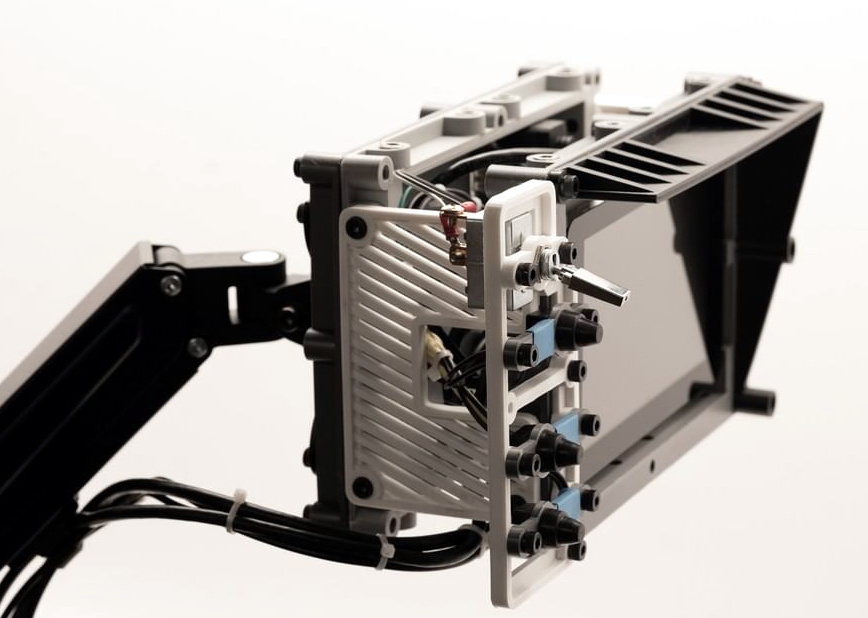
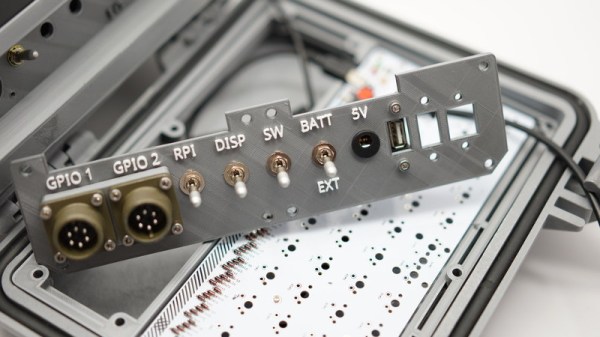
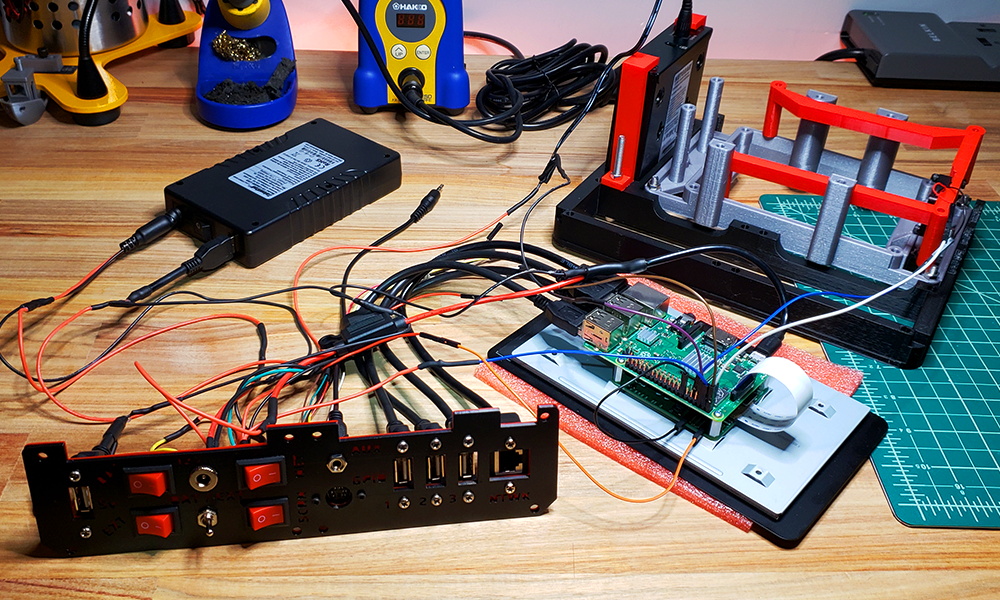
He deleted the more esoteric components such as the mil-spec connectors on the front panel, and improved the ability to switch between different power sources with a capacitor bank big enough to smooth out any momentary interruptions. There’s also added circuitry so the device can be run on a wider range of voltages, allowing the use of whatever batteries or power sources can be scrounged up. [Evan] even thought to use automotive style fuses that could be pilfered from abandoned vehicles if necessary.

We know what you’re probably thinking; a better way to hone your survival skills and prepare for a disaster would be to just go camping a few times a year. Fair enough. But if you’re a city dweller who might not have the option, it’s hard to argue that you wouldn’t be better off having a mobile repository of survival information to consult should you need it. Doubly so if it looks this cool.

Continue reading “Surviving The Apocalypse With A Briefcase Full Of Pi”

Multiple 3D Printers, And One Pi To Rule Them All

If you’ve got a desktop 3D printer, there’s an excellent chance you’ve heard of OctoPrint. This web front-end, usually running on a Raspberry Pi, allows you to monitor and control the printer over the network from any device that has a browser. But what if you’ve got two printers? Or 20? The logistics of each printer getting its own Pi can get uncomfortable in a hurry, which is why [Jay Doscher] has been working on a way to simplify things.

Leveraging the boosted processing power of the Raspberry Pi 4 and some good old fashioned Linux trickery, [Jay] is now controlling multiple printers from a single device. The trick is to run multiple instances of the OctoPrint backend and assign them to virtual network interfaces so they don’t interfere with each other. This takes some custom systemd unit files to get up and running on Raspbian, which he’s been kind enough to include them in the write-up.

But getting multiple copies of OctoPrint running on the Pi is only half the battle. There still needs to be a way to sort out which printer is which. Under normal circumstances, the printers would be assigned random virtual serial ports when the Pi booted. To prevent any confusion, [Jay] explains how you can use custom udev rules to make sure that each printer gets its own unique device node. Even if you aren’t trying to wrangle multiple 3D printers, this is a useful trick should you find yourself struggling to keep track of your USB gadgets.

If you’re wondering why [Jay] needs to have so many 3D printers going at the same time, we hear they’ve been keeping rather busy running off parts for commissioned copies of his popular projects. Something to consider the next time you’re wondering if there’s a way to make a happy buck out of this little hobby of ours, folks.

A Raspberry Pi Terminal That’s Always Within Reach

Inspired by films such as The Matrix, where hackers are surrounded by displays and keyboards on articulated arms, [Jay Doscher] created this cyberpunk “floating” terminal so your favorite Linux single board computer is always close at hand. Do you actually need such a thing mounted to the wall next to the workbench? Probably not. But when has that ever stopped a Hackaday reader?

[Jay] has come up with a modular design for the “A.R.M. Terminal” that allows the user to easily augment it with additional hardware. The 3D printed frame of the terminal has hardpoints to bolt on new modules, which thanks to threaded metal inserts, will have no problem surviving multiple configurations.

This initial version features a panel on the left side that holds various buttons and switches attached to the Pi’s GPIO pins. With a bit of code, it’s easy to pick up the status of these controls and use them to fire off whatever tasks your imagination can come up with. On the bottom [Jay] has mounted a stand-alone VFD audio spectrum display that’s hooked up to the Pi’s 3.5 mm jack. It’s totally unnecessary and costs as much as the Raspberry Pi itself, but it sure is pretty.

If there’s a downside to the design, it’s that the only display currently supported is the official Raspberry Pi touchscreen which is only 800×480 and a bit pricey compared to more modern panels. On the other hand, there’s something to be said for the standardized bolt pattern on the back of the official screen; so if you want to use a higher resolution display, be prepared to design your own mounting bracket. Extra points if you share your changes with the rest of the class.

For anyone who likes the look of the A.R.M. Terminal but isn’t too keen on being tethered to the wall, you’re in luck. [Jay] previously created the Raspberry Pi Recovery Kit which shares many of the same design principles but puts them into a ruggedized case that’s ready for life in the field.

Stackable Open Source 3D Printer Enclosure

One of the unfortunate realities of desktop FDM 3D printing is that environmental factors such as ambient temperature and humidity can have a big impact on your results. Even with the exact same settings, a part that printed beautifully in the summer can warp right off the bed during the winter months. The solution is a temperature-controlled enclosure, but that can be a daunting project without some guidance. Luckily, [Jay Doscher] has spent the last few months designing a very impressive enclosure that he’s released to the community as open source.

While we’ve seen no shortage of DIY printer enclosures over the years, they tend to be fairly lightweight. But that’s not the case here. Obviously not wanting to leave anything to chance, [Jay] designed this enclosure with 2020 extrusion and aluminum side panels. You could probably sit on the thing with no ill-effects, which is good, since he also designed the enclosure to be stackable should your print farm need to expand vertically.

Of course, there’s more to this enclosure than just an aluminum box. It’s packed with features like an integrated Raspberry Pi for running Octoprint, internal and external environmental monitoring with the Adafruit SHT31-D, and a Logitech Brio 4K video camera to watch the action. While not currently implemented, [Jay] says he’s also working on an internal fire suppression system and a fan controller system which will circulate air inside the enclosure should things get a little too toasty.

The enclosure has been designed around the ever-popular Prusa i3 MK3/S, even going so far as to relocate the printer’s display to the outside so you don’t have to open the door to fiddle with the settings. But adapting it to whatever rig you happen to be running shouldn’t be a problem. Though admittedly, perhaps not as easy as adjusting an enclosure made out of metal shelving.

Continue reading “Stackable Open Source 3D Printer Enclosure”

A Mobile Terminal For The End Of The World

If civilization goes sideways and you need to survive, what are the bare essentials that should go in your bunker? Food and fresh water, sure. Maybe something to barter with in case things go full on The Postman. That’s all sensible enough, but how’s that stuff going to help you get a LAN party going? If you’re anything like [Jay Doscher], you’ll make sure there’s a ruggedized Raspberry Pi system with a self-contained network with you when the bombs drop.

Or at least, it certainly looks the part. He’s managed to design the entire project so it doesn’t require drilling holes through the Pelican case that serves as the enclosure, meaning it’s about as well sealed up as a piece of electronics can possibly be. The whole system could be fully submerged in water and come out bone dry on the inside, and with no internal moving parts, it should be largely immune to drops and shocks.

But we imagine [Jay] won’t actually need to wait for nuclear winter before he gets some use out of this gorgeous mobile setup. With the Pi’s GPIO broken out to dual military-style panel mount connectors on the front, a real mechanical keyboard, and an integrated five port Ethernet switch, you won’t have any trouble getting legitimate work done with this machine; even if the closest you ever get to a post-apocalyptic hellscape is the garage with the heat off. We especially like the 3D printed front panel with integrated labels, which is a great tip that frankly we don’t see nearly enough of.

This is actually an evolved version of the Raspberry Pi Field Unit (RPFU) that [Jay] built back in 2015. He tells us that he wanted to update the design to demonstrate his personal growth as a hacker and maker over the last few years, and judging by the final product, we think it’s safe to say he’s on the right path.

Handheld LoRa Joystick For Long-Range Bots

Wanting a simple tool to aid in the development of LoRa controlled robotic projects, [Jay Doscher] put together this very slick one-handed controller based on the 900 MHz Adafruit Feather M0. With a single trigger and a miniature analog joystick it’s a fairly simple input device, but should be just enough to test basic functionality of whatever moving gadget you might find yourself working on.

Wiring for this project is about as simple as you’d expect, with the trigger and joystick hanging off the Feather’s digital ports. The CircuitPython code is also very straightforward, though [Jay] says in the future he might expand on this a bit to support LoRaWAN. The controller was designed as a barebones diagnostic tool, but the hardware and software in its current form offers an excellent opportunity to layer additional functionality on a known good base.

Everything is held inside a very well designed 3D printed enclosure which [Jay] ran off on his ELEGOO Mars, one of the new breed of low-cost resin 3D printers. The machine might be pretty cheap, but the results speak for themselves. While resin printing certainly has its downsides, it’s hard not to be impressed by the finish quality of this enclosure.

While LoRa is generally used for transmitting small bits of information over long distances, such as from remote sensors, this isn’t the first time we’ve seen it used for direct control of a moving object. If you’re not up to speed on LoRa, check out this excellent talk from [Reinier van der Lee] that goes over the basics of the technology and how he used it to build a community sensor network.

Raspberry Pi Field Unit (RPFU)

Raspberry Pis are great for tons of projects, but if you want to use them outside, you’re going to need a waterproof enclosure. Not happy with what was available, [Jay Doscher] went all out and created the Raspberry Pi Field Unit — a piece of tech that looks straight out of the Call of Duty franchise.

Wanting it to be extra durable, [Jay] started with a Pelican Case 1300 — the standard in electronics protection. These come with a Pelican panel mount, so he had some plastic laser cut specifically to fit the panel mount, and attach all of his components. Speaking of components, he got only the best — inside is:

  • A Raspberry Pi 2 with a few PIHATs (permanent prototyping shield)
  • A 10.1″ IPS display
  • A high power wireless USB dongle
  • Weather proof USB and LAN connectors
  • An RTC for when it’s off the network
  • A 12V power supply for running off solar panels
  • DC-to-DC adapters to bring it down to 5V
  • A whole bunch of hardware from McMaster-Carr

Continue reading “Raspberry Pi Field Unit (RPFU)”