Build Your Own RGB Fill Light For Photography

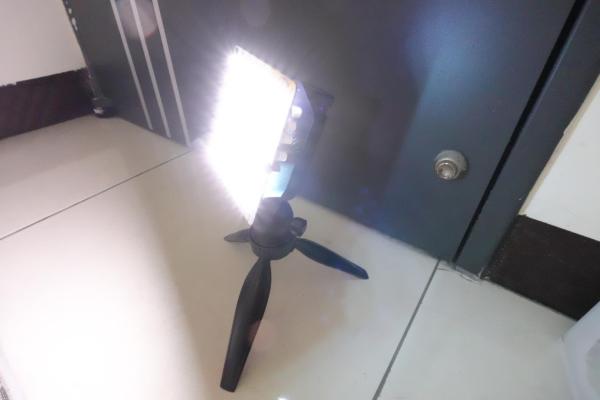
Photography is all about light, and capturing it for posterity. As any experienced photographer will tell you, getting the right lighting is key to getting a good shot. To help in that regard, you might like to have a fill light. If you follow [tobychui]’s example, you can build your own!

Colors!

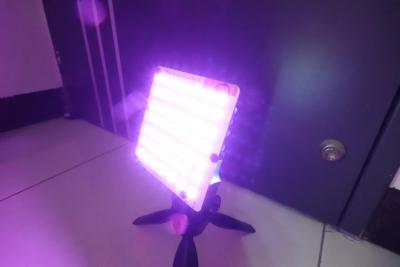
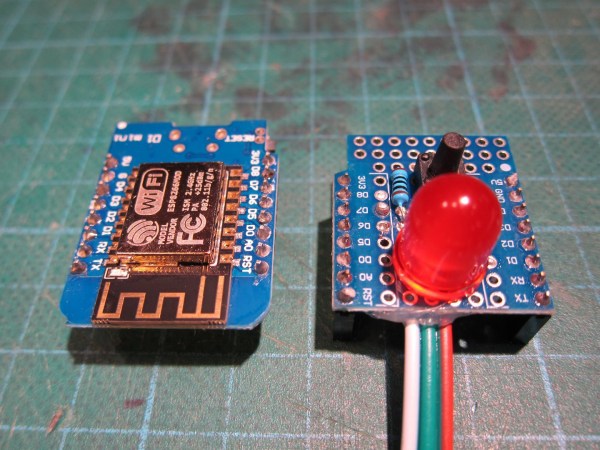
The build relies on addressable WS2812B LEDs as the core of the design. While they’re not necessarily the fanciest LEDs for balanced light output, they are RGB LEDs, so they can put out a ton of different colors for different stylistic effects. The LEDs are under the command of a Wemos D1, which provides a WiFI connection for wireless control of the light.

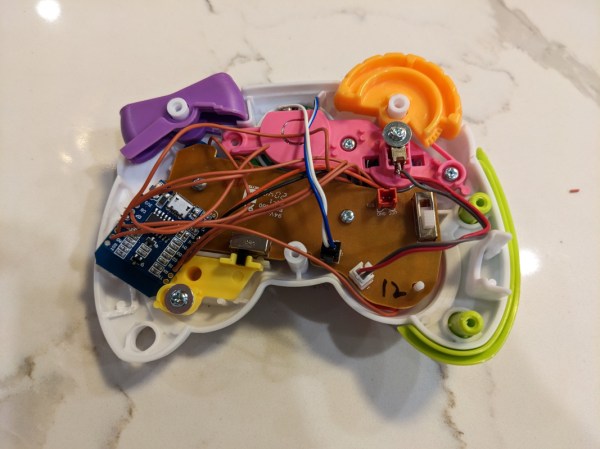
[tobychui] did a nice job of building a PCB for the project, including heatsinking to keep the array of 49 LEDs nice and cool. The whole assembly is all put together inside a 3D printed housing to keep it neat and tidy. Control is either via onboard buttons or over the WiFi connection.

Files are on GitHub if you’re seeking inspiration or want to duplicate the build for yourself. We’ve seen some other similar builds before, too. Meanwhile, if you’re cooking up your own rad photography hacks, don’t hesitate to let us know!

Arduino Turned Into Something Kinda Like A Pager

Video may have killed the radio star, but cell phones and smart phones all but killed the pager. They still exist, of course, but only in very niche applications. [João Santos] wanted a pager-like experience for himself, though, so he enlisted an Arduino and got to work. Watch a video of the system working below.

The build uses an Arduino Uno to drive a simple HD44780 LCD display with 16 characters each across two lines of text. It’s hooked up to a Wemos D1, which uses its WiFi connection to get online. To this end, it’s capable of talking to a web application which allows users to enter text messages. It receives these messages, passes them to the Arduino Uno over I2C, and then the Uno shuttles the message to the display. It’s overkill, but [João] just found it quicker to get everything up and running via this route.

Continue reading “Arduino Turned Into Something Kinda Like A Pager”

1D Fireworks Are Nice And Quiet

Maybe you do it out of respect for the dogs and parents of young children in the neighborhood. Or maybe you do it because they’re harmful to the environment, or just because it’s too darn cold outside. Whatever your reasoning for not setting off fireworks, don’t fret — you can probably put together your own silent one-dimensional “fireworks” display from what you’ve got in the parts bin.

[Daniel Westhof]’s design is simple, requiring little more than a Wemos D1 Mini and a strip of WS2812 LEDs. Once activated, a red rocket shoots up from the ground and detonates, sending lights in both directions on the strip to imitate the bombs bursting in air. It’s controlled with a small push button switch, and there’s a deliciously large red LED indicator that shows the thing is ready for detonation.

You might be surprised to find that there’s a wide array of 1D gaming and animation projects out there, many of which made possible by the ubiquitous addressable RGB LED strip. We’ve seen a dungeon crawler, at least two different versions of the classic PONG, and even the makings of a simplified Wolfenstein.

Big Red Button Puts Toddler In Command Of Chromecast

Controversial position: the world needs more buttons. We’ve gotten so far away from physical interfaces like buttons, knobs, and switches in favor of sleek but sterile touch-screen “controls” that when we see something like this big red button so toddlers can start a TV show, we just have to latch onto the story and see what it’s all about.

As it turns out, the big red button itself is probably the least interesting part of [Mads Chr. Olesen] build. The real meat of the project is the reverse engineering effort needed to get Chromecast to start the show. As [Mads] explains, once upon a time a simple GET request to a URL was all it took to do so, but no more; Google has repeatedly nerfed the Chromecast API over the years, enough that [Mads] had some digging to do.

Luckily, pyChromecast is a thing, but using it for DRTV, a streaming service of the Danish Broadcasting Corporation, required figuring out the AppID of the DRTV app. It looks like [Mads] used Wireshark to sniff traffic to and from the Chromecast, and netlog-viewer to analyze the capture. That and a little Developer Tools action in Chrome led to all the information needed to modify pyChromecast to support DRTV. The rest of the project consisted of building a box for the huge red arcade button and wiring it up to a Wemos D1. A Raspberry Pi actually talks to the Chromecast, and now the toddler is able to call up his favorite show and pause and restart it at will, no parent required.

We appreciate the reverse engineering heroics [Mads] displays here, which provide good general lessons for other purposes. It’s been a while since we’ve seen a Chromecast physical interface build, too, so we appreciate the refresher.

Toy Gaming Controller Makes The Big Leagues

Some of the off-brand video game consoles and even accessories for the major brands can leave a lot to be desired. Whether it’s poor build quality or a general lack of support or updates, there are quite a few things on the market not worth anyone’s time or money. [Jonathan] was recently handed just such a peripheral, a toy game controller originally meant for a small child, but upon further inspection it turned into a surprisingly hackable platform, capable of plenty of IoT-type tasks.

The controller itself was easily disassembled, and the functional buttons within were wired to a Wemos D1 Mini instead of the originally-planned ESP32 because of some wiring irregularities and the fact that the Wemos D1 Mini having the required amount of I/O. It’s still small enough to be sealed back inside the controller as well, powered by the batteries that would have powered the original controller.

For the software, [Jonathan] is using MQTT to register button presses with everything easily accessible over Wi-Fi, also making it possible to update the software wirelessly. He was able to use it to do a few things as proof-of-concept, including playing a game in PyGame and controlling a Sonos speaker, but for now he’s using it to control an LED sculpture. With something this easily modified, though, it would be pretty straightforward to use it instead for a home automation remote control, especially since it is already set up to use MQTT.

Continue reading “Toy Gaming Controller Makes The Big Leagues”

Keeping Badgers At Bay With Tensorflow

Human-animal conflict is always a contentious issue, and finding ways to prevent damage without causing harm to the animals often requires creative solutions. [James Milward] needed a humane method to stop badgers and foxes from uprooting his garden, leading him to create the Furbinator 3000, a system that combines computer vision with audio deterrents..

[James] initially tried using scent repellents (which were ignored) and blocking access to his garden (resulting in more digging), but found some success with commercial ultrasonic audio repellent devices. However, these had to be manually turned off during the day to avoid annoying activation of the PIR motion sensors by [James] and his family, and the integrated solar panels couldn’t keep up with the load.

This presented a good opportunity to try his hand at practical machine vision. He already had a substantial number of sample images from the Ring cameras in his garden, which he turned into a functional TensorFlow Lite model with about 2.5 hours of training. He linked it with event-activated RTSP streams from his Ring cameras using the ring-mqtt library. To minimize false positives on stationary objects, he incorporated a motion filter into the processing pipeline. When it identifies a fox or badger with reasonable accuracy, it generates an MQTT event.

[James] modified the ultrasonic devices so they would react to these events using an ESP8266-based WeMos D1 Mini Pro development board and added an external 5 V power supply for sustained operation. All development was performed in a Docker container which simplified deployment on a Raspberry Pi 4.

After implementing the system, [James] woke up to the satisfying sight of his garden remaining untouched overnight, a victory that even earned him some coverage by the BBC.

Thanks for the tip [Laurent]!

A Buzzing, Flashing Phone Ringer For The Elderly

For a lonely person, elderly or otherwise, the sound of a ringing phone can be music to the ears, unless of course it’s another spam call. But what good is a phone when you can’t hear it well enough to answer?

[Giovanni Aggiustatutto] was tasked with building an additional ringer for a set of cordless landline phones belonging to an elderly friend. Rather than try to intercept the signal, [Giovanni] chose to simply mic up the phone base that’s connected to the phone port on the router and send a signal over Wi-Fi to a second box which has a loud piezo buzzer and a handful of LEDs.

At the heart of this build is a pair of ESP8266 Wemos D1 minis and an Arduino sound sensor module inside a pair of really nice-looking 3D printed boxen that may or may not have been inspired by an IKEA air quality sensor. On the receiving side, a green LED indicates the system is working, and the red LEDs flash as soon as a call comes in.

All the code, schematics, and STL files are available for this build, and between the Instructable and the build video after the break, you should have no trouble replicating it for the hard-of-hearing in your life.

Continue reading “A Buzzing, Flashing Phone Ringer For The Elderly”