More LEDs Means Faster Print Times For 3D Printer, But There’s A Catch

[Jan Mrázek] is no stranger at all to home-grown improvements with his Elegoo Mars SLA 3D printer, and there is a lot going on in his experimental multi-LED upgrade which even involved casting his own lens array. In the end it did speed up his prints by a factor of three to four, though he cooked an LCD to failure in the process. Still, it was a fun project done during a COVID-19 lockdown; as usual there is a lot to learn from [Jan]’s experiences but the mod is not something he necessarily recommends people do for themselves.

[Jan] started by wondering whether better print quality and performance could be obtained by improving the printer’s UV light source. The stock printer uses a single large UV LED nestled into a reflector, but [Jan] decided to try making a more precise source of UV, aiming to make the UV rays as parallel as possible.

Custom LED array molded in clear epoxy.

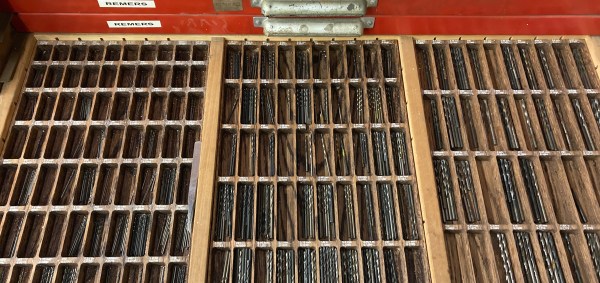
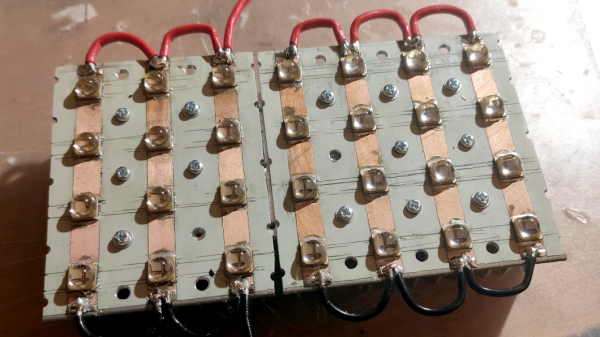
To do this, he took a two-pronged approach. One was to replace the single large UV LED with a 4×7 array of emitters plus heat sink and fans. The other was to make a matching array of custom lenses to get the UV rays as parallel as possible.

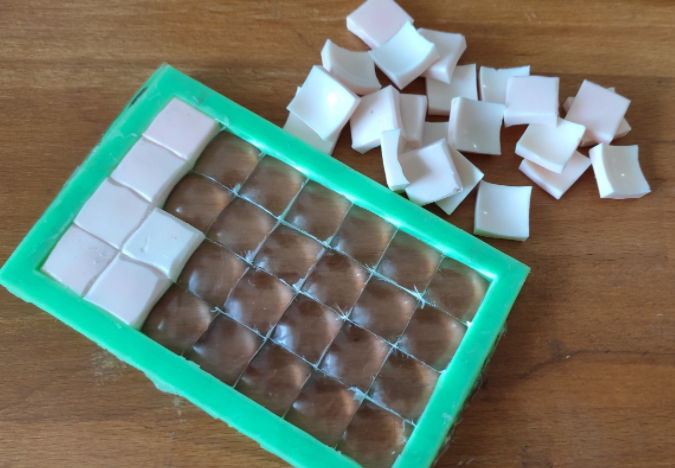
Casting one’s own lens array out of clear epoxy was a lot of work and had mixed results, but again, it was a lockdown project and the usual “is-this-really-worth-it” rules were relaxed. In short, casting a single custom lens out of clear epoxy worked shockingly well, but when [Jan] scaled it up to casting a whole 4×7 array of them, results were mixed. Mold deformation and artifacts caused by the areas between individual lenses robbed the end result of much of its promise.

More success was had with the array of UV emitters, which enabled faster curing thanks to higher power, but the heat needs to be managed. The stock emitter of the printer is about 30 W, and [Jan] was running his new array at 240 W. This meant a blazing fast one second exposure time per layer, but the heat generated by the new lighting was higher than anticipated. After only ten hours the LCD failed, probably at least in part due to the heat. [Jan] halved the power of the array down to 120 W and added an extra fan, which appears to have done the trick. Exposure time is two to three seconds per layer, and it’s up to 150 hours of printing without problems.

Again, it’s not a process [Jan] necessarily recommends to others (and he definitely recommends buying lenses if at all possible instead of casting them) but as usual there is a lot to learn from his frank sharing of results, both good and bad. We’ve seen 3D-printed lenses as well as adding WiFi connectivity to one of these hobbyist printers, and it’s great to see the spirit of hacking alive and well when it comes to these devices.

Magnifying On The Cheap

If there is one thing we’ve learned during several years of running the Hackaday SMD soldering challenge it is this: Most people need magnification to do good soldering at a tiny scale. The problem is, like most tools, you can buy something as cheap as a $5 binocular headset or you can spend $1,000 or more on a serious microscope. What’s in between? [Noel] looks at some affordable options in a recent video that you can see below.

[Noel] started out with a cheap “helping hand” that has a simple little magnifying glass attached to it. The major criterion was to find something that would have no delay so he could solder under magnification. While it is possible to work under a scope with a little lag in the display, it is frustrating and there are better options.

Continue reading “Magnifying On The Cheap”

Portable Ham Antenna Uses SMD Capacitors

[K6ARK] likes to operate portable, so he puts together very lightweight antennas. One of his latest uses tiny toroids and SMD capacitors to form trap elements. You can see  the construction of it in the video below.

You usually think of toroid winding as something you do when building transmitters or receivers, especially small ones like these. We presume the antenna is best for QRP (low power) operation since the tiny core would saturate pretty quickly at higher power. Exactly how much power you should pass through an FT50-43 core depends on the exact application, but we’ve seen numbers around 5 watts.

Continue reading “Portable Ham Antenna Uses SMD Capacitors”

Exploring The New Super Mario Game & Watch

Nintendo has revived the classic Game & Watch, this time in glorious full-color and running the same Super Mario Bros that first graced the Nintendo Entertainment System (NES) back in 1985. Even though it’s only been on the market for a few days, [stacksmashing] has already made some impressive progress towards unlocking the full potential of this $50 retro handheld.

It will come as no surprise to the average Hackaday reader that what we’re looking at here is a pocket-sized NES emulator, but until [stacksmashing] cracked his open, nobody was quite sure what kind of hardware is was running on. Thankfully there wasn’t an epoxy blob in sight, and all of the chips were easily identifiable. Armed with the knowledge that the Game & Watch is running on a STM32H7B0 microcontroller with a nearby SPI flash chip holding the firmware, it was just a matter of figuring out how the software worked.

Connecting to the SWD header.

It didn’t take long to find that an unpopulated header on the board would give him access to the Serial Wire Debug (SWD) interface of the STM32, though unfortunately he found that the chip’s security mode was enabled and he couldn’t dump the firmware.

But he was able to dump the RAM through SWD, which allowed him to identify where the Super Mario Bros NES ROM lived. By connecting the SPI flash chip to a reader and comparing its contents with what the system had in RAM, [stacksmashing] was able to figure out the XOR encryption scheme and come up with a tool that will allow you to insert a modified ROM into an image that can be successfully flashed to the chip.

So does that mean you can put whatever NES ROM you want on the new Game & Watch? Unfortunately, we’re not quite there yet. The emulator running on the device has a few odd quirks, and it will take some additional coaxing before its ready to run Contra. But we’ve seen enough of these devices get hacked to know that it’s just a matter of time.

Continue reading “Exploring The New Super Mario Game & Watch”

Sorting Thousands Of Drill Bits

[Austin Adee] came into some drill bits. A lot of them actually. But when thousands of assorted sizes are delivered in one disorganized box, are they actually useful? Not unless you’re drilling holes where diameter doesn’t matter.

So two projects were at hand: finding a place to store a few hundred different sizes of bits, and tackling the actual sorting itself. In the end, he used input from a digital caliper alongside a Python script that showed him where to put them.

The start of the tray design process was a bit of a research project, establishing the common sizes and how many would fit into a given space. This data was used to spin up the layout for trays with 244 different pockets to hold the bits. The pockets were CNC milled, but getting labels for each to work with the laser engraver was a bit of a hack. In the end, filling in the letters with white crayon really makes them pop, despite [Austin’s] dissatisfaction with the level of contrast.

But wait, we promised you an epic sorting hack! Unfortunately there’s no hopper, vibration feed, and sorting gantry that did this for him (now if it were perler beads he’d have been all set). Still, the solution was still quite a clever one.

A set of digital calipers with a Bluetooth connection sends the dimension back to a python script every time you press the capture button. That script find the pocket for the nearest size and then highlights it on a map of the drill bit drawer displayed on the computer monitor. In the end the trays fit into a wide tool chest drawer, and are likely to keep things organized through exactly one project before everything is once again in disarray.

[Austin] mentions a lag of up to one second for the Bluetooth calipers to do their thing. For assembly-line style work, that adds up. We remember seeing a really snappy reaction time on these digital calipers hacked for wireless entry.

Kipp Bradford Discusses The Entanglement Of Politics And Technology

Kipp Bradford wrapped up his keynote talk at the Hackaday Remoticon with a small piece of advice: don’t built bridges in the middle of the ocean. The point is that a bridge must connect two pieces of land to be useful and if technology isn’t useful to humanity, does it matter at all?

In reality we build bridges in the middle of the ocean all the time as each of us finds nonsensical reasons to learn new skills and try things out. But when it comes time to sit down and make an organized end goal, Kipp wisely asks us to consider the impact we’d like that work to have on the world. Equally importantly, how will we make sure completed work actually gets used? This is where the idea of politics in technology comes to play, in the sense that politics is a major mechanism for collective decision-making within a society.

Currently the CTO of Treau, and a Lecturer and Researcher at Yale, Kipp delivered this keynote live on November 7th. Kipp was an expert judge for the Hackaday Prize in 2017 and 2018. The video of his talk, and a deeper look at the topics, are found below.

Continue reading “Kipp Bradford Discusses The Entanglement Of Politics And Technology”

Bare-Metal STM32: From Power-Up To Hello World

Some may ask why you’d want to program a Cortex-M microcontroller like the STM32 series using nothing but the ARM toolchain and the ST Microelectronics-provided datasheet and reference manual. If your first response to that question wasn’t a panicked dive towards the nearest emergency exit, then it might be that that question has piqued your interest. Why, indeed?

Definitely, one could use any of the existing frameworks to program an STM32 MCU, whether the ST HAL framework, plain CMSIS, or even something more Arduino-flavored. Yet where is the fun in that, when at the end of the day one is still fully dependent on that framework’s documentation and its developers? More succinctly, if the contents of the STM32 reference manuals still look like so much gibberish, does one really understand the platform?

Let’s take a look at how bare-metal STM32 programming works, and make the most basic example run, shall we? Continue reading “Bare-Metal STM32: From Power-Up To Hello World”