A Drop-In Controller Replacement For Commercial Reflow Ovens

If you need a reflow oven, you can very easily head down to Walmart or Target and pick up a toaster oven for fifteen bucks or so. Even without any control electronics, a bone-stock toaster oven works well enough for reflow soldering, but if you want to do it right you’ll also want to add a themocouple, a microcontroller, and maybe a fancy display. That’s option one.

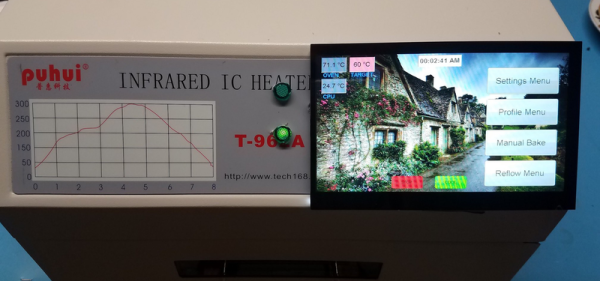
If you value your time more than your money, you’ll probably just plonk down a few hundred bucks for a T-962A reflow oven, the standard infrared oven that’s meant for reflowing solder. It’s a good oven, but as with all bargain basement tools from China, the user interface isn’t great. [PhillyFlyers] is working on a drop-in controller for what is probably the most popular reflow oven on the planet, and this thing looks good.

This is a controller for the T-962A oven that includes all the connectors as the stock control board. We’ve seen a few of these projects to improve cheap tools, from 3D printer controllers to a replacement board for the ubiquitous K40 laser cutter. Now the most popular reflow oven is getting the same treatment.

The specs for this replacement board include a five-inch, 800 x 480 display, powered by an STM32H7 microcontroller. All of the usual functionality of the oven is retained, but it adds the ability to hand-draw reflow profiles, save reflow profiles to an SD card, and support for four K-type thermocouples. Basically, it’s what you would expect from an upgraded version of the T-962 oven.

Most importantly, this is a direct drop-in replacement for the stock electronics. Grab one of these boards, and all you have to do for installation is break out a screwdriver. It makes a great tool even better, which is exactly what this very popular reflow oven needs.

Measure Your YouTube Importance

How do you hack your motivation? Do you put red marker Xs on a paper calendar every day you exercise? Do you use an egg timer to sprint through dozens of emails? Do you lock all the doors and shut off your data to write some bulletproof code? If you are [Hulk], you build a YouTube Desktop Notifier showing his YouTube subscribers and views. This is his ticket to getting off the couch to make a video about just such a device. There is something poetic about building a mechanism to monitor its own success making a feedback loop of sorts. The Hackaday.io page follows the video, so anyone who wants to build their own doesn’t have to scribble notes while pausing the video which is also posted below the break.

The hardware list is logical, starting with a NodeMCU module programmed through the Arduino IDE. Addressable 7-segment displays show the statistics in red, but you can sub in your preferred color with the back-lighting LEDs. It should be possible to share the CLK pins on the displays if you are important enough to need more digits. [Hulk] already outlined a list of improvements including switching to addressable backlights and adding daily and monthly tracking.

Monitoring online values without a computer monitor is satisfying on a level because it shows what motivates us, whether that is Bitcoin or the weather.

Continue reading “Measure Your YouTube Importance”

Old CDs Create A Haunting Rainbow Vortex

The 1960s were, in Western culture, a time of great social and political upheaval, and the dawning of the psychedelia subculture. This resulted in an art style consisting of bright colours in wild, shifting designs. [Afraser-kruck] has built a device capable of generating beautiful rainbow light patterns, which he calls Mesmer-Eyes.

Unnerving, to say the least.

The device uses two CDs, stripped of their reflective coating. This leaves the plastic layer behind, which appears to be acting as a circular diffraction grating. By passing light from a flashlight through a CD, a dazzling rainbow vortex is created, and the effect is even further improved by adding a second disc. The patterns can be moved and shifted by changing the distance between the discs themselves, as well as the flashlight. This is achieved through the use of a sled that slides on PVC pipes, holding each individual element.

It’s a build of a kind we haven’t seen before, and is put to good use as a creepy Halloween decoration, imitating the famous Cheshire Cat. It’s one we can’t wait to tackle ourselves, and we wonder how difficult it would be to turn it into a projection, or a larger scale design.

Creepy eyes remain a Halloween staple; we’ve featured them before. Video after the break.

Continue reading “Old CDs Create A Haunting Rainbow Vortex”

Maker Media Reboots Itself As Make Community

At a community meeting this week, Dale Dougherty, former CEO of Maker Media announced the relaunch of the Make brand. Maker Media is dead, but the brand may live on as Make Community, LLC. Dougherty will remain the CEO of Make Community, and Todd Sotkicwicz, former CFO of Maker Media, was identified as the current CFO of Make Community. This is the same organization that brought you Make Magazine and the Maker Faires gearing up to give you even more Make Magazines and more Maker Faires.

Early this year, we heard rumors about the future of Maker Media and its flagship Maker Faires. Then in May, just before the Bay Area Maker Faire, Dougherty told the San Francisco Chronicle that it was ‘quite possible this could be the last Bay Area Maker Faire’. The Bay Area Faire came and went, and early last month we received news that employees were let go and Maker Media had ceased operations.

Now, according to Dougherty’s summary at the meeting, what remained has now been reformed into a new LLC, Make Community, and he was holding this meeting to gauge how much the community would be willing to contribute. The official launch of Make Community will supposedly be next week, but you can check out the future home of the Make Community at make.co.
Continue reading “Maker Media Reboots Itself As Make Community”

Giving The Pi 4 PCI Express

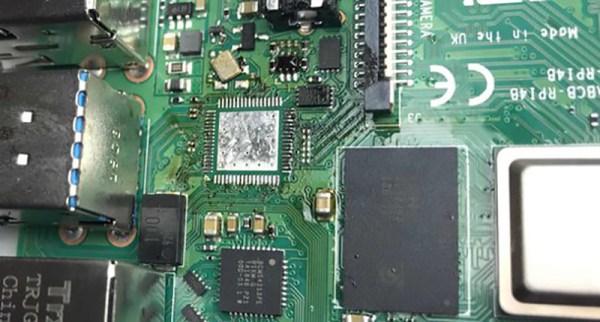
The release of the Raspberry Pi 4 brought us a new SoC, up to 4 Gigs of memory, and most importantly, got away from that janky USB to USB and Ethernet solution. The Raspberry Pi 4 has a PCI Express interface buried under some chips, and if you’re very good at soldering you can add a PCIe x1 device to the new best single board computer.

[Thomasz] took a look at the Raspberry Pi 4 and realized the new USB 3.0 chip is attached to the PCI Express interface on the SoC. That is, if you remove this chip and you have some very fine wires, you can patch in a real PCI Express slot. Removing the chip is easy enough with a hot air gun, although a few caps did get messed up. Throw that in an ultrasonic cleaner, and you have a blank canvas to work PCI magic.

This hack requires six wires, or three differential pairs, there’s a reference clock, a lane 0 transmit, and a lane zero receive. Working backwards from a PCI Express riser, [Thomasz] traced out these connections and soldered a few wires in. On the Pi side, a few capacitors were required to be compliant with the PCI Express spec, but the soldering isn’t too bad. You can do a lot with a small tip on an iron and a microscope.

The Pi was successfully wired up to a PCI Express riser card, along with the lines for ground, 5V, link reactivation, and a power good signal. The only thing left to do was to plug in a PCI card and test. This didn’t go as well as expected, because the PCI Express adapter didn’t like being enumerated by the Raspberry Pi kernel. In subsequent experiments, an Adaptec SAS controller worked. Does this mean external graphics cards for the Pi? No, not quite; this is only one lane of PCIe, where modern graphics cards require an x16 slot for the best performance. Still, if you’ve ever wanted a SCSI card for a Pi, this is the best option yet.

Four Chips To Retro Perfection

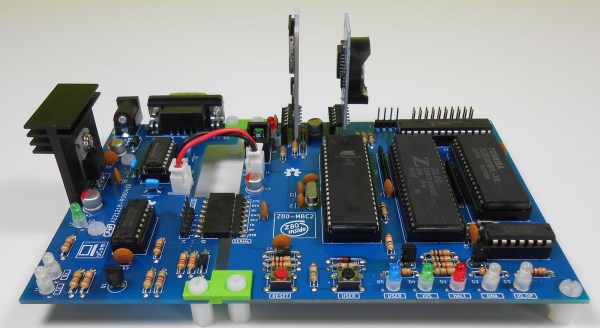
Over the years, we’ve seen many people build a computer from the ground up. It’s always great, but this one takes the cake. I’m not just saying that because there’s a cute little ‘Z80 Inside’ logo on the silk screen, either. It’s a four IC Z80 computer, a tiny board, and [Just4Fun]’s entry into this year’s Hackaday Prize.

This single board computer is only four chips, the most important being the CMOS Z80 CPU. This is the same CPU as was found in the TRS-80 and the ZX Spectrum, both classics from the early days of computing. In addition to the PCU, there’s a Toshiba SRAM with 128 whole kilobytes of random access memories. A 74HC00 is thrown into the mix for glue logic, and everything else happens through a specially-programmed ATMega32A. This last chip provides a universal I/O subsystem, the EEPROM, and the 4/8MHz clock for the CPU.

Those four chips are really all you need for a fully functional computer, but you can do so much more with this little board. There’s a uCom board, or basically a ‘transparent’ USB-to-serial emulator that will allow you to upload a hex file to the board. Of course this means you can also connect it to a terminal, and with FuzixOS, there’s Unix for the Z80. It’s a wonderment of retrocomputing, and one of the best ways to build an old computer today.

Continue reading “Four Chips To Retro Perfection”

Ask Hackaday: What Are Your Apollo Memories?

This month will mark the 50th anniversary of the Apollo 11 mission that brought to a successful conclusion the challenge laid down by President Kennedy only eight years earlier. Three men went to the Moon, two walked on it, and they all came back safely, in a dramatic eight-day display of engineering and scientific prowess that was televised live to the world.

If you’ve made more than 50 trips around the sun, chances are good that you have some kind of memories of the first Moon landing. An anniversary like this is a good time to take stock of those memories, especially for something like Apollo, which very likely struck a chord in many of those that witnessed it and launched them on careers in science and engineering. We suspect that a fair number of Hackaday readers are in that group, and so we want to ask you: What are your memories of Apollo?

A Real American Hero

My memory of the Moon landing is admittedly vague. I had just turned five the month before, hadn’t even started kindergarten yet, but I had already caught the space bug in a big way. I lived and breathed the space program, and I knew everything about the Mercury missions that were over by the time I was born, and the Gemini missions that had just wrapped up. Apollo was incredibly exciting to me, and I was pumped to witness the landing in the way that only a five-year-old can be.
Continue reading “Ask Hackaday: What Are Your Apollo Memories?”