Sit next to any piece of machinery long enough and you get to know it by the sounds it makes. Think about the sounds coming from any 3D-printer or CNC machine; it’s easy to know without looking when the G code is working through the sines and cosines needed to trace out a circle, for instance.
It was the same back in the day, when bored and bright software engineers heard note-like sounds coming from their gear and wrote programs to turn them into crude music machines. And now, [Ken Shirriff] details his efforts to revive a vintage IBM 1403 line printer’s musical abilities. The massive 1960s-era beast is an irreplaceable museum piece now, but when [Ken] and his friends at the Computer History Museum unearthed stacks of punch cards labeled with song titles like “Blowin’ In the Wind” and “The Blue Danube Waltz,” they decided to give it a go.
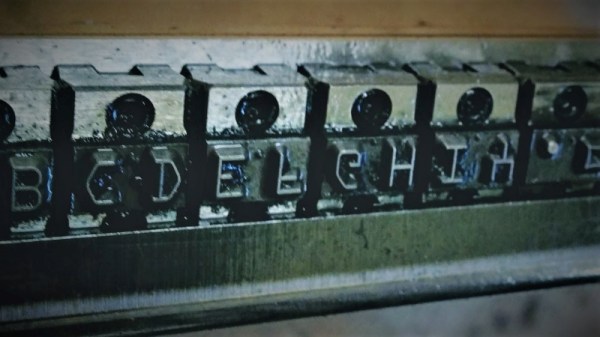
The 1403 line printer has a unique chain-drive print head, the inner workings of which [Ken] details aptly in his post. Notes are played by figuring out which character sequences are needed to get a particular frequency given the fixed and precisely controlled speed of the rotating chain. The technique is quite similar to that used by musical instruments such as the Floppotron, or when coercing music from everyday items including electric toothbrushes.
Lacking the source code for the music program, [Ken] had to reverse engineer the compiled program to understand how it works and to see if playing music would damage the chain drive. The video below shows the printer safely going through a little [Debussy]; audio clips of songs originally recorded back in 1970 are available too.
Continue reading “Teaching A Vintage Line Printer To Make Music, All Over Again”