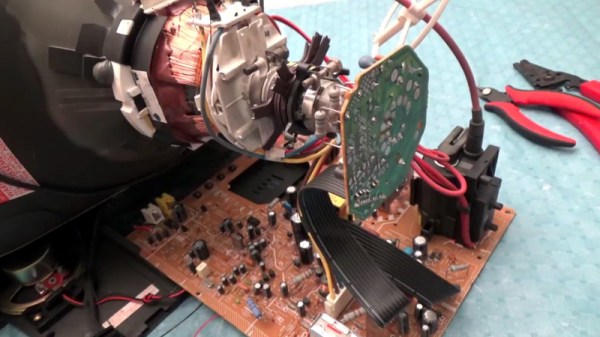
While an old CRT TV may work well enough on a MAME cabinet project, the real arcade purists are quick to point out that a proper arcade monitor and a TV aren’t the same thing. A real arcade board uses RGB to connect to the monitor, that is, direct control over the red, green, and blue signals. Conversely video over coax or composite, what most people associate with old CRT TVs, combine all the video information down into an analog signal. Put simply, RGB allows for a much cleaner image than composite.
 Many in the arcade restoration scene say that trying to convert a bog standard CRT TV into a RGB monitor isn’t possible, but [Arcade Jason] had his doubts. Over on his YouTube channel, he’s recently posted a tutorial on how to go from a trashed CRT TV to a monitor worthy of proper arcade gaming with relatively little work. As real arcade monitors are becoming increasingly rare, these kind of modifications are likely to get more common as coin-op gamers look to keep the old ways alive.
Now obviously every TV is going to do be different inside. All CRT TVs contain high voltages, and on some the circuit boards aren’t even mains-isolated, so take care if you try this. [Jason] certainly doesn’t claim that the method he demonstrates will work on whatever old TV you happen to have kicking around. But the general idea and some of the techniques he shows off are applicable to most modern TVs, and can help you tailor the method to your particular piece of gear. It all starts with a wet finger. Seriously.
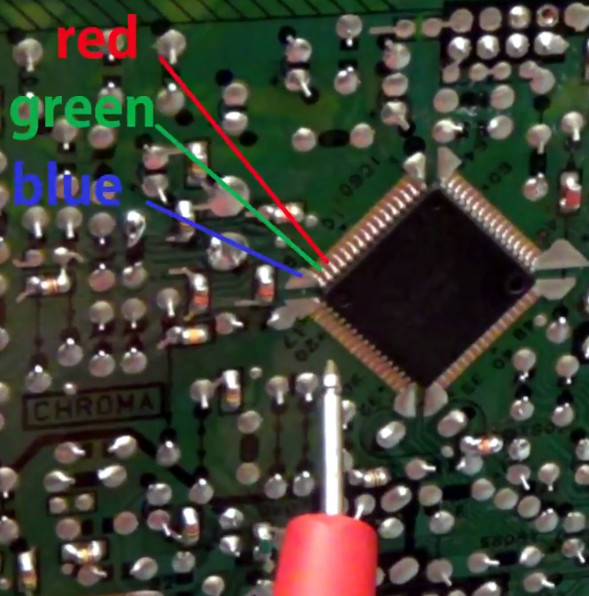
[Jason] demonstrates a rather unique way of determining which pins on the TV’s control chip are responsible for the individual color signals by wetting his finger and sliding it over the pins. When a change in color is seen on the displayed image, you know you’re getting close. We can’t say it’s the most scientific or even the safest method, but it worked for him.
He then follows up with a jumper wire and resistor to find the precise pins which are responsible for each color, and solders up his actual RGB connection for the arcade board. In addition to the three color wires, a sync signal is also needed. This is the same sync signal used in composite video, so all that’s needed is to solder to the pad for the original composite video jack. Add a ground signal, and you’ve got yourself a proper RGB monitor.
Interestingly, this one has come full circle, as [Jason] says his attempt was inspired by an old post on Hackaday. It’s the Circle of Hacker Life.
[Thanks to Seebach for the tip]
Continue reading “Convert A Curbside CRT TV Into An Arcade Monitor”