A GPU card with a home-made fan assembly

3D-printed Fan Mount Keeps Server GPU Cool In Desktop Case

Most readers of Hackaday will be well aware of the current shortages of semiconductors and especially GPUs. Whether you’re planning to build a state-of-the art gaming PC, a mining rig to convert your kilowatt-hours into cryptocoins, or are simply experimenting with machine-learning AI, you should be prepared to shell out quite a bit more money for a proper GPU than in the good old days.

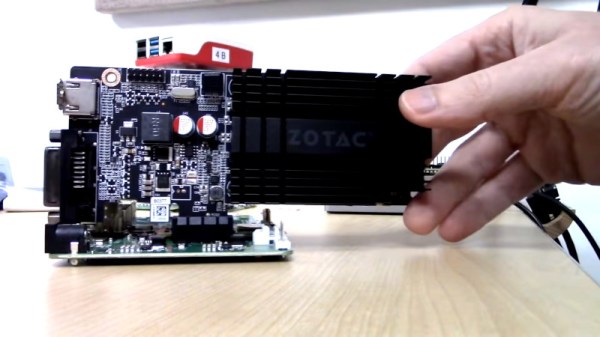
Bargains are still to be had in the second-hand market though. [Devon Bray] chanced upon a pair of Nvidia Tesla K80 cards, which are not suitable for gaming and no longer cost-effective for mining crypto, but ideal for [Devon]’s machine-learning calculations. However, he had to make a modification to enable proper thermal management, as these cards were not designed to be used in regular desktop PCs.

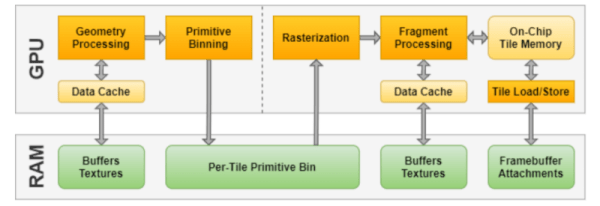
The reason for this is that many professional-grade GPU accelerators are installed in rack-mounted server cases, and are therefore equipped with heat sinks but no fans: the case is meant to provide a forced air flow to carry away the card’s heat. Simply installing the cards into a desktop PC case would cause them to overheat, as passive cooling will not get rid of the 300 W that each card pumps out on full load.

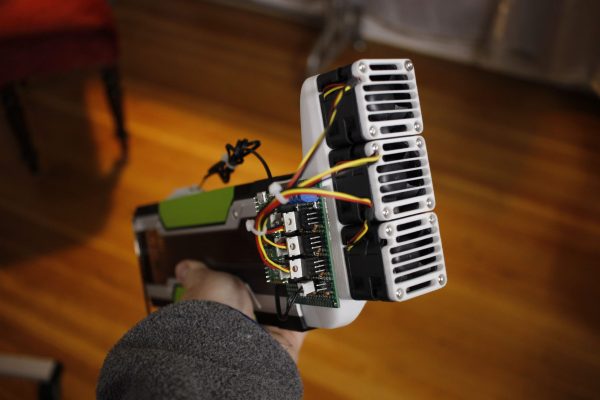
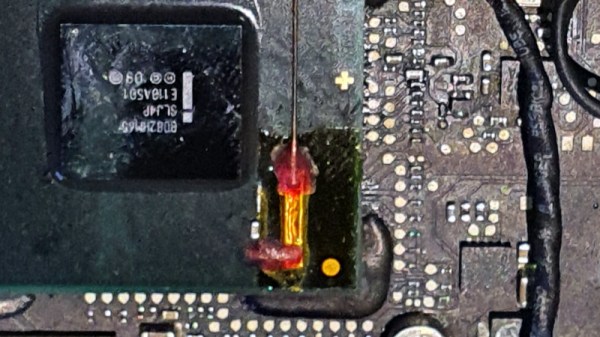
[Devon] decided to make a proper thermal solution by 3D printing a mount that carries three fans along with an air duct that snaps onto the GPU card. In order to prevent unnecessary fan noise, he added a thermal control system consisting of a Raspberry Pi Pico, a handful of MOSFETs, and a thermistor to sense the GPU’s temperature, so the fans are only driven when the card is getting hot. The Pi Pico is of course way more powerful than needed for such a simple task, but allowed [Devon] to program it in MicroPython, using more advanced programming techniques than would be possible on, say, an Arduino.

We love the elegant design of the fan duct, which enables two of these huge cards to fit onto a motherboard side-by-side. We’ve seen people working on the opposite problem of fitting large fans into small cases, as well as designs that discard the whole idea of using fans for cooling.

Continue reading “3D-printed Fan Mount Keeps Server GPU Cool In Desktop Case”

What Kind Of GPU Are You?

In the old days, big computers often had some form of external array processor. The idea is you could load a bunch of numbers into the processor and then do some math operations on all of the numbers in parallel. These days, you are more likely to turn to your graphics card for number crunching support. You’ll usually use some library to help you do that, but things are always better when you understand what’s going on under the hood. That’s why we enjoyed [RasterGrid’s] post on GPU architecture types.

If you can tell the difference between IMR (immediate mode) and TBR (tile-based) rendering this might not be the post for you. But while we knew the terms, we found a lot of interesting detail including some graphics and pseudo code that clarified the key differences.

Continue reading “What Kind Of GPU Are You?”

Trying (And Failing) To Use GPUs With The Compute Module 4

The Raspberry Pi platform grows more capable and powerful with each iteration. With that said, they’re still not the go-to for high powered computing, and their external interfaces are limited for reasons of cost and scope. Despite this, people like [Jeff Geerling] strive to push the platform to its limits on a regular basis. Unfortunately, [Jeff’s] recent experiments with GPUs hit a hard stop that he’s as yet unable to overcome.

With the release of the new Compute Module 4, the Raspberry Pi ecosystem now has a device that has a PCI-Express 2.0 1x interface as stock. This lead to many questioning whether or not GPUs could be used with the hardware. [Jeff] was determined to find out, buying a pair of older ATI and NVIDIA GPUs to play with.

Immediate results were underwhelming, with no output whatsoever after plugging the modules in. Of course, [Jeff] didn’t expect things to be plug and play, so dug into the kernel messages to find out where the problems lay. The first problem was the Pi’s limited Base Address Space; GPUs need a significant chunk of memory allocated in the BAR to work. With the CM4’s BAR expanded from 64MB to 1GB, the cards appeared to be properly recognised and ARM drivers were able to be installed.

Alas, the story ends for now without success. Both NVIDIA and ATI drivers failed to properly initialise the cards. The latter driver throws an error due to the Raspberry Pi failing to account for the I/O BAR space, a legacy x86 feature, however others suggest the problem may lay elsewhere. While [Jeff] may not have pulled off the feat yet, he got close, and we suspect with a little more work the community will find a solution. Given ARM drivers exist for these GPUs, we’re sure it’s just a matter of time.

For more of a breakdown on the Compute Module 4, check out our comprehensive article. Video after the break.

Continue reading “Trying (And Failing) To Use GPUs With The Compute Module 4”

A Dead Macbook GPU Shouldn’t Stop You, With This BGA Soldering Hack

On some 2011 Macbook Pro models, there is a tendency for the Radeon GPU to fail. This should mean game over for the computer, but surprisingly salvation is offered by its having not one but two GPUs on board. The Intel processor also has a GPU, and Apple use a pile of logic in an FPGA to switch at will between them. The community have produced fresh FPGA code to revive a dead Mac on its Intel GPU, but at the expense of losing brightness control. [Ayilm1] has brought back the brightness with a clever BGA reworking hack that gains access to a brightness control line present on the Intel BD82HM65 Platform Controller Hub chip but not used in the Macbook.

We’re used to impressive soldering work here at Hackaday, and we’ve seen our share of wiring direct to the balls on an upturned BGA chip. This is a similar idea but at another level, as a section of the top insulation on an in-place BGA is removed to expose the microvia above the ball carrying the required signal. A tiny wire is soldered to the exposed pad and taken to a piece of copper tape stuck down to provide mechanical strength, and a piece of enameled copper wire is run from that to the other side of the PCB where lies its destination. It comes with FPGA code to take advantage of it, but even for non-Macbook owners, it’s an extremely impressive piece of work. It’s not the first fine-soldering Macbook fix we’ve seen, either.

Thanks [lightpink784] for the tip.

GPU Turned Into Radio Transmitter To Defeat Air-Gapped PC

Another week, another exploit against an air-gapped computer. And this time, the attack is particularly clever and pernicious: turning a GPU into a radio transmitter.

The first part of [Mikhail Davidov] and [Baron Oldenburg]’s article is a review of some of the basics of exploring the RF emissions of computers using software-defined radio (SDR) dongles. Most readers can safely skip ahead a bit to section 9, which gets into the process they used to sniff for potentially compromising RF leaks from an air-gapped test computer. After finding a few weak signals in the gigahertz range and dismissing them as attack vectors due to their limited penetration potential, they settled in on the GPU card, a Radeon Pro WX3100, and specifically on the power management features of its ATI chipset.

With a GPU benchmarking program running, they switched the graphics card shader clock between its two lowest power settings, which produced a strong signal on the SDR waterfall at 428 MHz. They were able to receive this signal up to 50 feet (15 meters) away, perhaps to the annoyance of nearby hams as this is plunk in the middle of the 70-cm band. This is theoretically enough to exfiltrate data, but at a painfully low bitrate. So they improved the exploit by forcing the CPU driver to vary the shader clock frequency in one megahertz steps, allowing them to implement higher throughput encoding schemes. You can hear the change in signal caused by different graphics being displayed in the video below; one doesn’t need much imagination to see how malware could leverage this to exfiltrate pretty much anything on the computer.

It’s a fascinating hack, and hats off to [Davidov] and [Oldenburg] for revealing this weakness. We’ll have to throw this on the pile with all the other side-channel attacks [Samy Kamkar] covered in his 2019 Supercon talk.

Continue reading “GPU Turned Into Radio Transmitter To Defeat Air-Gapped PC”

Java On GPUs And FPGAs

There was a time when running a program on an array of processors meant that you worked in some high-powered lab somewhere. Now your computer probably has plenty of processors hiding in its GPU and if you have an FPGA, you have everything you need to make something custom. The idea behind TornadoVM is to modify OpenJDK and GraalVM to support running some Java code on parallel architectures supported by OpenCL. The system can utilize multi-core CPUs, GPUs (NVIDIA and AMD), Intel integrated GPUs, and Intel FPGAs.

If you want to try your hand at accelerated Java, there are some docker containers to get you started fast. There’ are also quite a few examples, such as a computer vision application.

Continue reading “Java On GPUs And FPGAs”

Running OpenCL On A Raspberry Pi GPU

This is an interesting development for media users and machine learning hackers: [doe300] has implemented OpenCL on the Raspberry Pi 3 Model B+called VCFCL That’s big news because the Pi 3+ has a Graphics Processing Unit (GPU) built into the processor that has been generally underutilized. The VideoCore IV GPU is built into the Broadcom BCM2837B0 and is surprisingly capable for a low-power chip. Although this GPU is well documented, it hasn’t been used that widely because you have to code specifically for this class of GPU. Adding in support for a high-level framework like OpenCL will make it much easier to run and adapt existing packages.

Continue reading “Running OpenCL On A Raspberry Pi GPU”