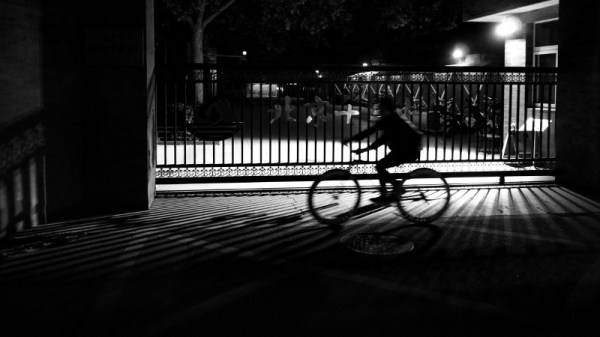
Retro-Styled Raspberry Pi Radio

Ok, so you want a radio — but not just any radio. It has to be wireless, access a variety of music services, and must have a vintage aesthetic that belies its modern innards. Oh, and a tiny screen that displays album art, because that’s always awesome. This 1938 Emerson AX212-inspired radio delivers.

Building on the backbone of a Raspberry Pi Zero W and an Adafruit MAX 98357 mono amp chip, the crux of this single-speaker radio is the program Mopidy. Mopidy is a music player that enables streaming from multiple services, with the stipulation that you have a premium Spotify account. Once signed up, [Tinkernut] helpfully outlines how to set up Mopidy to run automatically once the Pi boots up. The addition of a screen to display album art adds flair to the design,  and Adafruit’s 1.8″ TFT LCD screen is small enough to fit the bill.

But wait — there’s more!

Continue reading “Retro-Styled Raspberry Pi Radio”

Will It Sell?

Many of us develop things for one of two purposes: to hack something cool, or to sell something cool. When hacking something cool, your target market is yourself, and you already know you’ve made the sale. If your goal is to sell the thing you are making, then a lot more thought and effort is required. You could develop the coolest product in the world, but if your target market is too small, your price is too high, your lead time is too long, or any of a dozen other factors is not quite right, you’ll be spending a lot of time and effort on what will amount to a huge disappointment. The Hackaday Prize Best Product has many great examples which let us study some of these success factors, so let’s take a look. Continue reading “Will It Sell?”

Arduino Does Hard Science

We don’t know why [stoppi71] needs to do gamma spectroscopy. We only know that he has made one, including a high-voltage power supply, a photomultiplier tube, and–what else–an Arduino. You also need a scintillation crystal to convert the gamma rays to visible light for the tube to pick up.

He started out using an open source multichannel analyzer (MCA) called Theremino. This connects through a sound card and runs on a PC. However, he wanted to roll his own and did so with some simple circuitry and an Arduino.

Continue reading “Arduino Does Hard Science”

Ambitious Hackerboat Project Still Aiming High

Last year we wrote about Hackerbot Labs’ autonomous boat, which project members hope to someday circumnavigate the globe. Now called Project Ladon, progress continues apace with a recent ocean test of their modified 18’ kayak, the TSV Disputed Right of Way. The kayak’s internal spaces contain a pair of lead-acid truck batteries controlled by a home-brewed control system that uses relays to control the craft’s trolling motor, with a Beaglebone and Arduino Mega under the hood.

The test was not exactly a success, with the boat actually avoiding the waypoints rather than sticking to them. Fortunately the team was aboard a chase boat so they were able to keep tabs on the craft. Unlike a quadcopter, which just falls down, a watercraft that borks may never be seen again.

Entered into the 2016 Hackaday Prize, the project has continued to gather steam, with presentations at both Toorcamp and Maker Faire Bay Area. In addition, they’re maintaining their Hackaday.io project site as well as a Patreon page.

Check out a couple of videos after the break! The test video is 360-degrees so you can drag around the POV.

Continue reading “Ambitious Hackerboat Project Still Aiming High”

The 3D Printer Packing Problem

Form Labs recently announced the launch of the Fuse 1, a desktop SLS printer that will print all your parts using nylon powder and a laser. This a fundamentally different method of 3D printing as compared to filament-based machines, and the best way to use a Fuse 1 is to fill the entire volume of the machine with 3D printed parts. [Michael Fogelman] decided to investigate the 3D packing problem, and managed to fill this printer with the maximum number of 3D printed tugboats. If you’re wondering, it’s 113, as compared with 82 tiny Benchies using naive bin packing.

The formal definition of this sort of problem is the bin packing problem, or simply calculating the maximum number of items can be packed into a finite volume. There is no general solution to this problem, and it’s probably impossible to create an algorithm that will solve this problem for any collection of 3D models. Nevertheless, it’s possible to create a solution that shows marked improvement over a naive solution.

[Michael]’s solution involves simulated annealing. This algorithm begins by randomly placing tugboats, then mutating the position or rotation of one of the boats for each iteration. The code is less than 1000 lines of Go and is available on GitHub if you already have an SLS printer at your disposal.

It should be noted this type of problem isn’t particularly new to the world of 3D printers. There have been a few tools to solve the bin-packing problem for filament-based printers, but the solutions to these problems are two-dimensional; since filling a bed is a problem that only uses the ‘shadow’ of the Z-axis of each part, it’s a slightly easier problem to solve.

Now that Form Labs’ Fuse 1 SLS printer has been announced, there is a new application for this type of problem in the space of 3D printers. It’s not a perfect solution — and it’s doubtful there will ever be a perfect solution — but if you’re looking for a way to fill the volume of your powder printer with parts, this is the best you’re going to do.

Animated robots Mira and Gertie

Pixar Style Robots Are Treasure Trove Of Building Tricks

[Alonso Martinez] is an artist working on virtual characters at Pixar so it’s no wonder that his real life robots, Mira and Gertie,  have personalities that make them seem like they jumped straight out of a Pixar movie. But what we really like are the tricks he’s used inside to bring them to life that are sure to get reused for the same or other things.

Mira's head rotation mechanism
Mira’s head rotation mechanism

For example, Mira’s head can rotate in yaw, pitch and roll. To figure out how to make it do that he recalled having a joystick called the Microsoft Sidewinder Pro that had force feedback. That meant it might have had motors in line with the motions, much like what he wanted. To see how it worked, he bought one on eBay, took it apart, and improved on it to come up with his own design. But besides making use of the design in joysticks and heads, we can imagine it used to make robot eyeballs rotate in their sockets too. And as a side note, he’s running the robot off a Raspberry Pi, but notice the clever, space-saving way he’s mounted the whole mechanism to the Pi’s four mounting holes.

What also piqued our interest are the two tiny servos used in the head mechanism, two HD-DSM44 digital servos. These are even smaller than Tower Pro SG90s and with the added advantage of being metal geared.

Gertie's delta jumping legs
Gertie’s delta jumping legs

To make the eyes blink he had to overcome the fact the head was a thin-walled sphere sliding over the body, and the eyes had to fit in the thin wall without contacting the body. His solution was to make them out of OLED screens with acrylic hemispheres for the protruding eyeballs. The circuit boards talk to the screens through ribbon cables that are around 32 connections per inch, which made for some careful soldering. And to further create a thin profile he even sanded the solder points flat.

His other robot, the yellow and green Gertie, jumps to move around and its internal mechanism is also a joy to examine. To swivel and hop, it uses much the same design as a delta 3D printer, with three legs that can move the upper body in any direction, and compress like a spring before leaping. We like how his method for determining the appropriate thickness of 3D printed PLA parts such that they wouldn’t break was simply trial an error, taking advantage of the rapid prototyping possible with 3D printers. He did cheat on one main part of each leg though, and that was to go with RC car tie rods for the lower half of each leg — but we won’t tell on him if you won’t.

And that’s only a small sample of the neat tips and tricks you’ll find in the video below (they start looking inside the robots at 7:35).

Continue reading “Pixar Style Robots Are Treasure Trove Of Building Tricks”

Best Product Entry: Pocket Thermal Camera

One of the entries in the Hackaday Prize Best Product competition is [x-labz]’s pocket thermal imager. It’s more than a prototype, it’s a design conceived to get out into the world and be used by many. Best Product entries are open until July 24th, and with a $30,000 cash prize on the line let’s take a look at some of the things that elevate a project to product status.

Thanks to recent advances in the state of thermal image sensors, a tool that gives you Predator vision is almost a necessity on the modern workbench. The pocket thermal imager will find drafts in your house during winter, will tell you how to cook a steak, figure out what part is shorting out in your latest electronics project, and will tell you how terrible the heated bed is on your 3D printer.

[x-labz]’s thermal camera is based around the FLIR Lepton image sensor, an 80×60 pixel thermal imaging sensor that’s good enough for most uses. This camera is soldered onto a PCB sandwich containing an Atmel SAMD21 microcontroller, full-color OLED display, SD card, and a battery management system.

What we’ve mentioned so far isn’t out of the ordinary for any other entry in the Hackaday Prize. Building something for the Best Product competition is different, though: a lot of thought has to go into the manufacturability and the fit and finish of this device. So far, everything’s looking great for [x-labz]’s camera. There’s a 3D printed case that looks like it could be easily translated into an injection-moldable shell and at least some of the parts of the user interface are unbelievably satisfying. We’re looking forward to seeing the full Bill of Materials and a business plan (a new requirement this year). That’s an area where many hardware designers lack experience; being able to study the examples from Best Product entries will be a welcomed resource.

There’s a world of difference between building a project and building a product, and the entire goal of the Best Product portion of the Hackaday Prize is to reward those people who go the extra mile as aspiring entrepreneurs and show us how that’s done. $50k in cash prizes are set aside for Best Product; $30,000 for the winner as we mentioned before, but there is also $1000 for each of the twenty entries that make it to the finals in this category in addition to some much deserved notoriety from Hackaday’s community of hardware aficionados and early adopters.