If you are beyond a certain age, you will recall when getting on the Internet was preceded by strange buzzing and squawking noises. Modems used tones to transmit and receive data across ordinary telephone lines. There were lots of tricks used to keep edging the speed of modem up until — at the end — you could download (but not upload) at a blazing 56,000 bits per second. [Martin Kirkholt Melhus] decided to recreate a modem. In a Web browser. No kidding.
We started to say something about a modem in the cloud, but that wouldn’t really be accurate. The modem uses the HTML 5 audio API, so it really runs in the browser. We would have been really surprised if [Martin] had cooked up a modem able to interact with a real modem, but as you might expect, the browser modem only communicates with other instances of itself. If you want a brief introduction to HTML 5 audio, you might enjoy the video below.
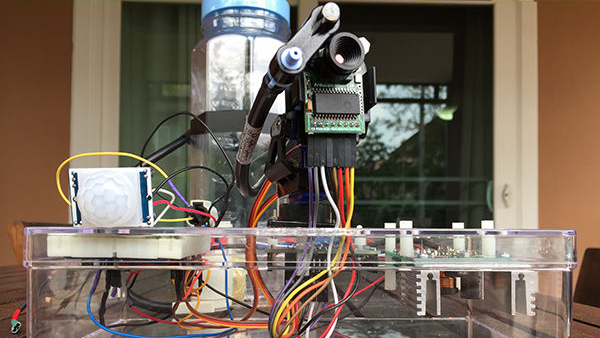
Thieves beware. If you prowl around [Matthew Gaber]’s place, you get soaked by his motion activated super-squirter. Even if he’s not at home, he can aim and fire it remotely using an iPhone app. And for the record, a camera saves photos of your wetted-self to an SD card.
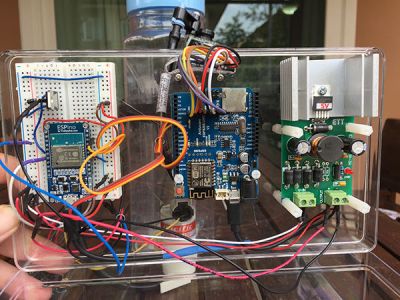
ESPino, ArduCAM UNO and voltage converter boards
The whole security system is handled by three subsystems for target acquisition, photo documentation, and communications. The first subsystem is centered around an ESPino which utilizes a PIR sensor to detect motion. It then turns on a windscreen washer pump and uses pan and tilt servos to squirt water in a pattern toward the victim.
The target acquisition hardware also sends a message to the second subsystem, an ArduCAM ESP8266 UNO board. It takes a burst of photos using an ArduCAM Mini Camera mounted beside the squirter outlet. The UNO can also serve up a webpage with a collection of the photos.
The final subsystem is an iPhone app which talks to both the ESPino and the UNO board. It can remotely control the squirter and provide a video feed of what the camera sees.
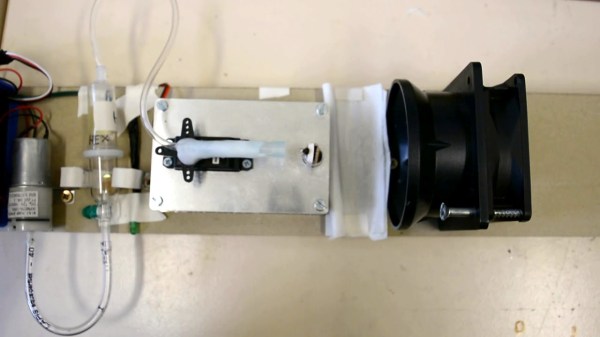
One detail of the build we really enjoyed is the vacuum relief valve he fabricated himself. It prevents siphoning through the pump when it’s not on. Don’t miss a demo of the squirter in action after the break.
When you’re sick or have a headache, you tend to see things a bit differently. An ill-feeling human will display a cognitive bias and expect the world to punish them further. The same is true of honey bees. They are intelligent creatures that exhibit a variety of life skills, such as decision-making and learning.
It was proven back in 2011 that honey bees will make more pessimistic decisions after being shaken in a way that simulates an attack by varroa destructor mites. The bees were trained to associate a reward of sugar-water with a particular odor and to associate foul-tasting punishment water with another odor—that of formic acid, a common treatment against varroa mites. When a third stimulus created by mixing the two odors was presented, the experimenters found that the aggravated bees were more likely to expect the bad odor. Sure enough, they kept their tongues in their mouths when they smelled the third odor. All the bees that weren’t shaken looked forward to sucking down a bit of sugar-water.
So, how does one judge a honey bee’s response? Whenever their antennae come in contact with something appetizing, they stick out their proboscis involuntarily to have a taste. This is called proboscis extension reflex (PER), and it’s the ingrained, day-one behavior that leads them to suck the nectar out of flower blossoms and regurgitate it to make honey.
[LJohann] is a behavioral biologist who wanted to test the effects of varroa mite treatment on bee-havior by itself, without agitating the bees. He built a testing apparatus to pump odors toward bees and judge their response which is shown in a few brief demo videos after the break. This device enables [LJohann] to restrain a bee, tantalize its antennae with sucrose, and pump a stimulus odor at its face on the cue of an LED and piezo buzzer. A fan mounted behind the bee helps clear the air of the previous scents. We especially like the use of a servo to swing the tube in and out of the bee’s face between tests.
[LJohann] and his colleagues concluded that the varroa mite treatment by itself does not make the bees pessimistic. This is great news for concerned apiarists who might be skeptical about using formic acid in the fight against the honey bee’s worst predator. Check out the brief demo videos after the break.
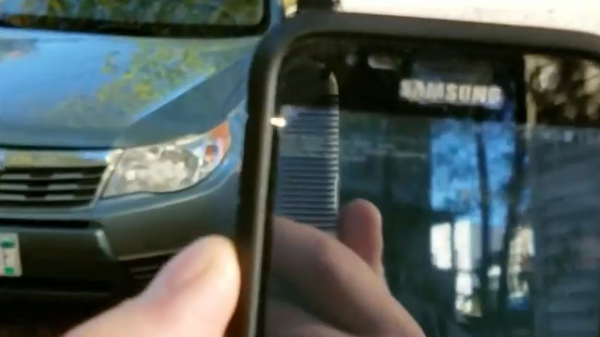
[tomwimmenhove] has found a vulnerability in the cryptographic algorithm that is used by certain Subaru key fobs and he has open-sourced the software that drives this exploit. All you need to open your Subaru is a RasPi and a DVB-T dongle, so you could complain that sharing this software equates to giving out master keys to potential car thieves. On the other hand, this only works for a limited number of older models from a single manufacturer — it’s lacking in compatibility and affordability when compared to the proverbial brick.
This hack is much more useful as a case study than a brick is, however, and [tomwimmenhove]’s work points out some bad design on the manufacturer’s side and as such can help you to avoid these kind of mistakes. The problem of predictable keys got great treatment in the comments of our post about an encryption scheme for devices low in power and memory, for instance.
Those of you interested in digital signal processing may also want to take a look at his code, where he implements filtering, demodulation and decoding of the key fob’s signal. The transmission side is handled by rpitx and attacks against unencrypted communications with this kind of setup have been shown here before. There’s a lot going on here that’s much more interesting than stealing cars.
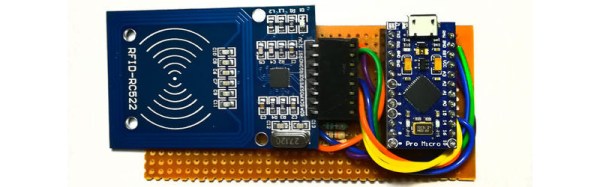
Sometimes we see projects whose name describes very well what is being achieved, without conveying the extra useful dimension they also deliver. So it is with [Prasanth KS]’s Windows PC Lock/Unlock Using RFID. On the face of it this is a project for unlocking a Windows PC, but when you sit down and read through it you discover a rather useful primer for complete RFID newbies on how to put together an RFID project. Even the target doesn’t do it justice, there is no reason why this couldn’t be used with any other of the popular PC operating systems besides Windows.
The project takes an MRFC-522 RFID module and explains how to interface it to an Arduino. In this case the Arduino in question is an Arduino Pro Micro chosen for its ability to be a USB host. The supplied code behaves as a keyboard, sending the keystroke sequence to the computer required to unlock it. The whole is mounted in what seems to be a 3D printed enclosure, and for ease of use the guts of the RFID tag have been mounted in a ring.
As we said above though, the point of this project stretches beyond a mere PC unlocker. Any straightforward RFID task could use this as a basis, and if USB is not a requirement then it could easily use a more run-of-the-mill Arduino. If you’re an RFID newbie, give it a read.
Sometimes when researching one Hackaday story we as writers stumble upon the one train of thought that leads to another. So it was with a recent look at an unmanned weather station buoy from the 1960s, which took us on a link to a much earlier automated weather station.
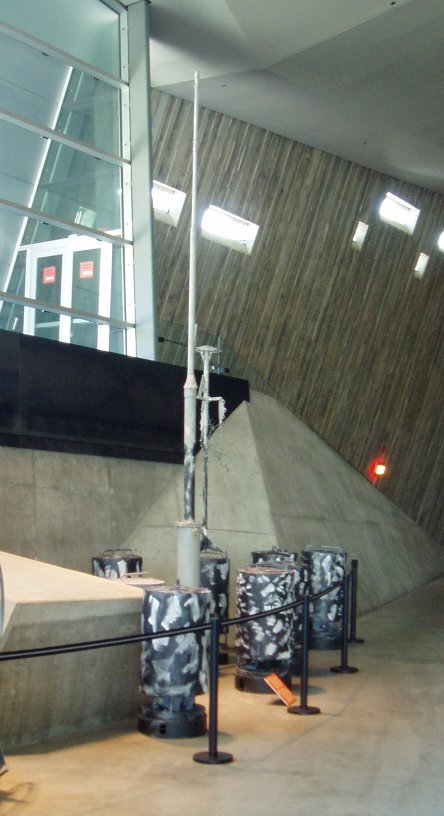
The restored Kurt in the Canadian National War Museum.
Weather Station Kurt was the only successful installation among a bold attempt by the German military during the Second World War to gain automated real-time meteorological data from the Western side of the Atlantic. Behind that simple sentence hides an extremely impressive technical and military achievement for its day. This was the only land-based armed incursion onto the North American continent by the German military during the entire war. Surrounded as it was though by secrecy, and taking place without conflict in an extremely remote part of Northern Labrador, it passed unnoticed by the Canadian authorities and was soon forgotten as an unimportant footnote in the wider conflagration.
Kurt took the form of a series of canisters containing a large quantity of nickel-cadmium batteries, meteorological instruments, a telemetry system, and a 150W high frequency transmitter. In addition there was a mast carrying wind speed and direction instruments, and the transmitting antenna. In use it was to have provided vital advance warning of weather fronts from the Western Atlantic as they proceeded towards the European theatre of war, the establishment of a manned station on enemy territory being too hazardous.
A small number of these automated weather stations were constructed by Siemens in 1943, and it was one of them which was dispatched in the U-boat U537 for installation on the remote Atlantic coast of what is now part of modern-day Canada. In late October 1943 they succeeded in that task after a hazardous trans-Atlantic voyage, leaving the station bearing the markings of the non-existent “Canadian Meteor Service” in an attempt to deceive anybody who might chance upon it. In the event it was not until 1977 that it was spotted by a geologist, and in 1981 it was retrieved and taken to the Canadian War Museum.
There is frustratingly little information to be found on the exact workings on the telemetry system, save that it made a transmission every few hours on 3940kHz. A Google Books result mentions that the transmission was encoded in Morse code using the enigmatic Graw’s Diaphragm, a “sophisticated contact drum” named after a Dr. [Graw], from Berlin. It’s a forgotten piece of technology that defies our Google-fu in 2017, but it must in effect have been something of a mechanical analogue-to-digital converter.
Should you happen to be visiting the Canadian capital, you can see Kurt on display in the Canadian War Museum. It appears to have been extensively restored from the rusty state it appears in the photograph taken during its retrieval, it would be interesting to know whether anything remains of the Graw’s Diaphragm. Do any readers know how this part of the station worked? Please let us know in the comments.
Weather station Kurt retrieval image, Canadian National Archives. (Public domain).
Weather station Kurt in museum image, SimonP (Public domain).
Think about an Internet-connected device that never needs charging, never plugs into an outlet, and will never run out of power. With just a small solar cell, an Internet of Thing module can run for decades. This is the promise of energy harvesting, and it opens the doors to a lot of interesting questions.
Joining us for this week’s Hack Chat will be [John Tillema], CTO and co-founder of TWTG. They’re working on removing batteries completely from the IoT equation. They have a small device that operates on just 200 lux — the same amount of light that can be found on a desktop. That’s a device that can connect to the Internet without batteries, wall warts, or the black magic wizardry of RF harvesting. How do you design a device that will run for a century? Are caps even rated for that? Are you really going to download firmware updates several decades down the line?
For this week’s Hack Chat, we’ll be discussing what energy harvesting actually is, what TWTG’s ‘light energy’ technology is all about, and the capabilities of this technology. Going further, we’ll be discussing how to design a circuit for low-power usage, how to select components that will last for decades, and how to measure and test the entire system so it lives up to the promise of being always on, forever, without needing a new battery.
This is a community Hack Chat, so of course we’ll be taking questions from the community. If you have a question, add it to the discussion sheet