Make Your Own Smart Watch

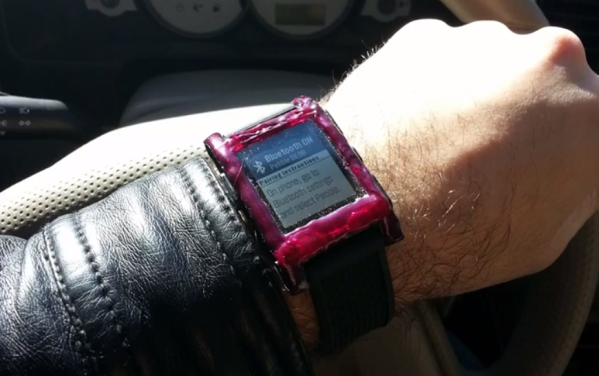
Wearables are all the rage lately. Have you been eyeing the Pebble or one of the new smart watches lately but are not sure if it’s for you? With [GodsTale’s] “Retro Watch” you can now build your own, allowing you to try out a smart watch without making a huge investment.

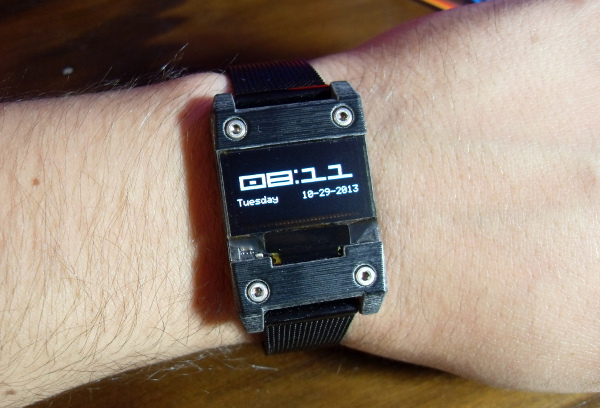
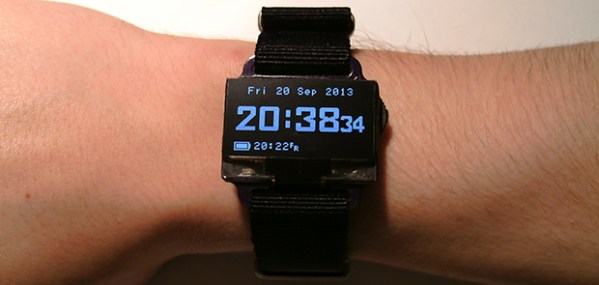
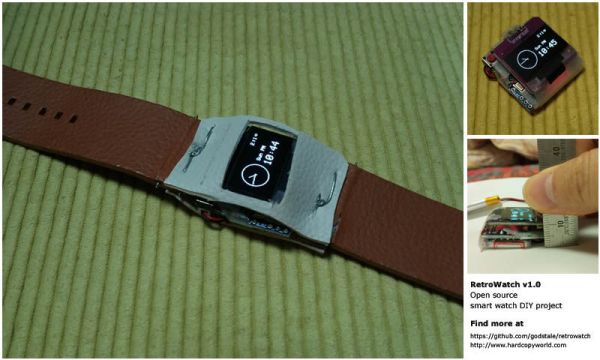
This smart watch uses very common and easy to obtain parts: Arduino Pro Mini, HC-06 Bluetooth module, Adafruit’s 0.96’’ OLED display, and a lithium battery. It is amazing how few parts can be used to make such a functional project. While the example packaging shown is a bit rugged around the edges, it gets the job done. Having such simple hardware allows [GodsTale] to focus on the software. One of the coolest aspects of this project is the Android app [GodsTale] provides. The app provides basic functionality, such as viewing RSS feeds and Android notifications. Check out the GitHub and a more detailed write-up for more information.

It would be great to see this project evolve in the future, it has so much potential. We would love to see a custom circuit board, or a model for a 3D printed case for this awesome smart watch. See a video of the Retro Watch in action after the break. If you thought this was cool, check out a few of these recent hacks.

Continue reading “Make Your Own Smart Watch”

Fixing The Unfixable: Pebble Smartwatch Screen Replacement

[Colt] found himself with a broken Pebble, so he fixed it. The Pebble watch really ignited the smartwatch world with its record-breaking Kickstarter campaign. Working on the Pebble has proved to be frustrating experience for hardware hackers though. Ifixit’s teardown revealed the Pebble extremely difficult to repair. This isn’t due to some evil plan by the smartwatch gods to keep us from repairing our toys. It’s a problem that comes from stuffing a lot electronics into a small waterproof package. [Colt’s] problem was a bad screen. Pebble has a few known screen issues with their early models. Blinking screens, snow, and outright failed screens seemed to happen at an alarming rate as the early Kickstarter editions landed. Thankfully all those issues were corrected and replacements sent to the unlucky owners.

The actual screen used in the Pebble is a Sharp Memory LCD. Memory is an apt name as the screens actually behave as a SPI attached write only memory. Sharp sells flexible printed circuit (FPC) versions of the LCDs to aid in debugging. For space constrained designs though, an elastomeric or “zebra strip” connector is the common way to go. Alternating bands of conductive and insulating material make electrical connections between the Pebble’s circuit board and the conductive portions of the LCD glass.

[Colt] found himself with a dead screen out of warranty, so he decided to attempt a screen replacement. He found a replacement screen from Mouser, and proceeded to remove the top case of his watch. The top plastic case seems to be the hardest part of getting into a Pebble. It appears to be bonded with a glue that is stronger than the plastic itself. [Colt] broke the glass of his screen during the removal, which wasn’t a big deal as it was already dead. Prying only destroyed the top plastic, so he broke out a rotary tool which made quick work of the plastic.  The new screen worked perfectly, but had to be held in just the right position over its zebra connector. Some waterproof epoxy held it in place permanently. The next step was a new top cover. An old flip phone donated its plastic shell to the effort, and hot glue kept everything in place. [Colt] finished his work with a couple of layers of model paint. The result certainly isn’t as pretty or waterproof as the original. It is functional though, and about $120 USD cheaper than buying a new Pebble.

Continue reading “Fixing The Unfixable: Pebble Smartwatch Screen Replacement”

RIVERWATCH: An Autonomous Surface-Aerial Marsupial Robot Team

cata

Every once in a while we get a tip for a project that really, really, really blows our minds. This is one of them.

It looks like a basic catamaran with a few extra bells and whistles — except it is so much more than that. You’re looking at a fully Autonomous Surface Vehicle, complete with a piggybacking 6-rotor UAV. It’s decked out in cameras, sonar sensors, laser rangefinders, high accuracy GPS-RTK tracking, an IMU, oh, and did we mention the autonomous 6-rotor UAV capable of taking off and landing on it?

It all started out as a simple experiment within ECHORD (the European Clearing House for Open Robotics Development), and since then it has become a fully funded project at UNINOVA, a Centre of Technology and Systems in Portugal.

The purpose of the mind-blowing robot team is to collect data of river environments — think of it as Google Maps 2.0 — which is almost an understatement for what it is capable of.

You seriously have to watch the video after the break.

Continue reading “RIVERWATCH: An Autonomous Surface-Aerial Marsupial Robot Team”

Stylish OLED Watch Uses Accelerometer Instead Of Buttons

A few days ago [Andrew] contacted us to offer his help for the design of the mooltipass project case. While introducing himself, he casually mentioned his OLED watch that you can see above.

The watch is based on the low-power MSP430F microcontroller from Texas Instruments. It can consume as little as 1.5uA while maintaining a real-time clock and monitoring interrupts. It also uses ferroelectric RAM, which doesn’t need any power to retain its memory contents. That means there’s no need to set the time again if you remove the CR2016 battery that powers the watch.

[Andrew] chose an 0.96″ OLED display that only consumes up to 7mA. He also included an accelerometer that allows him to interact with the watch through its single and double tap detecting feature. He modeled his PCB using EagleCAD and the whole assembly using Sketchup. Most of the components were soldered in his reflow (toaster) oven. The final result is a mere 8.8mm thick and looks very professional in our opinion.

How Much Can You Cram Into A Wristwatch

Creating wearable electronics that are functional and not overly bulky is very, very hard. [Zak], though, makes it look easy. He started his DIY digital wrist watch to see how much he could cram into a watch-sized device. The finished product is really incredible, and one of the most amazing DIY watches we’ve ever seen.

The electronics for the watch include an ATMega328p, a DS3231M Real Time Clock, a Microchip battery charger, and a few resistors and caps. The display is an OLED, 1.3″ wide and only 1.5 mm thick, contributing to the crazy 10mm overall thickness of the watch.

The software is where this watch really shines. Along with the standard time and date functions, [Zak] included everything and more a wrist watch should have. There is an interface to set up to ten alarms on different days of the week, a Breakout and ‘Car Dodge’ game, a flashlight with integrated ‘rave’ mode, and a stopwatch. On top of this, [Zak] included some great animations very similar to the CRT-like animations found in Android.

It’s a fabulous piece of kit, and if any project were deserving of being made into an actual product, this is it.

You can check out [Zak]’s demo of all the functions of his watch below.

Continue reading “How Much Can You Cram Into A Wristwatch”

Stealth Peephole Camera Watches Your Front Door

In this week’s links post we mentioned an over-powered DSLR peephole that purportedly cost $4000. So when we saw this tip regarding a relatively inexpensive digital peephole, we thought some of you might be a bit more interested.

The hardware is quite simple; a decent webcam, a Raspberry Pi, and a powered USB hub. The camera gets stripped down to its PCB and hidden inside the door itself. Even if you see this from the inside it’s just a suspicious-looking wire which wouldn’t make most people think a camera was in use.

On the software side of things, [Alex] set up his Raspberry Pi as a 24/7 webcam server to stream the video online. Unlike using a cheap wireless CCTV camera, his video signals are secure. He then runs Motion, a free software motion detector to allow the camera to trigger events when someone comes sneaking by. It can be setup to send you a text, call you, play an alarm, take a picture, record a video… the list goes on. His blog has a full DIY guide if you want to replicate this system. We just hope you have a stronger door!

We covered a similar project back in 2011, but it had made use of real server instead of an inexpensive Raspberry Pi.

[Thanks Alex!]

Sony SmartWatch Hack Lets It Tell Time With A Teapot Animation

sony-smartwatch-wireframe

This hack turns the Sony SmartWatch into a wristwatch. Functionally it’s not all that impressive. But the journey to get to this point represents quite a bit more. This example features an animated tea pot using a 3D rendering engine ported over to the device.

[Federico] started work on the project soon after hearing that Sony had released details about developing for the hardware. He dug into the documentation but soon found it lacked the depth he needed to get a handle on bare metal work. He shelved the project for a while until coming across the Astrosmash project we featured in June. That used a wrapper that allows Arduino sketches to run on the watch. After studying how that’s done he had enough background to port this code.

We’re still waiting to see a really innovative hack for the watch. But we’re glad to see progress with each new proof of concept like this one!

Continue reading “Sony SmartWatch Hack Lets It Tell Time With A Teapot Animation”