When we learn about the internals of a microprocessor, we are shown a diagram that resembles the 8-bit devices of the 1970s. There will be an ALU, a program counter, a set of registers, and address and data line decoders. Most of us never go significantly further into the nuances of more modern processors because there is no need. All a processor needs to be is a black box, unless it has particularly sparked your interest or you are working in bare-metal assembly language.
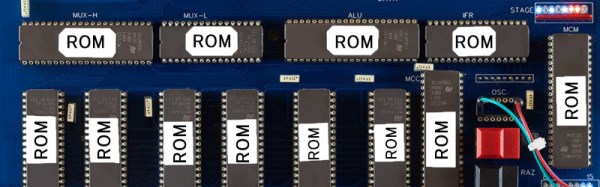
We imagine our simple microprocessor as built from logic gates, and indeed there have been many projects on these pages that create working processors from piles of 74 series chips. But just occasionally a project comes along that reminds us there is more than one way to build a computer, and our subject today is just such a moment. [Olivier Bailleux] has created his “Gray-1”, a processor whose only active components are memory chips, both ROM and RAM.
The clever part comes with the descriptions of how the ROMs are used to recreate the different functions of the processor, through careful programming. Some functions such as registers for example use loops, in which some of the address lines are driven from the data lines to maintain the ROM at a set location. The name of the computer comes from its program counter, which counts in Gray code.
The full processor implements a RISC architecture, and there is a simulator to allow code development without a physical unit. The write-up is both comprehensive and accessible, and makes a fascinating read.
It’s safe to say this is the only processor we’ve seen with this novel approach to architecture. Some more conventional previous features though have been an effort to create a processor entirely from NAND gates, and another made from 74 logic.