We have run out of fruits to name all the single-board computers on the market, but that doesn’t mean you can’t buy a rotten one. Bad documentation, incomplete specifications and deprecated firmwares are just some of the caveats of buying only by price and hardware features. To help you out in case you just need to find a great and open-enough SBC with community support, [Eric] has put together a decent list with 81 individually reviewed boards over at hackerboards.com.
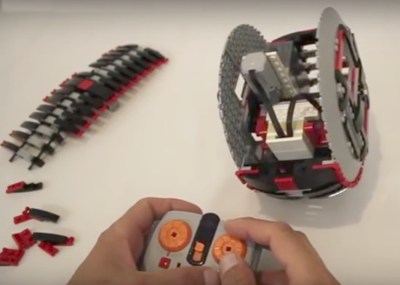
[Jason]’s at it again. This time the LEGO maestro is working on a LEGO BB-8 droid. As a first step he’s made a motorized monowheel that not only races along hallways and through living rooms at the peril of any passing people, but turns as well.
To drive it forward there’s an axle that runs across the center of the wheel and a motor that rotates that axle. He’s also included some weight bricks. Without the mass of those bricks for the rotation to work against, the motor and axle would just spin in place while the friction of the floor keeps the wheel from rotating. If you’ve seen the DIYer’s guide to making BB-8 drive systems, you’ll know that this is classified as an axle drive system.
LEGO monowheel interior shown while leaning to turn
For steering the monowheel left or right he has another mass located just above the axle. Shifting the mass to the left causes the monowheel to lean and move in that direction. Shifting the mass to the right makes the wheel move to the right in the same fashion. Being ever efficient, [Jason] has the motor that shifts the mass doubling as the mass itself.
As with any proof-of-concept, there are still some issues to work out. When turning the wheel left or right it can tip onto its side. Ridges on both sides of the wheel’s circumference reduce the chances of that happening but don’t eliminate it altogether. Also, the steering mass/motor doesn’t yet have a self-centering mechanism; after a turn it’s up to the person holding the remote control to find center. If the mass isn’t correctly centered after a turn, there tends to be some wobble.
As always, we’re looking forward to seeing how [Jason] solves those issues but first he’ll have to put it back together since, as you can see from the video below, it didn’t quite pass the stair test.
We hear a lot about drone surveillance, drone package delivery, drone this, and drone that. Honestly, though, the best use of drones has been taking cool aerial videos and posting them online. Until now.
The US Fish and Wildlife Service plans to cover acres upon acres of prairie-dog habitat with vaccine-laced, peanut-butter coated M&Ms. The snacks also include a dye that will show up in the whiskers of prairie dogs that take the bait, allowing scientists to assess the efficacy of the program. And this is all in the name of saving endangered black-footed ferrets which share burrows with the prairie dogs. It seems they were getting the plague from the prairie dogs.
The quads are outfitted with a “glorified gumball machine” that spreads the vaccine tidbits around. Why a quad? They can cover more space with less disruption to the animals’ habitat. That’s a great application in our book.
How does one go about measuring the mass of an object? Mass is defined as the amount of matter an object contains. This is very different from weight, of course, as the mass of our object would remain the same despite the presence or size of a gravitational field. It is safe to say, however, that most laboratory measurement systems are here on Earth, and we can use the Earth’s gravity to aid in our mass measurement. One way is to use a balance and a known amount of mass. Simply place our object on one side of the balance, and keep adding known amounts of mass to the other side until the balance is balanced.
But what if our object is very small…too small to see and too light to measure with gravity? How does one measure the mass of single atom? Furthermore, how does one determine how much of an object consists of a particular type of atom? There are two commonly used tools just for this purpose. Chances are you’ve heard of one of these but not the other. These tools used to measure substances on the atomic level is the focus of today’s article.
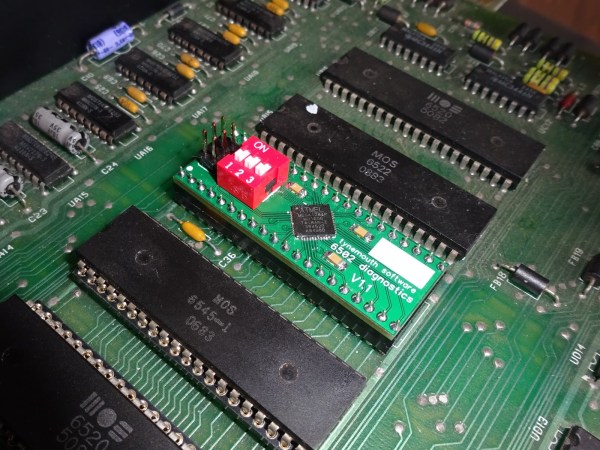
Microcontrollers are getting faster and faster, as is most of the rest of the computing world. Just like you can play Nintendo console games on the newest Nintendo handhelds, it seems that modern microcontrollers can replace CPUs on personal computers from the 80s. At least, that’s what [Dave] has shown with his latest project: an Atmel microcontroller that directly attaches to the CPU slot on a Commodore PET.
Essentially, the project started out as a test rig of sorts for the Commodore. [Dave] wanted to see if some of the hardware on the Commodore was still functional and behaving properly. From there, it somewhat snowballed. The address bus was easy enough to investigate, but adding only a few more pins on the microcontroller he was already using would be enough to access the databus too. A character table was soon added, a test algorithm, and more useful insights. It’s a masterful manipulation of this older hardware with modern technology and is definitely worth a look.
There’s a lot more going on in the retrocomputing world than meets the eye. One might think these old computers were all in landfills by now, but there is a devoted fanbase that does everything from building new hard drives for old computers or investigating their true audio-visual potential.
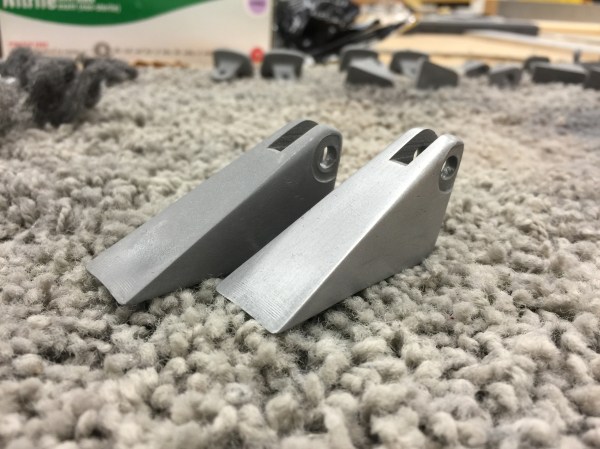
Sometimes we need the look, feel, and weight of a metal part in a project, but not the metal itself. Maybe you’re going for that retro look. Maybe you’re restoring an old radio and you have one brass piece but not another. It’s possible to get a very metal like part without all of the expense and heat required in casting or the long hours in the metal fabrication shop.
Before investing in the materials for cold casting, it’s best to have practical expectations. A cold cast part will not take a high polish very well, but for brushed and satin it can be nearly indistinguishable from a cast part. The cold cast part will have a metal weight to it, but it clinks like ceramic. It will feel cool and transfers heat fairly well, but I don’t have numbers for you. Parts made with brass, copper, and iron dust will patina accordingly. If you want them to hold a bright shine they will need to be treated with shellac or an equivalent coating afterward; luckily the thermoset resins are usually pretty inert so any coating used on metal for the same purpose will do.
It is best to think of the material as behaving more or less like a glass filled nylon such as the kind used for the casing of a power tool. It will be stiff. It will flex a relatively short distance before crazing and then cracking at the stress points. It will be significantly stronger than a 3D printed part, weaker than a pure resin part, and depending on the metal; weaker than the metal it is meant to imitate.
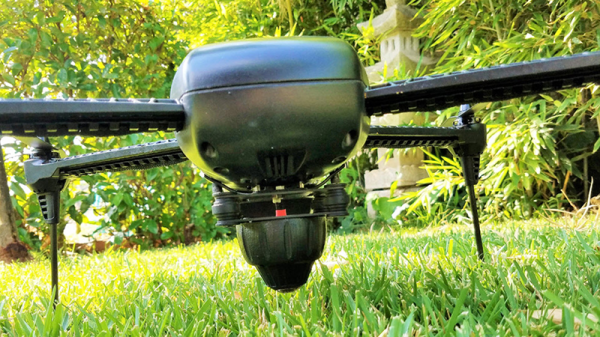
One of the problems with a cheap drone is getting good video, especially in real time. Cheap hobby quadcopters often have a camera built-in or mounted in a fixed position. That’s great for fun shots, but it makes it hard to get just the right shot, especially as the drone tilts up and down, taking the camera with it. Pricey drones often have a gimbal mount to keep the camera stable, but you are still only looking in one direction.
Some cheap drones now have a VR (virtual reality) mode to feed signal to a headset or a Google Cardboard-like VR setup. That’s hard to fly, though, because you can’t really look around without moving the drone to match. You can mount multiple cameras, but now you’ve added weight and power drain to your drone.
MAGnet Systems wants to change all that with a lightweight spherical camera made to fit on a flying vehicle. The camera is under 2.5 inches square, weighs 62 grams, and draws less than 3 watts at 12 volts. It picks up a sphere that is 360 degrees around the drone’s front and back and 240 degrees centered directly under the drone. That allows a view of 30 degrees above the horizon as well as directly under the drone. There is apparently a different lens that can provide 280 degrees if you need that, although apparently that will add size and weight and be more suitable for use on the ground.
The software (see video below) runs on Windows or Android (they’ve promised an iOS version) and there’s no additional image processing hardware needed. The camera can also drive common VR headsets.